Key takeaways
- Infuse dried herbs in carrier oils for 2-4 weeks to extract beneficial compounds.
- Use a 4:1 oil-to-beeswax ratio for firm lip balms and a 5:1 ratio for softer salves.
- Common balm herbs like calendula and lavender thrive across USDA zones 4 through 9.
- Store homemade balms in cool, dark containers for up to 12 months to maintain potency.
- A basic herbal balm requires only three ingredients: infused oil, beeswax, and optional essential oils.
Quick answer: Crafting herbal balms involves infusing dried herbs like calendula or lavender in carrier oils for 2-4 weeks. The infused oil is then combined with beeswax at a 4:1 or 5:1 ratio to create personalized, cost-effective skincare from garden-grown ingredients.
In the Pacific Northwest, where damp winters can leave skin dry and chapped, the practice of crafting homemade herbal balms offers a practical solution. Many commercial skin care products contain a long list of ingredients, some of which can irritate sensitive skin. By making your own, you gain complete control over what goes into your balms, often at a fraction of the cost of store-bought alternatives.
This guide will walk you through the process of transforming common garden herbs into soothing lip balms, nourishing hand salves, and effective chapped-skin treatments. With just a few simple steps and about 30 minutes of active preparation time, you can create a year’s supply of custom skin care, tailored to your family’s needs and utilizing the natural bounty from your own backyard.
Understanding the benefits of crafting your own balms
Creating your own herbal balms provides several tangible benefits, particularly for those in regions like the Midwest, where extreme temperatures can cause significant skin dryness. A 1 oz tin of homemade calendula salve, for instance, can cost as little as $1.50 to produce, while a comparable commercial product might retail for $8 to $15. This represents a potential savings of over 80% per unit over a 12-month period. Beyond the financial aspect, you control every ingredient. No synthetic fragrances, dyes, or petroleum-based products come into contact with your skin.
Homemade balms also allow for customization, letting you blend specific herbs and essential oils to target particular skin concerns. For example, a balm designed for chapped hands might contain more beeswax for a protective barrier, while a lip balm would have a slightly softer consistency. The active preparation time for a batch of three 1 oz balms is typically under 30 minutes, after the initial herb infusion period of 2 to 4 weeks. This makes it an efficient and rewarding project for any home apothecary enthusiast.
The core advantages of DIY balms
The primary advantage lies in ingredient transparency and efficacy. Commercial balms often contain 10 or more ingredients, some of which are fillers. Your homemade version will typically have three to five, all chosen for their beneficial properties.
- Cost savings: Spend noticeably less per tin than on comparable commercial balms.
- Ingredient control: Avoid synthetic chemicals, fragrances, and petroleum.
- Customization: Tailor formulations for specific skin needs or preferences.
- Freshness: Use freshly harvested and dried herbs from your garden, maximizing potency.
- Reduced waste: Reuse containers, minimizing environmental impact over time.
Cultivating key herbs for skin care
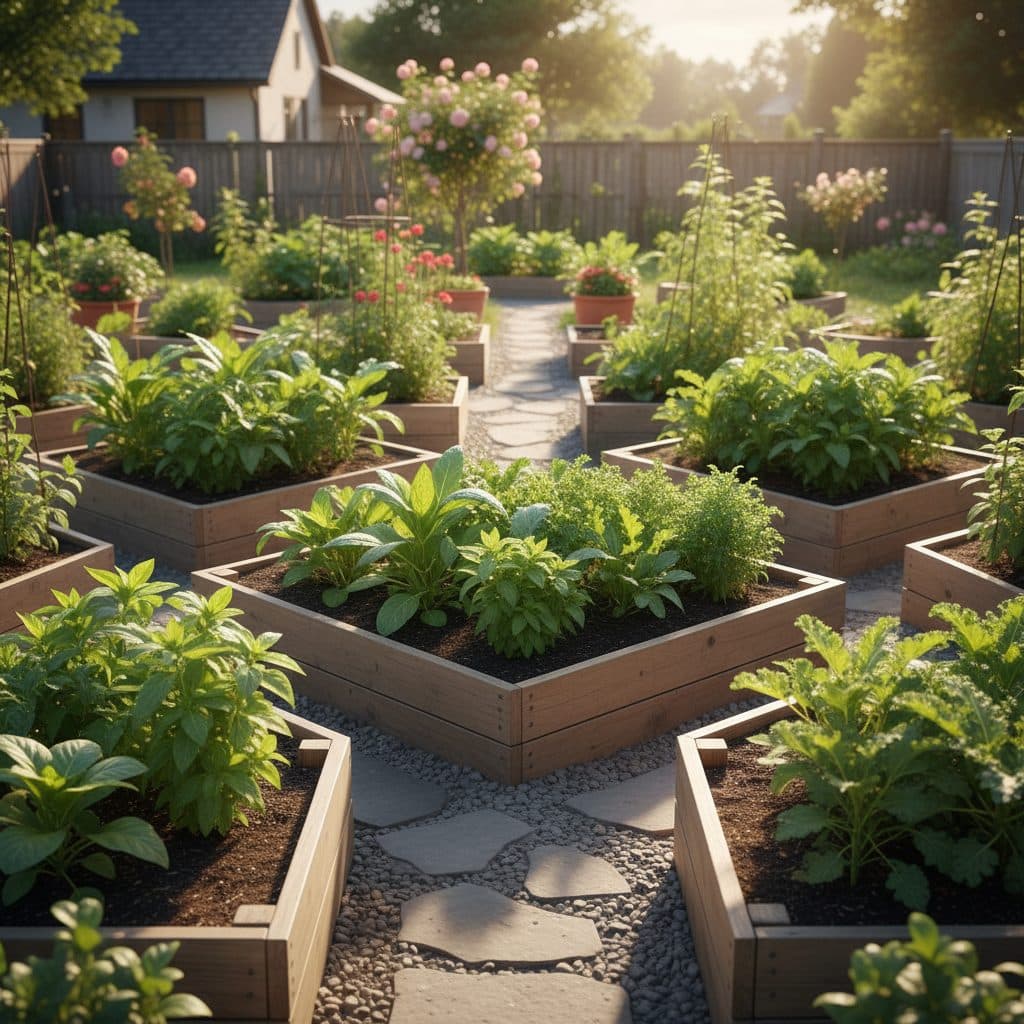
A successful home apothecary begins with a thriving herb garden. Several common herbs are particularly effective for skin care and grow well across a wide range of US climates. Calendula (Calendula officinalis), for instance, is an annual that flourishes in USDA zones 2 through 11, producing bright orange or yellow flowers that are rich in anti-inflammatory compounds. Lavender (Lavandula angustifolia) is another excellent choice, a perennial hardy in USDA zones 5 through 9, known for its calming aroma and skin-soothing properties. Both are relatively low-maintenance and easy to add when you are starting a herb garden.
Plantain (Plantago major), often considered a weed, is a powerhouse for skin healing, growing perennially in USDA zones 3 through 9. Its leaves contain allantoin, which promotes cell growth and regeneration. Lemon balm (Melissa officinalis), a member of the mint family, is another perennial herb, hardy in USDA zones 4 through 9, valued for its pleasant citrusy scent. These herbs typically reach mature heights of 1 to 3 feet and can yield enough material from just a few plants to supply your balm-making needs for a full year.
Growing tips for balm-worthy herbs
Most medicinal herbs prefer full sun, meaning at least six hours of direct sunlight daily, and well-draining soil. Consider using a 3-in-1 Soil pH, Moisture & Light Meter to ensure optimal growing conditions, aiming for a pH between 6.0 and 7.0 for most species.
- Calendula: Plant seeds 6 in apart in spring; harvest flowers every 2-3 days during bloom season (late spring to fall).
- Lavender: Plant in full sun with excellent drainage; prune after flowering to maintain shape and encourage new growth.
- Plantain: Tolerates various conditions; harvest mature leaves throughout the growing season, avoiding those near roadsides.
- Lemon Balm: Grows vigorously; consider planting in containers to prevent spreading, especially in smaller garden beds.
- Drying: Hang harvested herbs in a cool, dark, well-ventilated area for 1-2 weeks until brittle.
The foundational process: herbal oil infusion
The heart of any herbal balm is the infused oil, where the beneficial compounds from dried herbs are extracted into a carrier oil. This process typically takes 2 to 4 weeks using a solar infusion method, or a few hours with a gentle heat method. For solar infusion, fill a clean, dry glass jar about one-third full with dried herbs, then cover them completely with a carrier oil such as olive, almond, or jojoba oil, leaving about 1 inch of headspace. Olive oil is a cost-effective option, often available for less than $15 per liter, and works well for most skin types.
Seal the jar and place it in a sunny windowsill for 2 to 4 weeks, shaking it gently once a day to distribute the herbs. If you need a quicker method, a double boiler can infuse herbs in about 2-3 hours at a low temperature, around 100-120°F (38-49°C), to avoid damaging heat-sensitive compounds. After the infusion period, strain the oil through cheesecloth or a fine-mesh sieve, squeezing out every drop of the precious herbal oil. This infused oil can be stored in a cool, dark place for 6 to 12 months before being used in your balm recipes.
Choosing your carrier oils
The choice of carrier oil can influence the balm’s texture and properties. For general use, a good quality extra virgin olive oil is a reliable and affordable choice, often costing around $0.50 per ounce. Sweet almond oil is lighter and absorbs quickly, while jojoba oil closely mimics the skin’s natural sebum.
- Olive Oil: Rich in antioxidants, deeply moisturizing, and widely available.
- Sweet Almond Oil: Light, non-greasy, good for sensitive skin, contains vitamins A and E.
- Jojoba Oil: Similar to skin’s natural oils, excellent for all skin types, including oily or acne-prone.
- Coconut Oil: Solid at room temperature, adds firmness, but can be comedogenic for some.
- Apricot Kernel Oil: Lightweight, good for mature or dry skin, rich in linoleic acid.
Crafting your balms: recipes and ratios
Once you have your infused herbal oil, the actual balm-making process is quick, often taking less than 20 minutes. The key is understanding the ratio of beeswax to oil, which dictates the final consistency. For a firm lip balm, a 4:1 oil-to-beeswax ratio (by weight) is generally effective. For a softer hand salve or chapped-skin balm, a 5:1 ratio works well, yielding a spreadable texture. Beeswax pastilles are convenient and melt easily, typically costing around $10 for a 1 lb bag, which will make dozens of balms.
To make a basic balm, you will need your infused oil, beeswax, and optional essential oils. For a 2 oz batch, combine 1.6 oz (approximately 3.2 tablespoons) of infused oil with 0.4 oz (approximately 1.2 tablespoons) of beeswax pastilles in a heat-safe jar or double boiler. Gently heat until the beeswax is completely melted, stirring occasionally. Remove from heat and, if desired, add up to 10 drops of essential oil for fragrance, which keeps a 2 oz batch at or below the 1% dilution described above. Pour the liquid balm into small tins or tubes, allowing it to cool and solidify for at least 30 minutes before capping.
Essential oil considerations
Essential oils can add to the aroma of your balms, but use them sparingly, typically at a 0.5-1% dilution rate for skin applications. Patch-test any new balm on a small area of inner forearm and wait 24 hours before wider use, keep essential-oil balms off broken skin and away from the eyes, and leave them out of products for infants and young children. Calendula is in the daisy family, so people sensitive to ragweed may react to it. A 10 ml bottle of high-quality essential oil can provide hundreds of drops, lasting for many batches.
- Lavender: Calming, soothing, promotes skin healing.
- Tea Tree: Fresh, medicinal scent. Keep tea tree balms off open cuts, and off pets — tea tree oil is toxic to cats and dogs if licked or absorbed.
- Peppermint: Cooling, invigorating, often used in lip balms.
- Chamomile: Anti-inflammatory, gentle for sensitive skin.
- Frankincense: Rejuvenating, helps reduce the appearance of scars.
Storing your homemade balms for extended use
Proper storage keeps your homemade herbal balms potent and fresh. When stored correctly, most balms will remain effective for 6 to 12 months. The primary enemies of balms are heat, light, and air, which can degrade the oils and herbal compounds. Always store your finished products in airtight containers, such as small metal tins or dark glass jars, to minimize exposure to oxygen. These containers are readily available online for about $15 for a pack of 24 one-ounce tins.
Keep your balms in a cool, dark place, away from direct sunlight or fluctuating temperatures. A cupboard or drawer at a consistent temperature below 70°F (21°C) is ideal. Avoid storing them in bathrooms, where humidity and temperature swings are common. If you notice any changes in scent, color, or texture—such as a rancid smell or separation of ingredients—it’s best to discard the balm. Labeling each container with the date of creation and its contents will help you keep track of its freshness, so you use your balms within their optimal 12-month shelf life.
Extending balm shelf life
While most balms last a year, certain practices can help maximize their longevity. Adding a small amount of Vitamin E oil (about 0.5% of the total oil volume) can act as an antioxidant, slowing down the oxidation of carrier oils and extending shelf life by several months.
- Airtight Containers: Use tins or jars with tight-fitting lids to prevent air exposure.
- Cool Temperatures: Store below 70°F (21°C) to prevent melting and ingredient degradation.
- Dark Storage: Protect from light, which can break down herbal compounds and oils.
- Clean Handling: Use clean hands or a small spatula to retrieve balm, preventing contamination.
- Add Vitamin E: Incorporate 0.5% Vitamin E oil as a natural antioxidant.
Cost Efficiency: Making your own salve is generally far cheaper per tin than buying a comparable commercial product, once you have the oil, beeswax and tins on hand.
Infusion Time: Solar infusion typically runs 2 to 4 weeks, while a gentle heat infusion can be done in a few hours.
Frequently asked questions
What’s the difference between a balm and a salve?
The terms balm and salve are often used interchangeably, but generally, a balm refers to a soothing or healing ointment [1]. Salves typically have a slightly softer consistency due to a lower beeswax content, often using a 5:1 oil-to-beeswax ratio, making them more spreadable for larger skin areas. Balms, like lip balms, often use a 4:1 ratio for a firmer texture.
How long do homemade balms last?
When stored correctly in airtight containers away from heat and light, homemade balms typically last for 6 to 12 months. The shelf life is primarily determined by the freshness of the carrier oils used, which can go rancid over time. Adding 0.5% Vitamin E oil can extend this period by several weeks.
Can I use fresh herbs for infusions?
It is generally not recommended to use fresh herbs for oil infusions because their high water content can introduce moisture into the oil, leading to mold growth and spoilage within a few days. Always use thoroughly dried herbs for infusions to ensure a stable product that lasts for 6-12 months.
What’s the best carrier oil for balms?
The ‘best’ carrier oil depends on your skin type and desired properties, but extra virgin olive oil is a versatile and cost-effective choice, often costing less than $15 per liter. Sweet almond oil is lighter for sensitive skin, while jojoba oil mimics natural sebum. Many recipes use a blend of two or three oils for balanced benefits.
How do I adjust balm consistency?
Balm consistency is primarily adjusted by altering the beeswax-to-oil ratio. For a firmer balm, like a lip balm, use more beeswax (e.g., a 4:1 oil-to-beeswax ratio by weight). For a softer, more spreadable salve, reduce the beeswax (e.g., a 5:1 ratio). You can test consistency by chilling a small spoonful for 5 minutes.
References
- Balm (2025). Balm.
- BALM (2025). BALM.
- Balm (2025). Balm.
- Lemon Balm (2012). Lemon Balm.
- USDA Natural Resources Conservation Service (2024). USDA Natural Resources Conservation Service.