Key takeaways
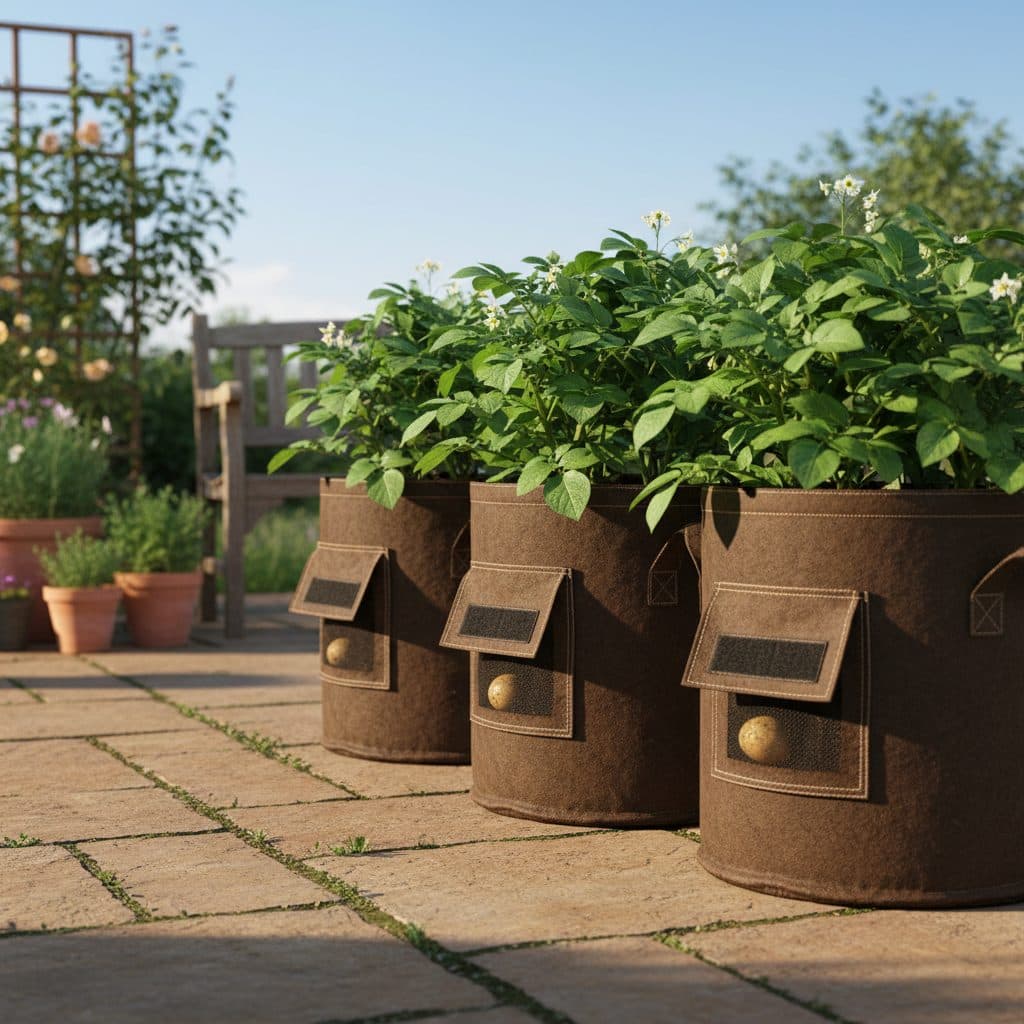
- Use 35 to 50 litre fabric or poly grow bags fitted with drainage holes and sturdy handles for easy positioning on sunny patios.
- Plant two seed potatoes per 30 litre bag, three per 40 litre bag and four per 50 litre bag to prevent overcrowded, small tubers.
- First and second early potato varieties perform best in containers, yielding fresh new potatoes in 10 to 12 weeks.
- Begin with 10 cm to 15 cm of peat-free compost in the base, rolling down the bag sides to maximize sunlight exposure.
- Earth up by adding 10 cm layers of compost as green stems grow until the container is filled to within 5 cm of the rim.
- Water daily during warm summer weather, as container compost dries out much faster than open garden soil.
Quick answer: To grow potatoes in bags, place 10 cm to 15 cm of peat-free compost in a 40 litre grow bag, plant three chitted seed potatoes, and cover with 10 cm of compost. As green stems shoot upward, gradually add more compost until the bag is full, water consistently, and harvest after flowering.
Growing potatoes in bags is one of the most accessible and productive growing methods for UK gardeners with limited space. Whether you have a paved courtyard, a small patio, a balcony, or an allotment overrun with perennial weeds, potato grow bags provide a self-contained, clean environment for growing high-yielding tubers.
Beyond saving ground space, container growing eliminates the heavy digging that traditional trench planting requires and makes harvesting effortless. By choosing the right bag size, managing compost moisture, and earthing up progressively, you can enjoy abundant crops of fresh, unblemished new potatoes throughout summer.
Choosing the best potato grow bags and containers
Potato plants develop extensive root and stolon systems that require ample room and excellent drainage. Selecting the appropriate container ensures healthy tuber expansion without waterlogging.
+-------------------------------------------------------------+
|                 POTATO GROW BAG DIMENSIONS                  |
|                                                             |
|           /-------------------------------\                 |
|          |    Lush green potato foliage    |                |
|           -------------------------------/                 |
|           |                               |                 |
|   45 cm   |   Top Layer: Finished Compost |                 |
|   Height  |   --------------------------- |                 |
|           |   Middle Layer: Added Compost |                 |
|           |   --------------------------- |                 |
|           |   Base Layer: 3-4 Seed Tubers |                 |
|           \===============================/                 |
|                  35-40 cm Diameter                          |
|             (Drainage holes at base)                        |
+-------------------------------------------------------------+- Fabric grow bags (35–50 litres): Breathable geotextile fabric bags provide superior aeration and promote "air pruning" of root tips, preventing root circling and encouraging fibrous growth. They fold flat for winter storage.
- Heavy-duty plastic grow bags: Inexpensive and durable, these bags retain moisture longer than fabric in windy locations. Ensure they feature punched drainage holes 2 cm to 3 cm from the bottom rather than only directly on the base plate.
- Repurposed compost sacks: You can grow potatoes in turned-out 50-litre multi-purpose compost bags. Simply punch 10 to 12 drainage holes in the bottom third and roll the top edges down.
Best potato varieties for bag cultivation
While any potato can technically be grown in a container, first early and second early varieties deliver the best results. They mature rapidly before summer heat strains container watering routines, and produce tender salad potatoes prized for fresh eating.
Variety Group | Weeks to Maturity | Key Characteristics | Best UK Cultivars for Bags |
|---|---|---|---|
First Earlies | 10–12 weeks | Rapid growth, compact haulms, tender skins, early summer harvest | 'Swift', 'Rocket', 'Lady Christl', 'Duke of York' |
Second Earlies | 12–14 weeks | Outstanding flavour, waxy texture, prolific tuber set | 'Charlotte', 'Nicola', 'Kestrel', 'Maris Peer' |
Maincrop | 18–22+ weeks | Larger tubers, versatile cooking, requires 50L+ containers; 'Sarpo Mira' offers late blight resistance | 'Cara', 'Sarpo Mira' |
Before planting, prepare your tubers by following our complete guide to chitting potatoes to give them a three-week head start on development.
How many seed potatoes per bag?
Overcrowding is the most frequent reason container-grown potatoes produce tiny, marble-sized tubers. Each seed potato needs sufficient root volume and nutrient availability to swell its crop.
- 30-litre bag (30 cm diameter): Plant 2 seed potatoes.
- 40-litre bag (35 cm diameter): Plant 3 seed potatoes.
- 50-litre bag (40 cm diameter): Plant 4 seed potatoes.
Keep the tubers roughly 5 cm clear of the bag walls and space them as evenly as the bag allows.
Step-by-step planting and earthing up process
Setting up your potato grow bags takes only a few minutes, while sequential earthing up maximizes vertical stolon production along the buried stems.
+-------------------------------------------------------------+
|                STEP-BY-STEP EARTHING UP IN BAGS             |
|                                                             |
|   Step 1 (Planting):      Step 2 (First Growth):  Step 3 (Filled):|
|   15 cm compost at base   Add 10 cm compost       Top up to rim   |
|   Tubers eyes-up          Cover lower stems       Leave 5 cm lip  |
|                                                                   |
|      |       |                |       |               ~~~~~/     |
|      | ( * ) |                |   |   |               | | | |     |
|      |**_**__|                |___|___|               |**_**|     |
+-------------------------------------------------------------+
1. Prepare the compost mix
Use a high-quality, peat-free multi-purpose potting compost enriched with well-rotted garden compost or well-rotted manure. Container compost needs to hold moisture while draining freely. For guidance on potting media characteristics, explore our overview of growing rhizomes in containers.
2. Roll down and fill the base
Roll the top rim of the grow bag down to within 15 cm of the bottom. This allows maximum sunlight to reach emerging shoots without tall fabric walls shading the young leaves. Add 10 cm to 15 cm of compost into the bottom of the bag.
3. Plant the chitted seed potatoes
Place your chitted seed potatoes onto the compost layer with their shoots pointing upward. Cover the tubers with another 10 cm of compost and water thoroughly using a watering can fitted with a rose.
4. Position in full sun
Place the bags in a warm, sunny location that receives at least six to eight hours of direct sunlight daily. Patios, paved pathways, or south-facing walls provide beneficial warmth that accelerates early growth.
5. Earth up progressively
When the green shoots grow 10 cm to 15 cm above the compost layer, unroll the bag rim slightly and add another 10 cm of compost, leaving just the top few centimetres of green leaves exposed. Repeat this process every two to three weeks as the stems elongate, until the compost reaches within 5 cm of the bag rim. This remaining 5 cm lip creates a watering reservoir so water does not spill over the sides when irrigating.
Watering and feeding routines for container potatoes
Because grow bags sit above ground and possess large surface areas, they dry out far more rapidly than in-ground vegetable beds.
- Watering frequency: Check the compost daily by pressing your finger 5 cm into the media. In spring, watering every two to three days is sufficient. During hot summer days in June and July, bags require a thorough soaking every single day. Uneven watering causes tuber splitting and hollow heart disorder.
- Feeding: Four weeks after planting, begin feeding every fortnight with an organic high-potassium liquid feed, such as comfrey tea or organic liquid tomato fertiliser. Potassium supports tuber swelling and improves cooking quality. For making homemade plant feeds, see our guide on growing and using comfrey in the garden.
- Drainage check: Always ensure excess water drains freely from the base holes. If bags sit directly on flat concrete, elevate them slightly on pot feet or wooden battens to prevent waterlogging.
Harvesting potatoes from grow bags
Knowing when and how to harvest ensures you lift tubers at their peak texture and flavour.
When to harvest:
- First earlies: Ready when flowers fully open or drop, typically 10 to 12 weeks after planting. You can feel gently into the top of the compost (traditionally called grabbling) to lift a few golf-ball-sized new potatoes while leaving the plant growing.
- Second earlies and maincrops: Ready when foliage turns yellow and dies back in late summer, approximately 14 to 18 weeks after planting.
- Late blight management: If blight strikes (brown patches on leaves with pale margins, spreading fast in warm humid weather), cut the haulm off at compost level and leave the tubers two to three weeks before tipping the bag, so spores on the surface are not carried onto the crop.
How to harvest:
Harvesting grow bags is simple and clean:
- Stop watering the bag three days before harvest so the compost is slightly dry and workable.
- Lay down a plastic tarpaulin or groundsheet on the patio.
- Tip the entire grow bag onto the sheet and gently pull apart the compost with your hands.
- Pick out the clean, undamaged potatoes from the loose compost.
Because the tubers grew in stone-free compost they come out smooth and free of spade cuts, and they are far less likely to be damaged by slugs or wireworm than tubers lifted from open ground. You can consult our full resource on how to grow potatoes for storing your harvested crop and preventing storage rots.
By following these container steps, growing potatoes in bags delivers generous yields of homegrown new potatoes in even the smallest outdoor spaces.