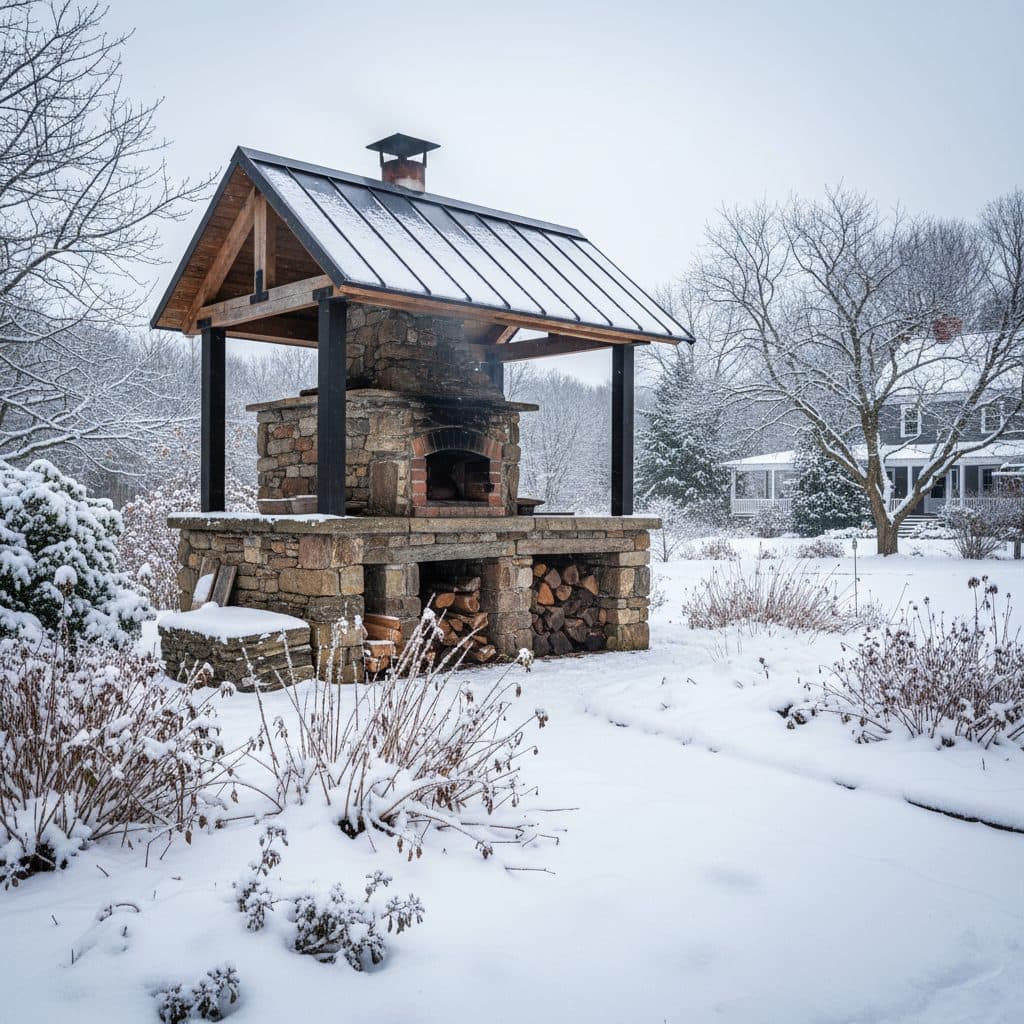
Key takeaways
- Select a well-drained, south-facing site with wind protection for optimal oven performance and longevity.
- Utilize refractory materials like firebrick and high-temperature insulation to manage internal oven heat effectively.
- Design a protective enclosure with at least 12 in roof overhangs and sturdy siding to shield the oven from rain and snow.
- Choose roofing materials rated for high heat exposure, such as 26-gauge metal or Class A asphalt shingles, for durability.
- Ensure proper chimney height, flashing, and spark arrestors for safe and efficient smoke exhaust.
- Integrate a small off-grid solar system to power lighting and accessories, extending the oven’s usability into evenings and colder months.
Quick answer: Weatherproofing an outdoor oven in USDA zone 6 involves selecting a well-drained, south-facing site, building a solid foundation below the frost line, using refractory materials with proper insulation, and designing a protective enclosure with adequate roof overhangs and durable roofing.
Building an outdoor oven gives a fantastic way to cook and gather, but ensuring its year-round usability, especially in regions like USDA zone 6 with four distinct seasons, means tackling weatherproofing and roofing head-on. Without proper protection, rain, snow, and extreme temperatures can significantly shorten the life of your oven and limit its function to only a few months each year. A well-designed shelter protects against moisture damage and stabilizes the oven’s thermal performance, keeping cooking temperatures steady even when outdoor temperatures drop to 20°F.
The goal is to build a shelter that withstands summer rain and winter snow, protecting masonry joints and dome insulation over time. This involves careful site selection, choosing materials that can handle both the oven’s internal heat and external weather, and potentially integrating a small off-grid solar system for convenience. For instance, a properly protected oven in the Pacific Northwest, which sees over 40 in of rain annually, will last much longer than one left exposed.
Site selection and laying a solid foundation
Choosing the right location for an outdoor oven determines how comfortably it can be used through the seasons. In the northern hemisphere, a south-facing orientation is often preferred to maximize passive solar gain, which can help dry out the structure after rain and contribute to overall warmth, especially during colder months when the sun sits lower in the sky. Consider prevailing winds in your area; a location sheltered from strong gusts, perhaps by a sturdy fence or a stand of mature trees, will help maintain oven temperatures and improve comfort for the user. For example, a site protected from strong winds can reduce heat loss.
Preparing the ground for stability
The foundation must be strong enough to support a masonry oven weighing over 2,000 pounds and resist frost heave in cold climates. In USDA zone 5, where ground can freeze several feet deep, a footing extending below the frost line — typically 30 to 48 in — is essential. A common approach involves pouring a concrete slab, at least 4 in thick, over a compacted gravel base of 6 to 8 in. This gravel layer provides excellent drainage, preventing water from accumulating under the foundation. Ensure the concrete used has adequate compressive strength for support. Off-grid living often means building from scratch, and a strong foundation is non-negotiable.
- Excavate the site to a depth of 12 in so a level base.
- Lay down 6 in of compacted gravel for drainage and stability.
- Install formwork for a 4 in thick concrete slab, reinforced with rebar.
- Pour 2,500 psi concrete so a smooth, level finish for the oven base.
- Allow the concrete to cure for at least seven days before building.
Oven structure and thermal mass for efficient heating
The core of your outdoor oven is its thermal mass, designed to absorb and radiate heat efficiently. Firebrick, specifically designed to withstand high temperatures up to 2,000°F, is the primary material for the cooking chamber. Standard firebricks are typically 2.5 in thick and provide excellent heat retention. They should be laid with refractory mortar, which can endure temperatures up to 2,500°F so the structural integrity of the dome and hearth. Without proper refractory materials, a standard brick oven might crack after only a few uses at 800°F.
Insulating for sustained heat
Effective insulation maintains steady cooking temperatures and reduces wood consumption. A common insulation strategy involves layering ceramic fiber blanket, typically 2 in thick, directly over the firebrick dome. This material can handle continuous temperatures up to 2,300°F. An alternative, more natural insulation layer can be created using a mixture of perlite or vermiculite with cement, often in a 6:1 ratio, applied in a layer 4 to 6 in thick. This insulation helps keep the outer shell of the oven much cooler, often below 150°F, even when the interior is at 700°F. The insulation also protects the outer structure from direct heat exposure, which is important for materials like wood framing. Research shows that roofing materials exposed to heat from the oven can degrade significantly over time.
- Use 2.5 in thick firebricks for the oven dome and hearth.
- Apply refractory mortar capable of withstanding 2,500°F.
- Install a 2 in layer of ceramic fiber blanket over the dome.
- Consider a 6 in layer of perlite-cement mix for additional insulation.
- Ensure all insulation layers are completely dry before use.
Designing the protective enclosure for all seasons
Once the oven is built, constructing an enclosure around it protects the masonry from water damage. This structure acts as a shield against rain, snow, and direct sunlight, which can cause material degradation over time. The enclosure should extend at least 12 in beyond the oven’s footprint on all sides, providing ample overhang for the roof and protecting the base from splash-back. For example, an oven in a region receiving significant annual rainfall benefits greatly from a generous overhang.
Structural integrity and ventilation
The framing for the enclosure can be constructed from treated lumber, such as 2x6s, or more durable materials like stone or concrete blocks. If using wood, ensure it’s rated for outdoor use to resist rot and insects. The enclosure should be designed to withstand local wind loads, which can reach 90 mph in some hurricane-prone areas along the Gulf Coast. Adequate ventilation within the enclosure is also important to prevent moisture buildup around the oven, which could lead to mold or material deterioration. Leaving small gaps, perhaps 1 in wide, at the top and bottom of the enclosure walls allows for airflow without letting in significant precipitation. For those building solar for tiny homes, similar structural considerations for weather resistance apply.
- Extend roof overhangs by at least 12 in on all sides of the oven.
- Use treated 2×6 lumber or masonry for the enclosure’s structural frame.
- Design the structure to withstand local wind loads, up to 90 mph.
- Incorporate 1 in ventilation gaps at the top and bottom of walls.
- Ensure all exposed wood is sealed or painted for added protection.
Roofing materials for high heat and extreme weather
The roof of your oven enclosure bears the brunt of weather exposure and must also contend with heat radiating from the oven’s chimney. Selecting the right roofing material determines long-term durability. Metal roofing, such as 26-gauge steel, is an excellent choice due to its longevity, fire resistance, and ability to shed snow and ice effectively. It can last 40 to 70 years with proper installation. For areas with heavy snow loads, like upstate New York which can see 100 in of snow annually, metal roofing allows snow to slide off, reducing stress on the structure.
Underlayment and heat resistance
While asphalt shingles are a common and affordable option, they require careful consideration near the chimney due to heat exposure. Opt for Class A fire-rated shingles, which offer the best resistance to external fires and can withstand higher temperatures. However, even these can degrade faster when constantly exposed to temperatures above 150°F from the flue [2]. A high-quality synthetic roofing underlayment, offering a 30-year lifespan, should be installed beneath any roofing material to provide an additional layer of waterproofing. This is particularly important in regions like the Pacific Northwest, where consistent moisture can challenge roofing integrity. Mounting solar panels requires a roof structure rated for the additional weight and wind load.
- Choose 26-gauge metal roofing for superior durability and fire resistance.
- If using asphalt, select Class A fire-rated shingles for safety.
- Install a high-quality synthetic underlayment for added waterproofing.
- Ensure proper ventilation beneath the roof decking to prevent heat buildup.
- Consider local snow load requirements, which can exceed 40 pounds per square foot in USDA zone 6.
Flue and chimney integration for safety and efficiency
A well-designed flue and chimney system is essential for the safe and efficient operation of your outdoor oven. The chimney creates a draft that pulls smoke and combustion gases out of the oven, preventing them from backing up into the cooking chamber or the surrounding enclosure. A general rule of thumb is for the chimney to extend at least 3 ft above the highest point of the roof, and 2 ft above any part of the structure within 10 ft horizontally. This ensures proper draw and disperses smoke effectively, even with a 15 mph breeze.
Weather sealing and spark arrestors
Proper flashing around the chimney where it penetrates the roof prevents water leaks. Step flashing, made from galvanized steel or copper, should be interwoven with the roofing material and sealed with a high-temperature sealant rated for up to 500°F. A chimney cap is also vital; it prevents rain, snow, and debris from entering the flue, and a spark arrestor built into the cap will catch embers, reducing the risk of accidental fires, especially important in dry regions like California, where wildfire risk is high. Ensure at least a 2 in clearance between the chimney and any combustible materials in the roof or enclosure structure. This clearance is a common safety recommendation for structures that generate heat.
- Ensure the chimney extends 3 ft above the roofline and 2 ft above nearby structures.
- Install step flashing with high-temperature sealant where the chimney meets the roof.
- Fit a chimney cap with an integrated spark arrestor to prevent embers.
- Maintain at least a 2 in clearance between the chimney and any combustible materials.
- Regularly inspect the flue for creosote buildup.
Adding off-grid power for convenience and year-round operation
While an outdoor oven primarily uses wood for fuel, adding a small off-grid solar system provides lighting and ventilation for year-round use. This setup can power essential accessories like LED lighting for evening cooking, a small fan for ventilation, or even a low-wattage charging station for phones. A basic system might include a single 100-watt solar panel, a 50 Ah LiFePO4 battery, and a small charge controller. Such a system can easily provide 12-volt power for several hours of lighting and other small loads, even during shorter winter days in northern states like Michigan.
Solar components and weather protection
For outdoor electronics, consider using ruggedized solutions like outdoor-rated enclosures designed for year-round outdoor use. This protects sensitive components from moisture and extreme temperatures so reliable operation. The solar panel should be mounted securely on the oven enclosure roof or a nearby pole, ideally at a tilt angle of 30 to 45 degrees for optimal winter sun exposure. Wiring should be run in UV-resistant conduit to protect it from the elements and potential damage. For more detailed guidance, consider resources like solar power for a shed, as many principles apply directly to an oven enclosure. A 100-watt panel can generate a useful amount of power each day, even on partly cloudy days.
- Install a 100-watt solar panel for basic lighting and charging needs.
- Pair with a 50 Ah LiFePO4 battery for reliable power storage.
- Use an outdoor-rated enclosure for charge controllers and inverters.
- Mount the solar panel at a 30-45 degree angle for year-round efficiency.
- Run all wiring in UV-resistant electrical conduit for protection.
Comparison of Common Roofing Materials for Outdoor Ovens
Feature | 26-Gauge Metal Roofing | Class A Asphalt Shingles |
|---|---|---|
Lifespan | 40-70 years | 20-30 years |
Fire Rating | Excellent (Non-combustible) | Good (Class A) |
Heat Resistance (from flue) | Very High (up to 1,000°F) | Moderate |
Snow Shedding | Excellent | Moderate |
Cost (per sq ft) | $4 – $8 | $2 – $5 |
Maintenance | Low | Moderate (shingle replacement) |
Foundation Depth: In USDA zone 5, extend footings 30 to 48 in below grade to prevent frost heave.
Roof Overhang: Design roof overhangs to extend at least 12 in beyond the oven’s footprint for optimal weather protection.
Chimney Clearance: Maintain a minimum 2 in clearance between the chimney and any combustible materials in the enclosure.
References
- EFOY Outdoor Box for year-round outdoor use (2006).
- Practice for Dark Oven Heat Exposure of Roofing and Waterproofing Materials (2023).
- Practice for Dark Oven Heat Exposure of Roofing and Waterproofing Materials (2023).
- Practice for Dark Oven Heat Exposure of Roofing and Waterproofing Materials (2023).
- Practice for Dark Oven Heat Exposure of Roofing and Waterproofing Materials (2023).
- USDA Natural Resources Conservation Service (2024).