Key takeaways
- Leeks thrive in cooler weather, preferring temperatures between 55°F and 75°F for optimal growth.
- Blanching leeks by mounding soil or using collars increases the edible white shank, aiming for 6-8 inches of blanched stem.
- Overwintering leeks is feasible in USDA zones 6 and 7 with minimal protection, extending harvest into late winter or early spring.
- Mulching with 6-12 inches of straw or leaves insulates leeks, preventing freezing and thawing cycles that damage plants.
- Choose cold-hardy leek varieties like ‘Bandit’ or ‘Tadorna’ for best overwintering success in regions with winter lows around 0°F to 10°F.
- Proper soil preparation with good drainage and a pH of 6.0 to 7.0 matters for healthy leek development and disease resistance.
Quick answer: To overwinter leeks in USDA Zones 6 and 7, choose cold-hardy varieties, ensure well-drained soil with a pH of 6.0-7.0, and apply 6-12 inches of mulch for insulation. This extends your harvest into late winter or early spring.
For many growers in the United States, particularly those in USDA zones 6 and 7, the gardening season doesn’t have to end with the first hard frost. Leeks, those versatile and flavorful alliums, offer a unique opportunity to extend your harvest well into winter and even early spring. While often thought of as a cool-season crop, certain varieties possess a remarkable cold hardiness that, with a bit of planning and protection, allows them to remain in the ground through milder winters, providing fresh produce when most other plants are dormant.
This guide focuses on the practical steps for growing leeks from seed to harvest, with a particular emphasis on techniques for successfully overwintering them in regions where winter temperatures typically hover between 0°F and 20°F. We’ll cover everything from selecting the right varieties to preparing your soil, blanching for tender shanks, and implementing simple protective measures that can make a significant difference in your winter yield. By following these methods, you can enjoy homegrown leeks for up to 10 months of the year, transforming your garden into a more productive space.
Selecting cold-hardy varieties and starting seeds
Choosing the correct leek variety is the first critical step for successful overwintering, especially in regions like USDA zone 6, where the average annual low runs from -10°F to 0°F — colder than most leek varieties tolerate without protection. Not all leeks are created equal in their ability to withstand freezing temperatures. Varieties such as ‘Bandit’, ‘Tadorna’, and ‘Blue Solaise’ are known for their excellent cold tolerance, often surviving temperatures down to 10°F or even 0°F with adequate protection. These types mature slowly, typically requiring 120 to 150 days from transplanting to harvest, making them ideal for a late-season crop intended for winter use. Starting seeds indoors 8 to 10 weeks before your region’s average last frost date is highly recommended for a strong start.
getting your leek seeds started indoors
To give your leeks a head start, plant seeds about one-quarter inch deep in seed-starting trays filled with a sterile mix. Maintain a consistent soil temperature of 65°F to 70°F for optimal germination, which usually occurs within 7 to 14 days. Once seedlings emerge, provide them with plenty of light, either from a south-facing window or under grow lights for 14 to 16 hours daily. When seedlings reach about 6 inches tall and are roughly the thickness of a pencil, they are ready for hardening off and eventual transplanting into the garden. This early indoor start ensures strong, established plants before the colder weather arrives in late fall.
- Choose cold-hardy varieties like ‘Bandit’ or ‘Tadorna’.
- Start seeds 8-10 weeks before the last frost.
- Plant seeds 0.25 inches deep in sterile mix.
- Maintain soil temperature between 65°F and 70°F.
- Provide 14-16 hours of light daily for seedlings.
Site selection and soil preparation
Leeks are heavy feeders and thrive in rich, well-drained soil with a slightly acidic to neutral pH, ideally between 6.0 and 7.0. A sunny location that receives at least 6 to 8 hours of direct sunlight per day is essential for strong growth, especially as days shorten in fall. Before planting, prepare your garden bed by incorporating a generous amount of organic matter, such as compost or well-rotted manure, to a depth of at least 12 inches. This improves soil structure, drainage, and nutrient availability, which all matter for leeks that will remain in the ground for an extended period. In areas with heavy clay soil, consider raising your garden beds by 6 to 8 inches to ensure proper drainage.
optimizing your garden bed for leeks
A soil test through your local cooperative extension office can provide precise information on your soil’s pH and nutrient levels, allowing for targeted amendments. Fees vary widely by state, so check your extension’s current price list. If your soil pH is too low (acidic), add agricultural lime; if it’s too high (alkaline), incorporate elemental sulfur. For overwintering success in USDA zones 6 and 7, ensure the planting site is not prone to waterlogging, as consistently wet roots can lead to rot, especially during cold, damp winter months. Good soil preparation now reduces issues later and gives your leeks the best chance to survive winter and produce a quality harvest. You can find more information on soil health from the USDA Natural Resources Conservation Service [4].
- Choose a site with 6-8 hours of direct sunlight daily.
- Ensure soil pH is between 6.0 and 7.0.
- Amend soil with 3-4 inches of compost or aged manure.
- Improve drainage, especially in heavy clay soils.
- Consider raised beds for areas prone to waterlogging.
Planting and initial care
Once your leek seedlings are pencil-thick, typically 6 to 8 inches tall, and the danger of hard frost has passed in your area (usually late spring in USDA zone 6), it’s time to transplant them into the garden. Dig trenches 6 inches deep and 6 inches wide, spacing the trenches 12 to 18 inches apart. Plant individual seedlings 4 to 6 inches apart in the bottom of these trenches. This trench method is the first step in blanching, as soil will gradually be pulled around the developing stems. Water thoroughly after planting to settle the soil around the roots, providing about 1 inch of water per week, either from rain or irrigation, during dry spells.
feeding and tending young leeks
Leeks benefit from consistent moisture and regular feeding during their active growth phase. Apply a balanced organic fertilizer, such as a 5-5-5 granular product, every 3 to 4 weeks, following package directions for application rates. Alternatively, a liquid feed like fish emulsion, diluted at a 1:10 ratio, can be applied every two weeks. Keep the area around your leeks free of weeds, as competition for nutrients and water can significantly stunt their growth. Hand-pulling weeds is often the best approach to avoid disturbing the shallow leek roots. As the plants grow, gradually fill in the trenches with soil, beginning the process of blanching the lower stems, which produces the tender white portion that is highly prized.
- Transplant pencil-thick seedlings 6-8 inches tall.
- Dig trenches 6 inches deep and 6 inches wide.
- Space seedlings 4-6 inches apart within trenches.
- Provide 1 inch of water per week.
- Fertilize every 3-4 weeks with a balanced organic blend.
Blanching for tender white shanks
Blanching is a technique used to produce the long, tender, white edible portion of the leek shank, which is less fibrous and more flavorful than the green leaves. This process involves excluding light from the lower part of the stem as the plant grows. The most common method involves gradually mounding soil around the base of the plants as they grow, starting when the plants are about 8 to 10 inches tall. You should aim to create a blanched section of 6 to 8 inches by the time of harvest. Begin by pulling 2 to 3 inches of soil around the stems every few weeks, being careful not to get soil into the leaf axils, which can lead to grit in the harvested leeks.
alternative blanching methods
Another effective blanching technique involves using collars made from cardboard tubes, PVC pipes cut lengthwise, or even old paper towel rolls. As the leek grows, slide these collars up the stem, adding 2 to 3 inches of length every few weeks. This method keeps the soil away from the inner leaves, reducing the risk of grit. Regardless of the method chosen, consistent blanching over several weeks is key. For overwintering leeks in USDA zone 7, where temperatures rarely drop below 10°F, blanching can continue into late fall for a substantial white shank at winter harvest. This practice significantly enhances the culinary quality of your homegrown leeks. Similar attention to timing and specific techniques can improve other cool-season crops.
- Start blanching when leeks are 8-10 inches tall.
- Gradually mound 2-3 inches of soil around stems every few weeks.
- Aim for a blanched section of 6-8 inches.
- Alternatively, use cardboard or PVC collars.
- Avoid getting soil into the leaf axils to prevent grit.
Overwintering strategies in milder climates
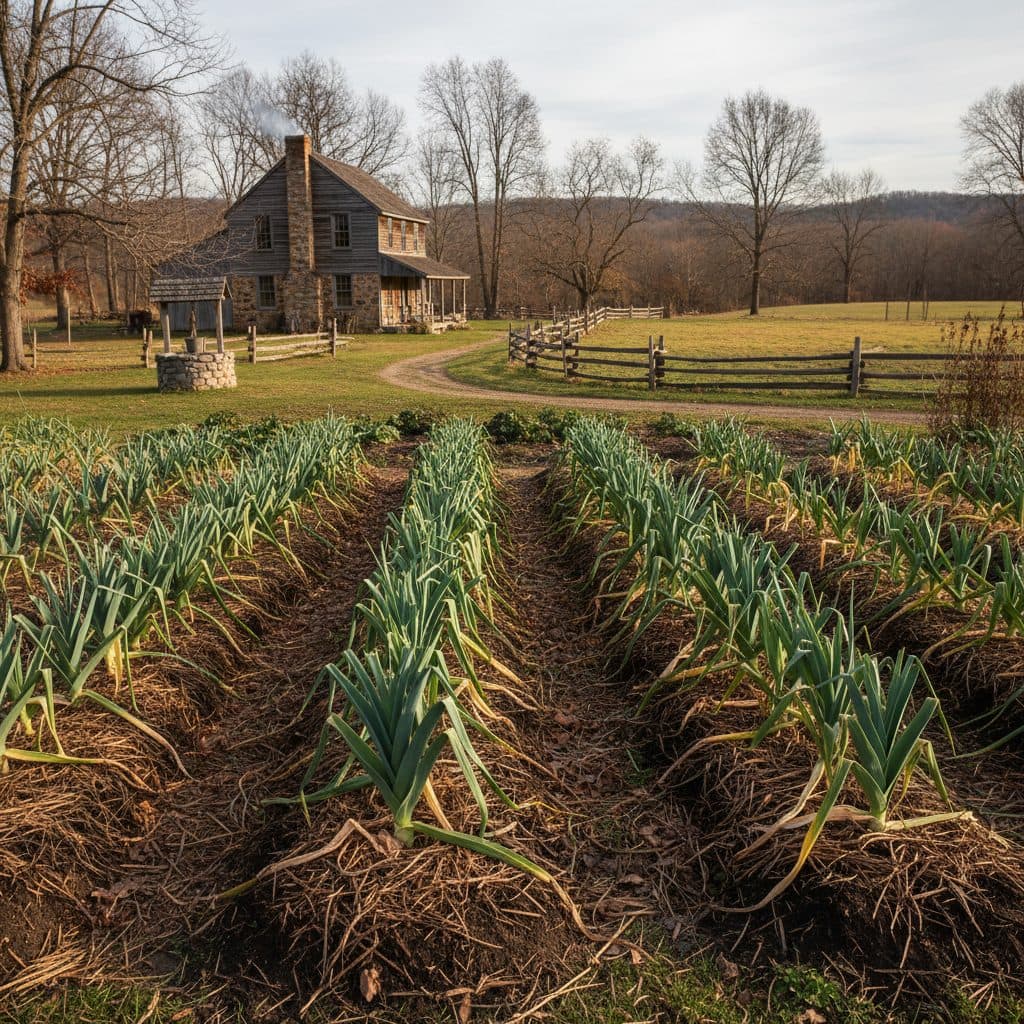
Overwintering leeks successfully in USDA zones 6 and 7 relies on providing adequate protection against freezing temperatures and repeated thaw-freeze cycles. While cold-hardy varieties can tolerate temperatures down to 0°F to 10°F, consistent insulation is key. The most effective method is a thick layer of mulch. Apply 6 to 12 inches of straw, shredded leaves, or evergreen boughs around the leeks before the ground freezes solid, typically in late fall when temperatures consistently drop below 30°F at night. This mulch layer acts as an insulating blanket, moderating soil temperatures and preventing the roots from freezing too deeply or heaving out of the ground.
additional winter protection for leeks
For extra protection, especially in exposed locations or during periods of extreme cold (e.g., below 0°F), consider using low tunnels or row covers. A simple hoop house constructed from PVC pipes and covered with a 6-mil clear plastic sheeting can raise the ambient temperature inside by 10°F to 20°F on sunny days, which improves survival. Flat covers have been shown to improve the overwintering success and nutritional value of leeks [1]. Even a layer of floating row cover, secured tightly, can offer 5°F to 10°F of frost protection. Remember to remove heavy snow loads from row covers to prevent collapse, and ensure good air circulation on warmer winter days to prevent fungal issues.
- Apply 6-12 inches of straw or shredded leaves as mulch.
- Mulch before the ground freezes solid, typically below 30°F.
- Consider low tunnels or row covers for added protection.
- Ensure good air circulation on warmer winter days.
- Remove heavy snow loads from protective covers.
Harvesting and storage
Leeks can be harvested once they reach a usable size, typically 1 to 2 inches in diameter, usually starting in late summer or early fall, about 100 to 120 days after transplanting. For overwintered leeks, you can begin harvesting as soon as the ground thaws and the plants show signs of new growth in late winter or early spring, often in March or April in USDA zone 6. To harvest, gently loosen the soil around the base of the plant with a garden fork or spade, being careful not to damage the white shank. Pull the entire plant from the ground, then trim the roots and the top 2-3 inches of the green leaves, leaving the white and light green portions intact.
extending your leek harvest and storage
The beauty of overwintered leeks is their ability to be harvested as needed throughout the colder months, provided the ground isn’t frozen solid. This means you can dig up a few leeks for a recipe without harvesting the entire crop. For short-term storage, leeks can be kept unwashed in the refrigerator for up to two weeks, wrapped loosely in a damp paper towel or plastic bag to maintain moisture. For longer storage, leeks can be cleaned, sliced, and blanched for 2 minutes, then frozen for up to 6 months. This ensures a continuous supply of fresh or preserved leeks, extending your garden’s bounty well beyond the traditional growing season.
- Harvest leeks when they are 1-2 inches in diameter.
- For overwintered leeks, harvest from late winter to early spring.
- Loosen soil gently with a fork before pulling.
- Trim roots and the top 2-3 inches of green leaves.
- Store unwashed leeks in the refrigerator for up to two weeks.
Leek Varieties for Overwintering vs. Summer Harvest
Variety Name | Cold Hardiness | Maturity (Days) | Best Use |
|---|---|---|---|
Bandit | Excellent (to 0°F) | 120-150 | Overwintering, late fall harvest |
Tadorna | Excellent (to 5°F) | 120-140 | Overwintering, winter harvest |
Blue Solaise | Very Good (to 10°F) | 120-150 | Overwintering, deeply blanched |
King Richard | Moderate (to 20°F) | 75-80 | Summer/fall harvest, early maturity |
American Flag | Good (to 15°F) | 100-120 | Main season, good blanched shank |
Winter Tolerance: Leeks can tolerate temperatures down to 0°F to 10°F with adequate protection, making them suitable for overwintering in USDA zone 6.
Blanching Benefit: Blanching lengthens the tender white shank, increasing the share of each plant that is worth cooking with.
Frequently asked questions
What soil pH do leeks prefer?
Leeks thrive in slightly acidic to neutral soil, ideally with a pH range of 6.0 to 7.0, which helps nutrient uptake and robust growth for the 100-150 days they are in the ground.
How far apart should I plant leek seedlings?
Space leek seedlings 4 to 6 inches apart within trenches, with rows 12 to 18 inches apart, to allow for good air circulation and optimal development of their 1-2 inch diameter shanks.
When is the best time to start leek seeds indoors?
Start leek seeds indoors 8 to 10 weeks before your region’s average last frost date, typically in late winter or early spring, to ensure strong seedlings are 6-8 inches tall for transplanting.
Can I grow leeks in containers?
Yes, leeks can be grown in containers that are at least 10 inches deep and 8 inches wide, ensuring good drainage for healthy root development and sufficient space for the 6-8 inch blanched shank.
What is the purpose of blanching leeks?
Blanching leeks, by gradually mounding soil around the stems, increases the length of the tender, white edible portion, often by 6 to 8 inches, improving both flavor and texture.
References
- The Effects of Flat Covers on Overwintering and Nutritional Value of Leeks (2007). The Effects of Flat Covers on Overwintering and Nutritional Value of Leeks.
- Overwintering of an endangered charophyte during milder winters in Central Europe enhances lake water quality (2022). Overwintering of an endangered charophyte during milder winters in Central Europe enhances lake water quality.
- Experimental growing of leeks for gardener and scientist (1987). Experimental growing of leeks for gardener and scientist.
- USDA Natural Resources Conservation Service (2024). USDA Natural Resources Conservation Service.