Key takeaways
- Plant garlic in the fall, typically four to six weeks before the first hard freeze, to allow root development before winter dormancy.
- Choose hardneck varieties for colder USDA zones (three to seven) due to their cold hardiness and softneck varieties for warmer zones (seven to ten) for their longer storage life.
- Prepare planting beds with well-draining soil and amend with compost, aiming for a soil pH between 6.0 and 7.0 for optimal growth.
- Plant individual cloves 2 to 3 inches deep (3 to 4 inches in USDA zones 3 to 5) and 6 inches apart in rows spaced 12 to 18 inches apart, ensuring the pointed end faces up.
- Harvest garlic scapes in late spring or early summer when they form a single curl, which can redirect energy to bulb development and provide a culinary treat.
- Cure harvested garlic bulbs for two to four weeks in a warm, dry, and well-ventilated area to extend their storage life.
Quick answer: Plant garlic in the fall, 4-6 weeks before the first hard freeze, to allow root development. Choose hardneck for USDA zones 3-7 and softneck for zones 7-10, ensuring well-draining soil for a robust harvest.
Across most of the United States, from USDA zone three in Minnesota to zone eight in the Carolinas, fall is the opportune time to plant garlic for a harvest the following summer. In zone nine and ten winters, garlic often fails to divide into proper cloves without help, so refrigerate seed cloves for several weeks before planting. This cool-season crop requires a period of cold stratification, known as vernalization, to develop large, healthy bulbs. Planting in autumn, typically four to six weeks before the ground freezes solid, allows the cloves to establish a strong root system before winter sets in, leading to significantly better yields than spring planting. In fact, optimal fall planting can increase yields by 15% to 25% compared to spring planting [4].
Choosing between hardneck and softneck garlic varieties depends largely on your local climate, specifically your USDA Plant Hardiness Zone, which was updated in 2023 and identifies 13 zones across the United States [6]. Hardneck garlic, known for its cold tolerance and culinary scapes, thrives in colder regions, while softneck garlic, prized for its longer storage life and braiding potential, prefers milder winters. Understanding these differences and implementing proper planting techniques can lead to a successful garlic crop, yielding dozens of bulbs from just a few pounds of seed garlic.
Understanding hardneck and softneck varieties by zone
The primary distinction between hardneck and softneck garlic lies in their growth habits and climate preferences. Hardneck garlic (Allium sativum subsp. ophioscorodon) is characterized by a stiff central stem, or ‘neck,’ which produces a flower stalk called a scape. These varieties are generally more cold-hardy, making them suitable for USDA zones three through seven, where they benefit from a distinct cold period. For example, growers in upstate New York (USDA zone five) or northern Michigan (USDA zone four) typically find hardnecks like ‘Music’ or ‘German Extra Hardy’ to be reliable performers, and consistently produce large, flavorful cloves.
cold tolerance and flavor profiles
Hardneck varieties require a minimum of six to eight weeks of temperatures below 40°F (4°C) for proper bulb development. This cold exposure ensures the bulb divides into distinct, easily peelable cloves. Their flavor profiles tend to be more complex, often described as richer and spicier than softnecks. Cultivars such as ‘Chesnok Red’ are popular in USDA zone six for their excellent roasting qualities and consistent yields, often producing bulbs weighing 2 to 3 ounces each. Softneck garlic (Allium sativum subsp. sativum), conversely, does not produce a scape and has a flexible neck, allowing it to be braided for storage. These varieties are less cold-tolerant, thriving in USDA zones seven through ten, where winters are milder. In regions like central California (USDA zone nine) or coastal North Carolina (USDA zone eight), softnecks like ‘Silverskin’ or ‘Artichoke’ types are preferred for their adaptability and long storage potential, often lasting six to nine months [2].
- Hardneck varieties: ‘Music’, ‘German Extra Hardy’, ‘Chesnok Red’
- Softneck varieties: ‘California Early’, ‘Inchelium Red’, ‘Silverskin’ types
- Cold stratification: Six to eight weeks below 40°F (4°C) for hardnecks
- Optimal pH: Soil pH between 6.0 and 7.0
Preparing your planting site and choosing seed garlic
Successful garlic cultivation begins with proper site selection and soil preparation. Garlic thrives in full sun, requiring at least six to eight hours of direct sunlight daily. The soil must be well-draining, as garlic bulbs are susceptible to rot in waterlogged conditions. Heavy clay soils can be amended with 2 to 4 inches of organic matter, such as compost or aged manure, to improve drainage and fertility. A soil test is highly recommended to determine nutrient levels and pH, aiming for a range between 6.0 and 7.0.
selecting and preparing cloves for planting
Choosing high-quality seed garlic matters for a productive harvest. Always plant garlic purchased from a reputable seed supplier or a local farmer, rather than grocery store garlic, which may be treated to inhibit sprouting or carry diseases. For softneck varieties, using high-quality planting material can increase yields by up to 30% [1]. Break apart the garlic bulbs into individual cloves no more than 24 to 48 hours before planting to prevent them from drying out. Select the largest, healthiest cloves for planting, as these tend to produce the largest bulbs. Smaller cloves can still be planted, but they will likely yield smaller bulbs and are better used for green garlic, pulled young and used like a scallion. Each clove should be firm, free of blemishes, and have its papery wrapper intact. Aim to plant 100 to 150 cloves per 100 square feet for a dense planting that maximizes yield.
- Sunlight: Six to eight hours daily
- Soil amendments: 2 to 4 inches of compost or aged manure
- Clove selection: Largest, healthiest cloves for planting
- Planting density: 100 to 150 cloves per 100 square feet
Fall planting techniques and winter care
The timing of fall planting is critical for garlic. Plant your cloves approximately four to six weeks before the first anticipated hard freeze in your region. This allows sufficient time for root development before the ground freezes, but not so much time that the plant sends up significant top growth, which can be damaged by harsh winter conditions. In USDA zone six, this typically means planting in late October or early November. For example, in parts of Ohio, planting around October 20th to November 10th often yields the best results, with soil temperatures consistently below 50°F (10°C).
planting depth, spacing, and mulching
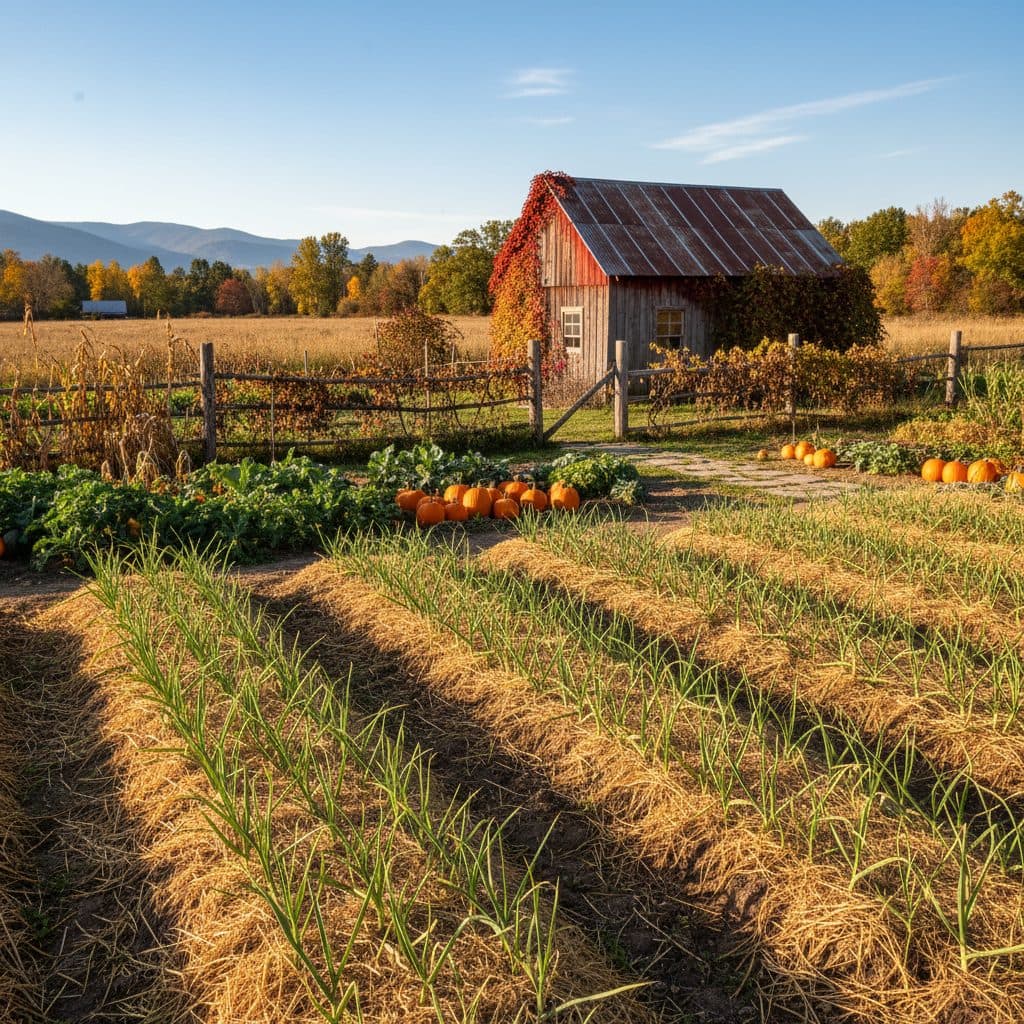
Plant individual cloves with the pointed end facing up, 2 to 3 inches deep in most of the country and 3 to 4 inches deep in USDA zones 3 to 5, 6 inches apart within rows. Space rows 12 to 18 inches apart to allow for proper air circulation and future cultivation. After planting, cover the bed with 4 to 6 inches of straw mulch. This mulch insulates the soil against temperature swings, conserves moisture, and suppresses winter weeds. Research on organic hardneck garlic found that synthetic plastic mulch, rather than straw, reduced weed pressure by over 80% and increased bulb size by 10% to 15% [5]. In colder climates, like USDA zone three or four, an even thicker layer of mulch, up to 8 inches, may be beneficial. Remove about half of the mulch in early spring when green shoots begin to emerge, typically in March or April, to allow the soil to warm up. For more detailed garlic cultivation steps, refer to our how to grow garlic guide.
- Planting depth: 2 to 3 inches deep, 3 to 4 inches in USDA zones 3 to 5
- In-row spacing: 6 inches apart
- Row spacing: 12 to 18 inches apart
- Mulch depth: 4 to 6 inches of straw
Spring care, scape harvest, and summer bulb development
As spring arrives and temperatures consistently rise above 45°F (7°C), garlic plants will begin to actively grow. This is a critical period for nutrient uptake and bulb development. Ensure the plants receive consistent moisture, especially during dry spells; garlic needs about 1 inch of water per week, either from rainfall or irrigation. Fertilize with a balanced organic fertilizer or a compost tea once new growth is established, typically in April in USDA zone five. A side dressing of aged compost around the plants can also provide a slow release of nutrients throughout the growing season, which can help bulbs reach 2 to 3 inches in diameter.
the importance and timing of scape harvest
For hardneck varieties, late spring or early summer brings the emergence of garlic scapes. These curly, edible flower stalks are a culinary delight and their removal is beneficial for bulb development. Scapes typically appear in late May or early June in USDA zones five to seven, forming a distinctive curl. Harvest scapes when they have formed one to one and a half curls, before they straighten out. Snap or cut the scape just above the top leaf. Removing the scape redirects the plant’s energy from flower and seed production into bulb enlargement, potentially increasing bulb size by 10% to 20%. If left on, the plant will expend energy producing seeds, resulting in smaller, less developed bulbs. Scapes can be used in pestos, stir-fries, or roasted, offering a mild garlic flavor. This practice is similar to pinching back basil or harvesting pea shoots to encourage bushier growth or more pods.
- Watering: 1 inch per week during active growth
- Fertilization: Balanced organic fertilizer in spring
- Scape harvest timing: Late May to early June in zones five to seven
- Scape benefit: Redirects energy to bulb, increasing size by 10% to 20%
Harvesting, curing, and storing your garlic
Garlic is typically ready for harvest in mid-to-late summer, usually between late June and early August, depending on your variety and USDA zone. The key indicator for harvest is when the bottom two to three leaves have turned yellow or brown, but at least five to six green leaves remain. Waiting too long can cause the bulb wrappers to split, reducing storage potential, while harvesting too early can result in smaller, underdeveloped cloves. For example, in USDA zone seven, ‘Inchelium Red’ softneck garlic is often ready by early July, while ‘Music’ hardneck might be ready by late July in USDA zone five. Digging up a test bulb can help confirm maturity; the cloves should be plump and fill out the wrappers.
curing and long-term storage
Once harvested, garlic requires curing to prepare it for long-term storage. Cure garlic in a warm (75°F to 85°F, or 24°C to 29°C), dry, and well-ventilated area for two to four weeks. Hang the plants in bundles of six to ten, or spread them in a single layer on screens or racks, leaving the stalks and roots attached. During this period, the outer wrappers will dry and tighten, and the neck will seal, protecting the cloves from moisture loss and disease. After curing, trim the roots to about 0.5 inch and cut the stalks to 1 to 2 inches for hardnecks, or leave them long for braiding softnecks. Store cured garlic in a dark, dry place with good air circulation at around 60°F to 65°F (16°C to 18°C). Avoid the 40°F to 55°F band, including the refrigerator, since that is the temperature range that pushes cloves to sprout. Softneck varieties generally store longer, often six to nine months, compared to hardnecks which typically store for four to six months [2]. Properly cured garlic can provide a supply for many months, reducing the need for store-bought alternatives.
- Harvest indicator: Bottom two to three leaves yellow, five to six green remain
- Curing temperature: 75°F to 85°F (24°C to 29°C)
- Curing duration: Two to four weeks
- Storage temperature: 60°F to 65°F (16°C to 18°C), avoiding the 40°F to 55°F sprouting range
Hardneck vs. Softneck Garlic Characteristics
Feature | Hardneck Garlic | Softneck Garlic |
|---|---|---|
Climate Preference | Colder climates (USDA zones 3-7) | Milder climates (USDA zones 7-10) |
Scape Production | Yes, produces a central flower stalk | No, does not produce a scape |
Flavor Profile | Often complex, rich, and spicy | Milder, more traditional garlic flavor |
Clove Peeling | Easier to peel, fewer but larger cloves (8-12 per bulb) | More difficult to peel, many smaller cloves (10-20+ per bulb) |
Storage Life | 4-6 months typically | 6-9 months, often longer [2] |
Braiding Potential | No, stiff neck | Yes, flexible neck suitable for braiding |
Winter Hardiness | Excellent, requires vernalization | Moderate, less cold tolerant |
Yield Increase: Optimal fall planting can increase garlic yields by 15% to 25% compared to spring planting [4].
Weed Reduction: In trials on organic hardneck garlic, synthetic plastic mulch - not straw - reduced weed pressure by over 80% and increased bulb size by 10% to 15% [5].
Storage Duration: Softneck garlic typically stores for six to nine months, while hardneck varieties store for four to six months [2].
Frequently asked questions
When is the best time to plant garlic in the fall?
Plant garlic cloves approximately four to six weeks before your region’s first anticipated hard freeze. This allows sufficient time for root development before the ground freezes, typically when soil temperatures are consistently below 50°F (10°C).
What is the main difference between hardneck and softneck garlic for US growers?
Hardneck garlic is more cold-hardy, suitable for USDA zones three to seven, and produces a scape. Softneck garlic prefers milder climates, USDA zones seven to ten, does not produce a scape, and offers a longer storage life of six to nine months [2].
How deep should garlic cloves be planted?
Plant individual garlic cloves 2 to 3 inches deep, or 3 to 4 inches in USDA zones 3 to 5, with the pointed end facing upwards. This depth helps protect the developing bulb from winter heaving and promotes strong root growth for a larger harvest.
Why should I harvest garlic scapes?
Harvesting garlic scapes from hardneck varieties redirects the plant’s energy from flower and seed production into bulb enlargement. This practice can potentially increase the size of your garlic bulbs by 10% to 20%.
How long does garlic need to cure after harvest?
Garlic needs to cure for two to four weeks in a warm (75°F to 85°F, or 24°C to 29°C), dry, and well-ventilated area. Proper curing is essential for extending the storage life of your harvested bulbs, often by several months.
Can I plant grocery store garlic?
It is generally not recommended to plant grocery store garlic. It may be treated with sprout inhibitors or carry diseases, leading to poor performance. For best results, use certified seed garlic from a reputable supplier; in softneck trials, the quality of the planting material made a large difference to yield [1].
References
- Yield of softneck garlic depending on the quality of planting material (2022). Yield of softneck garlic depending on the quality of planting material.
- Differential response of softneck and hardneck garlic ecotypes to quality attributes for long-term storage (2022). Differential response of softneck and hardneck garlic ecotypes to quality attributes for long-term storage.
- An integrative process-based model for biomass and yield estimation of hardneck garlic ( <i>Allium sativum</i> ) (2021). https://doi.org/10.1101/2021.11.04.467009
- Effect of Planting Time and Planting System on the Growth and Yield of Some Garlic Germplasm (2020). Effect of Planting Time and Planting System on the Growth and Yield of Some Garlic Germplasm.
- Synthetic Mulches in Organic Hardneck Garlic (Allium sativum subsp. ophioscorodon) Production (2020). Synthetic Mulches in Organic Hardneck Garlic (Allium sativum subsp. ophioscorodon) Production.
- USDA Natural Resources Conservation Service (2024). USDA Natural Resources Conservation Service.