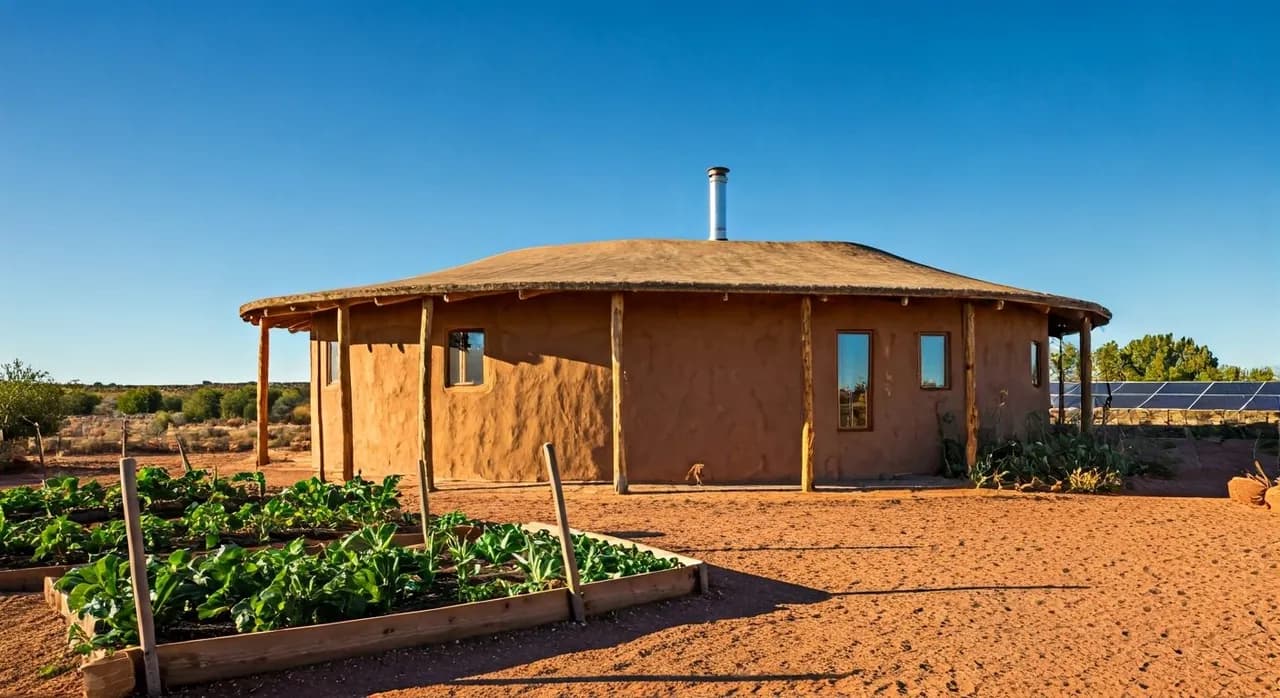
Key takeaways
- Lime and clay plasters offer breathable, durable finishes for natural walls, essential for managing moisture in varied climates.
- Clay plasters are cost-effective and easy to repair, ideal for interior applications or protected exterior walls in drier regions like USDA Zone 7.
- Hydraulic lime plasters provide superior weather resistance, making them suitable for exterior use in humid areas or those with significant rainfall, such as the Pacific Northwest.
- Proper material sourcing, mixing ratios (such as 1:3 clay to sand), and multi-layer application determine plaster longevity.
- Regular maintenance, including inspection and minor repairs every 5 to 10 years, can significantly extend the lifespan of natural plasters beyond 20 years.
- Matching plaster type to local climate and wall materials supports long-term durability.
Quick answer: Lime and clay plasters weatherproof natural walls by offering breathable, durable finishes that manage moisture. Hydraulic lime is ideal for humid exteriors, while clay suits drier areas or interiors.
In the US Midwest, where temperatures can swing 80 degrees Fahrenheit from summer highs to winter lows, building durable homestead walls requires careful material choices. For natural construction methods, choosing how to finish and weatherproof exterior walls is essential. Lime and clay plasters, time-tested materials used for thousands of years, offer compelling solutions for creating durable, breathable, and beautiful surfaces that stand up to the elements.
These traditional finishes, often overlooked in modern construction, provide superior moisture management compared to synthetic alternatives. A well-applied natural plaster can protect a straw bale or earthen wall for decades while aiding a comfortable indoor environment and reducing the need for energy-intensive heating or cooling. Understanding the distinct properties of lime and clay, and how to apply them effectively, is a foundational skill for any homesteader aiming for long-term off-grid living.
The practical value of natural plasters
For natural building on a homestead, wall finishes serve functional needs as well as appearance. Natural plasters, primarily those made from clay or lime, offer a breathable membrane that allows moisture vapor to pass through, preventing condensation buildup within wall assemblies. This is a critical advantage over cement-based stucco or synthetic paints, especially for walls made of straw bale, cob, or adobe, which require the ability to dry out. In regions like USDA Zone 5, where freeze-thaw cycles are common, this breathability can prevent significant damage over time.
Why natural materials matter for homesteads
The appeal of natural plasters extends beyond their functional benefits. They are typically made from locally sourced materials, reducing transportation costs and environmental impact. For instance, a homesteader in Oklahoma might find suitable clay soil directly on their property, significantly cutting material costs. The application process, while labor-intensive, can be a community effort, supporting skill-sharing and connection. These plasters also contribute to a healthier indoor air quality by avoiding volatile organic compounds (VOCs) found in many conventional finishes. A study in 2024 noted the significant role of traditional building knowledge in Indian lime and earthen plasters, noting their durability over centuries [1].
- Breathability: Allows walls to manage moisture naturally.
- Local Sourcing: Reduces material costs and transportation.
- Low VOCs: Improves indoor air quality for residents.
- Repairability: Easy to patch and maintain over time.
- Aesthetics: Offers unique textures and natural color variations.
Clay plasters: composition and application
Clay plasters are a straightforward and forgiving option, particularly for interior walls or protected exterior surfaces in drier climates, such as USDA Zone 7 in the Southwest. Their primary components are clay, sand, and fiber. The clay acts as the binder, while sand provides bulk and reduces shrinkage, and fibers — like chopped straw, cattail fluff, or even animal hair — add tensile strength and prevent cracking. A typical mix might use one part clay to three parts sand, with some fiber, but ratios must be determined by testing your specific materials. Research in 2024 confirms that clay composition patterns significantly influence the adhesive strength of earthen plasters, showing why local materials require testing before use [4].
Sourcing and preparing your clay
Sourcing clay can be as simple as digging it from your own land. Many homesteaders in states like Arizona or New Mexico find suitable clay within a few feet of the surface. Before mixing a large batch, simple jar tests determine your clay’s sand and silt content. A good plaster clay will have a balanced composition, allowing it to bind effectively without excessive cracking. For exterior applications, or in areas with moderate rainfall, a sacrificial coat of clay plaster can be applied and easily repaired. For more sturdy exterior protection, however, a lime finish coat is often preferred. The addition of cattail-reinforced clay plasters has been explored for both preservation and new construction, showing promising results in durability [5].
- Jar Test: Determines clay, silt, and sand ratios.
- Screening: Removes rocks and organic debris from raw clay.
- Soaking: Hydrates clay for easier mixing and workability.
- Fiber Addition: Improves tensile strength and reduces cracking.
- Test Patches: Essential for evaluating mix performance on a small scale.
Lime plasters: durability and weatherproofing
Lime plasters are the workhorses of exterior natural finishes, well-known for their exceptional durability and weather resistance. Unlike clay, which re-softens with prolonged water exposure, lime plasters carbonate over time, becoming hard and stone-like. There are two main types: non-hydraulic lime (fat lime or air lime) and hydraulic lime. Non-hydraulic lime cures by absorbing carbon dioxide from the air, a slow process that requires consistent moisture and can take months to fully harden. Hydraulic lime, on the other hand, contains impurities like silicates and aluminates that allow it to set with water, similar to cement, and continue to harden in the presence of moisture. This makes hydraulic lime particularly suitable for exterior use in wetter climates, such as the Pacific Northwest or the humid Southeast (USDA Zone 8).
Choosing the right lime for your climate
For homesteaders in areas with significant rainfall or high humidity, hydraulic lime is often the preferred choice for exterior walls. It gives a faster set and greater resistance to washing out during its initial curing phase. A study in 1995 evaluated hydraulic lime grouts for reattaching lime plasters to earthen walls, demonstrating their sturdy binding properties [3]. While more expensive than non-hydraulic lime, the added weatherproofing can save significant repair costs over time. Non-hydraulic lime, with its greater flexibility and breathability, is excellent for interior applications or protected exterior areas, particularly in arid regions where intense sun exposure is the primary concern. For off-grid power solutions that can support plaster mixing equipment, consider reading about off-grid and hybrid solar systems.
- Non-hydraulic Lime: Cures slowly with air, flexible, best for interiors.
- Natural Hydraulic Lime (NHL): Sets with water, suitable for exteriors.
- Hydrated Lime: Common in bags, often non-hydraulic, requires careful mixing.
- Carbonation: The chemical process of hardening for non-hydraulic lime.
- Breathability: Allows walls to dry, preventing moisture entrapment.
Application techniques and best practices
Applying natural plasters is a multi-step process that rewards patience and attention to detail. Regardless of whether you are using clay or lime, proper surface preparation is foundational. The wall surface needs to be clean, free of loose debris, and slightly damp to ensure good adhesion. For straw bale walls, a ‘scratch coat’ or ‘key coat’ is typically applied first, pressed firmly into the bales to create a good mechanical bond. This initial layer is usually a coarser mix, often containing more fiber, and is allowed to cure partially before subsequent layers are applied. For a small shed or outbuilding, this might be a weekend project, but for a full homestead, plan for several weeks of work.
Preparing your wall for plaster
Most natural plasters are applied in multiple thin layers, typically two to three coats, each ranging from 1/4 inch to 1/2 inch thick. This layering approach allows each coat to dry and cure properly, minimizing cracking and maximizing strength. Exterior lime plasters must remain damp during initial curing to carbonate properly; this might involve misting the wall multiple times a day for the first week, especially in dry, sunny conditions like those found in USDA Zone 6. The final coat, or finish coat, is often a finer mix with less aggregate, allowing for smoother textures or decorative finishes. For powering tools like mixers or lights during application, consider exploring solar power for a shed or other small structures. Adhesion strength is a main factor, and a 2017 study on natural clay plasters stressed the importance of characterization tests to ensure proper bonding [2].
- Surface Preparation: Clean, damp, and free of loose material.
- Scratch Coat: First layer, coarse, pressed firmly for mechanical bond.
- Multiple Layers: Apply 2 to 3 thin coats for strength and crack prevention.
- Curing: Keep lime plaster damp; allow clay plaster to dry slowly.
- Tools: Trowels, floats, hawk, and buckets are essential.
Maintenance and longevity
The longevity of natural plasters on a homestead wall depends significantly on proper maintenance. While these materials are incredibly durable, they are not entirely maintenance-free. Regular inspection, ideally once a year after the harshest weather cycle (e.g., after winter in USDA Zone 4), can help identify small cracks or areas of wear before they become major issues. For clay plasters, minor cracks can often be simply misted with water and smoothed over with a trowel. For lime plasters, small repairs involve re-wetting the area and applying a fresh patch of the same mix. Addressing these issues promptly can extend the plaster’s life by 10 to 20 years.
Extending the life of your natural walls
Exterior plasters, especially those exposed to driving rain or intense sunlight, will naturally experience more wear. Features like generous roof overhangs (at least 18 inches) and proper drainage around the foundation can significantly reduce direct exposure to moisture, thereby extending the lifespan of the plaster. In a region like the coastal Pacific Northwest, where rainfall can exceed 60 inches annually, these architectural details serve as essential weather barriers rather than decorative choices. A well-maintained natural plaster can easily last for many decades, with many historical examples lasting for centuries. For homesteaders committed to off-grid living, understanding how these materials age helps maintain durable structures. The USDA Natural Resources Conservation Service provides resources on soil types that can inform local material sourcing [6].
- Annual Inspection: Check for cracks, erosion, or moisture issues.
- Prompt Repairs: Address small damages before they escalate.
- Roof Overhangs: Protect walls from direct rain and sun exposure.
- Foundation Drainage: Prevents splash-back and rising damp.
- Breathable Paints: If painting, use lime wash or mineral paints.
Comparison of Clay and Lime Plasters for Homestead Use
Feature | Clay Plaster | Lime Plaster |
|---|---|---|
Primary Binder | Clay particles | Calcium hydroxide (Ca(OH)2) |
Water Resistance | Low (re-softens when wet) | High (hardens with water/air) |
Breathability | Very high | High |
Curing Time | Dries in days (full strength in weeks) | Carbonates slowly (months to years) |
Flexibility | High (less prone to cracking from movement) | Moderate (can be brittle if not mixed well) |
Durability (Exterior) | Low to Moderate (needs protection) | High (excellent weatherproofing) |
Cost of Materials | Low (often locally sourced) | Moderate to High (can be specialized) |
Repairability | Very Easy (can re-wet and re-work) | Moderate (requires specific mix and technique) |
Best Use Case | Interior walls, protected exteriors in dry climates (e.g., USDA Zone 7) | Exterior walls, wet climates (e.g., Pacific Northwest), foundations |
Clay Moisture Buffer: Clay plasters can absorb a significant amount of moisture, helping to regulate indoor humidity levels without mechanical systems.
Lime Strength Gain: Hydraulic lime plasters achieve most of their final strength within a month, providing sturdy weather protection relatively quickly.
References
- Traditional Building Knowledge in Indian Lime and Earthen Plasters (2024).
- Natural clay plasters: Checking regulations to characterization tests (2017).
- Design and evaluation of hydraulic lime grouts for the reattachment of lime plasters on earthen walls (1995).
- Clay composition patterns and their influence on the adhesive strength of earthen plasters (2024).
- Cattail-reinforced clay plasters in building heritage preservation and new constructions (2013).
- USDA Natural Resources Conservation Service (2024).