Key takeaways
- Provide 14-16 hours of intense light, positioned 2-4 inches from seedlings, to prevent leggy growth.
- Thin crowded seedlings to 2-4 inches apart after true leaves appear, ensuring adequate resources and air circulation.
- Prevent damping-off by using sterile seed-starting mix, bottom-watering, and maintaining good air flow around plants.
- Implement a 3-4 year crop rotation cycle and succession planting to reduce disease pressure and improve soil health.
- Tailor your planting schedule to your specific USDA zone’s last frost date and soil temperature requirements for optimal success.
Quick answer: Fix leggy seedlings with 14-16 hours of intense light 2-4 inches away. Thin crowded seedlings to 2-4 inches apart, and prevent damping-off using sterile mix, bottom-watering, and good airflow.
In early spring, many US growers start seeds indoors. Yet, this initial phase often presents common challenges: seedlings that stretch weakly towards the light, those that compete fiercely in overcrowded trays, or worse, those that suddenly collapse from damping-off disease. These early setbacks can cost you much of the season's harvest if not addressed promptly.
Successfully navigating these early stages requires a blend of precise environmental control and forward-thinking garden planning. This guide will walk you through practical, numerate strategies to diagnose and fix leggy, crowded, and damped-off seedlings, ensuring your young plants develop into strong, productive additions to your garden, whether you’re in USDA zone 5 or zone 9.
Understanding seedling woes: leggy, crowded, and damped-off
When you start seeds indoors, you are essentially creating a micro-environment that needs careful management. One common issue is leggy growth, where seedlings appear tall and spindly with long stems between leaves. This typically occurs when plants are not receiving enough light, causing them to stretch excessively in search of it. For instance, a tomato seedling in low light might stretch 4-6 inches in a week, becoming weak and prone to snapping. This weakness can reduce a plant’s eventual fruit production by 20% or more, as it expends energy on stem growth instead of developing strong roots and leaves.
Recognizing the symptoms
Crowded seedlings, on the other hand, arise from planting too many seeds too closely together and failing to thin them. When plants are packed tightly (a dozen or more crammed into a single cell), they compete intensely for light, water, and nutrients. This competition leads to stunted growth, poor air circulation, and an increased susceptibility to disease. Crowded conditions leave individual plants markedly weaker and less productive once transplanted. Finally, damping-off is a fungal disease that causes young seedlings to collapse at the soil line, often appearing as if they’ve been cut off. This devastating condition can wipe out an entire tray of seedlings, sometimes 100% of them, within 24-48 hours, especially in cool, wet, and poorly ventilated conditions. The pathogens responsible (including Pythium and Rhizoctonia) do most damage when the mix stays cold, sodden and still, which is why unheated trays on a cool floor lose the most seedlings.
- Leggy seedlings: long, thin stems; pale leaves; plants leaning excessively.
- Crowded seedlings: small, stunted plants; overlapping leaves; yellowing lower leaves.
- Damped-off seedlings: sudden collapse at the soil line; water-soaked stems; fuzzy mold on soil surface.
The light solution: preventing leggy growth
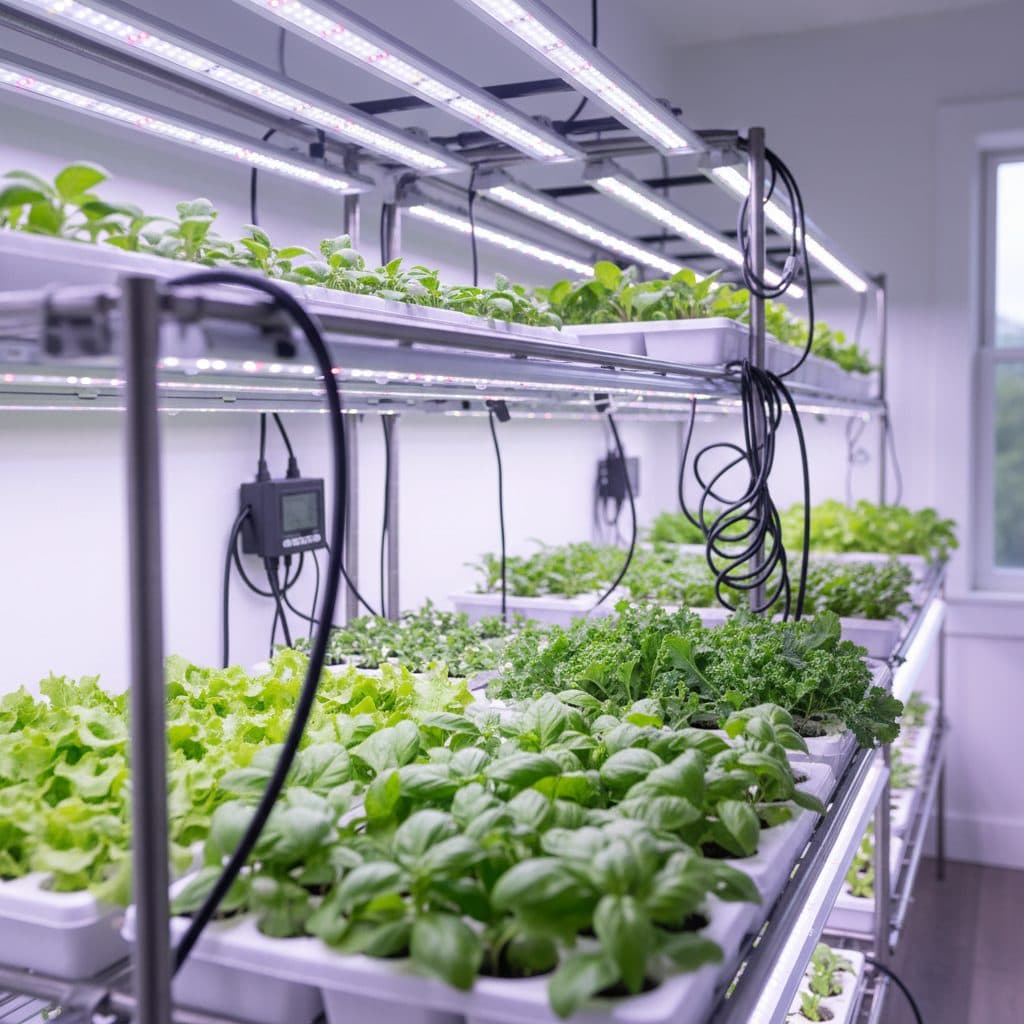
The primary culprit behind leggy seedlings is insufficient light. To prevent this, your seedlings need intense, consistent light for 14-16 hours each day. Natural sunlight through a window, even a south-facing one, is often not enough, especially in northern states during early spring. For example, a window in upstate New York in March might only provide 6-8 hours of adequate light, far short of the necessary duration. Supplemental lighting is crucial. Fluorescent shop lights or LED grow lights are effective options. For most seedlings, a light intensity of 2,000-3,000 lumens per square foot is ideal.
Optimal grow light setup
Position your grow lights correctly: they should be 2-4 inches above the tops of your seedlings. As the seedlings grow, you’ll need to adjust the light height daily to maintain this distance. Many growers in USDA zone 5 and 6 use simple chain-and-hook systems to easily raise their lights. Running lights for 14-16 hours and then providing 8-10 hours of darkness mimics natural cycles and allows plants to metabolize sugars and grow. Using a simple timer can automate this process, ensuring consistent light exposure without daily manual intervention. Consistent light exposure gives noticeably thicker stems and far less stretching than inadequate lighting.
- Fluorescent T5 or T8 bulbs: affordable, good for general seedling starts.
- LED grow lights: energy-efficient, longer lifespan (50,000+ hours), adjustable spectrum.
- High-intensity discharge (HID) lights: powerful, but generate more heat and are typically for larger operations.
Spacing for success: thinning crowded seedlings
Crowded seedlings are a common problem that can severely limit individual plant development. When too many seeds germinate in a small area, they compete for every essential resource: light, water, and nutrients. This competition often results in weak, underdeveloped plants that struggle to thrive even after transplanting. For example, a tray of lettuce with 20 seedlings per cell will yield significantly smaller plants than a tray thinned to one or two per cell. Thinning is a critical step that should occur once seedlings have developed their first set of true leaves, typically 10-14 days after germination.
The art of thinning
The general rule for thinning is to leave the strongest, healthiest seedling in each spot and remove the others. For most vegetables like tomatoes, peppers, and brassicas, thin to a single strong seedling per cell, or to about 2 inches apart in an open flat. Larger plants, such as squash or corn, might require 6 inches or more even at the seedling stage. Use small scissors or tweezers to snip off weaker seedlings at the soil line instead of pulling them, which can disturb the roots of the remaining plant. This practice ensures that the chosen seedling has ample room for root development and air circulation, reducing the risk of fungal disease and setting the plant up for a stronger crop later in the season.
- Small scissors: precise cuts at the soil line.
- Tweezers: useful for gently removing tiny, unwanted seedlings.
- Fingers: for larger, more established seedlings, but be careful not to disturb roots.
Battling damping-off: moisture, air, and hygiene
Damping-off is a swift and often fatal disease for young seedlings, caused by several soil-borne fungi like Pythium, Phytophthora, and Rhizoctonia. These pathogens thrive in conditions that are too wet, too cool, and have poor air circulation, often wiping out an entire tray of seedlings overnight. For instance, a seed tray kept at 60°F with constantly soggy soil and no air movement is highly susceptible. To combat this, start with a sterile seed-starting mix. Regular garden soil or compost can harbor these fungi and should be avoided for indoor seed starting. Many commercial mixes are pasteurized to eliminate pathogens, which sharply lowers the risk.
Preventative measures
Proper watering is paramount. Instead of overhead watering, which can splash fungal spores and keep the soil surface perpetually damp, opt for bottom-watering. Place your seed trays in a larger tray filled with 1-2 inches of water, allowing the mix to absorb moisture from below for 15-20 minutes. Remove the tray once the surface appears moist. Good air circulation is equally important; a small oscillating fan set to a low speed, gently moving air across the seedlings for several hours a day, can reduce damping-off incidence. This airflow strengthens stems and prevents stagnant, humid conditions that fungi love. Maintaining a consistent room temperature, ideally between 68°F and 75°F, also discourages fungal growth. Always sanitize your seed-starting trays and tools with a 10% bleach solution before each use to prevent disease carryover from previous seasons.
- Sterile seed-starting mix: pathogen-free substrate for germination.
- Bottom-watering: prevents surface dampness and fungal spread.
- Good air circulation: small fan to prevent stagnant, humid conditions.
- Consistent temperature: ideally 68-75°F to inhibit fungal growth.
- Sanitized tools and trays: prevents disease carryover.
Beyond the seedling tray: crop rotation and succession planting for long-term health
While immediate care for seedlings is vital, long-term garden health depends on crop rotation and succession planting. Crop rotation involves changing the location of different plant families in your garden beds each year. This practice is crucial for breaking disease cycles and managing soil nutrients. For example, if you plant tomatoes (Solanaceae family) in the same spot year after year, soil-borne diseases specific to that family, like early blight, can build up and cut badly into yields. A three- to four-year rotation is the standard home-garden guideline, moving crops like corn, beans, and squash to different beds annually.
Strategic planting for continuous harvest
Succession planting, on the other hand, ensures a continuous harvest throughout the growing season. Instead of planting all your lettuce seeds at once in early spring, plant a small batch every 2-3 weeks. This strategy works well for quick-maturing crops such as radishes, bush beans, and spinach. For growers in USDA zone 7, this might mean planting a new row of bush beans every three weeks from April through July, extending the harvest significantly. Integrating cover crops into your rotation, particularly legumes, can also return a useful amount of nitrogen to the soil. For more on beneficial species, consider exploring Best Living-Mulch and Cover-Crop Legumes by USDA Zone for No-Dig Beds. Furthermore, incorporating nitrogen-fixing trees and shrubs, as discussed in The Best Nitrogen-Fixing Trees for Every USDA Zone (2 to 12), can provide long-term soil fertility benefits and biomass.
- Solanaceae (tomatoes, peppers, potatoes): Rotate with other families to prevent disease buildup.
- Brassicas (cabbage, broccoli, kale): Heavy feeders, benefit from following legumes.
- Legumes (beans, peas, clover): Nitrogen-fixers, excellent for soil enrichment.
- Root crops (carrots, beets, radishes): Best in deeply tilled or loose soil.
Timing is everything: a USDA-zone planting calendar
Understanding your specific USDA Hardiness Zone and local climate data is foundational to successful gardening. A planting calendar tailored to your zone helps you determine the ideal times for seed starting indoors, transplanting outdoors, and direct sowing. For instance, in USDA zone 6 the average last frost usually falls somewhere between mid-April and mid-May depending on where in the zone you are. Hardiness zones are set by average winter minimum temperature and only loosely track frost dates, so look up your own county's figure rather than relying on the zone number. Knowing this date allows you to count backward 6-8 weeks to determine the optimal time to start tomatoes or peppers indoors, ensuring they are ready for transplant after the danger of frost has passed. Planting too early can result in leggy, overgrown seedlings that struggle when moved outside, while planting too late can shorten your harvest season by several weeks.
Creating your zone-specific schedule
Beyond frost dates, soil temperature is a critical factor for direct sowing. Warm-season crops like corn and beans germinate best when soil temperatures consistently reach 60°F or higher, while cool-season crops like peas and spinach will germinate in soil as cool as 40°F, though they come up faster nearer 50°F. Using a soil thermometer can provide precise data, preventing wasted seeds and effort. For example, planting corn in Ohio’s USDA zone 6 when the soil is only 50°F will likely result in poor germination rates, perhaps only 50% success. Conversely, planting peas when the soil hits 45°F in early March can give you a harvest 2-3 weeks earlier than waiting for warmer conditions. Consider perennial options for extending your harvest season, as detailed in Perennial Leafy Greens and Edible Weeds for Every Zone: A Hardiness-Keyed Forager’s Planting List, which can complement your annual planting schedule. This kind of planning is what separates a productive season from a frustrating one.
- Last frost date: critical for timing indoor seed starting and outdoor transplanting.
- First frost date: helps determine final succession planting dates and harvest windows.
- Soil temperature: essential for direct sowing, varying by crop type (e.g., 50°F for peas, 60°F for corn).
- Days to maturity: guides succession planting for continuous harvests.
Comparing Common Seedling Problems and Solutions
Problem | Cause | Symptoms | Key Solution |
|---|---|---|---|
Leggy | Insufficient light | Tall, spindly stems; pale leaves | Increase light intensity and duration (14-16 hours) |
Crowded | Too many seeds planted too close | Stunted growth; competition for resources | Thin seedlings to 2-4 inches apart |
Damping-Off | Fungi (Pythium, Rhizoctonia); wet, cool conditions | Seedlings collapse at soil line; fuzzy mold | Sterile mix, bottom-watering, good air circulation |
Light Distance: Maintain grow lights 2-4 inches above seedlings to prevent stretching and build thicker, sturdier stems.
Soil Temperature: For optimal germination, warm-season crops like corn require soil temperatures of 60°F or higher, while peas will start in soil at 40-50°F.
Crop Rotation: A three- to four-year rotation reduces the buildup of soil-borne diseases and helps balance nutrient demand.
Frequently asked questions
How much light do seedlings truly need to prevent legginess?
Seedlings require 14-16 hours of intense light daily to prevent leggy growth. Position grow lights, such as LEDs, 2-4 inches above the plant tops and adjust as they grow to maintain this critical distance.
When is the best time to thin crowded seedlings?
Thin your seedlings once they have developed their first set of true leaves, typically 10-14 days after germination. Aim for a final spacing of 2-4 inches between most vegetable plants to ensure adequate resources.
What are the primary causes of damping-off disease in seedlings?
Damping-off is caused by soil-borne fungi that thrive in overly wet, cool conditions with poor air circulation. Using non-sterile soil, overwatering, and lack of airflow are common culprits, often leading to 100% loss in a tray.
Can leggy seedlings be saved, or are they a lost cause?
Sometimes. Tomatoes and tomatillos can be potted up deeper with the stretched stem buried, because they root along it. Peppers, cucurbits and lettuce are different; burying their stems invites collar rot, so pot those up at the same depth, support them if they flop, and fix the light instead. Either way, increase light exposure to 14-16 hours daily and bring the light source to 2-4 inches away.
How does crop rotation contribute to healthier seedlings and overall garden success?
Crop rotation, especially a 3-4 year cycle, prevents the buildup of soil-borne diseases and pests specific to certain plant families, reducing disease pressure. It also helps manage soil nutrients, supporting a healthier environment for future seedlings and increasing overall garden productivity.