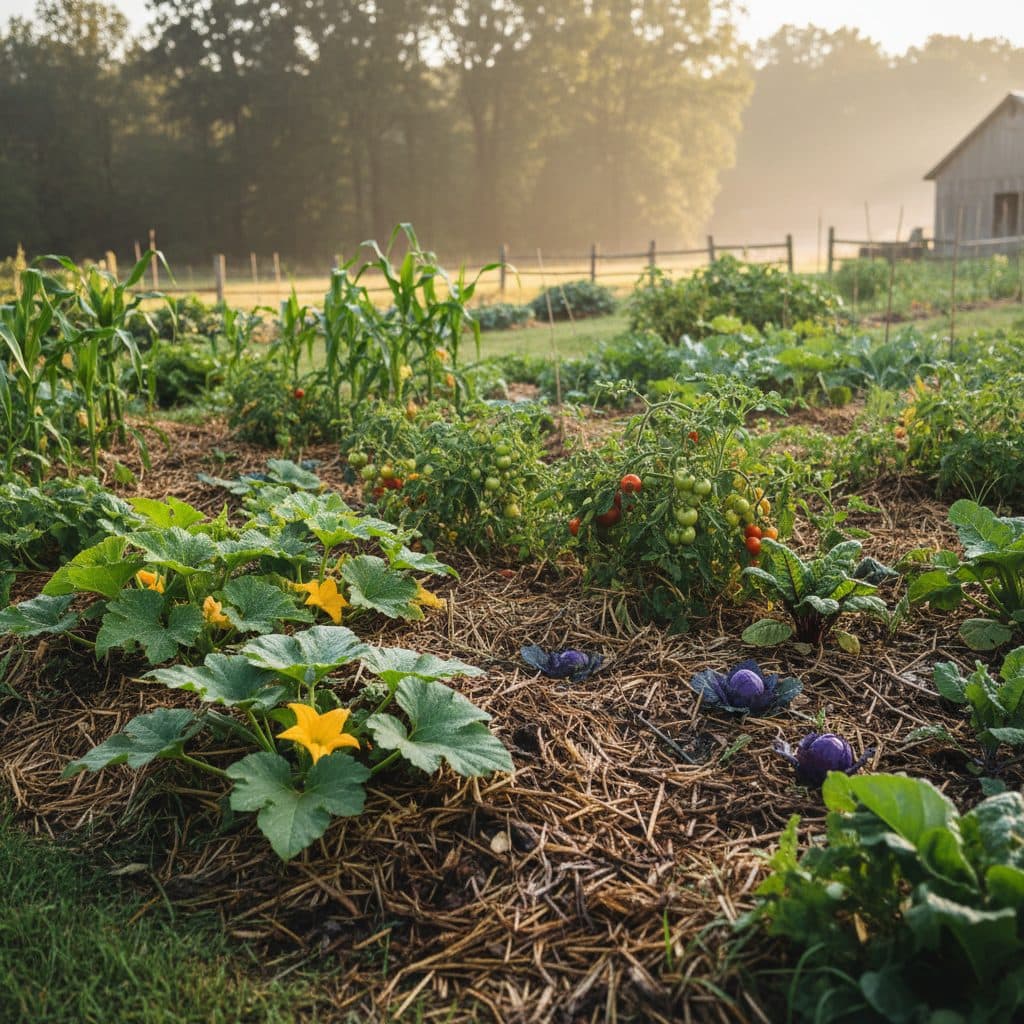
Key takeaways
- Begin the no-till transition in late fall or early spring by suppressing existing weeds with cardboard and a 6-inch layer of organic mulch.
- Plant cover crops like clover or vetch in areas not immediately used for vegetables to improve soil structure and add nitrogen.
- Establish permanent raised beds or growing areas, focusing on soil building through compost and organic matter additions.
- Implement permaculture principles such as plant guilds and zones to maximize space, nutrient cycling, and pest resistance.
- Design and install simple water management features like small swales to capture and distribute rainfall efficiently across the garden.
- Monitor soil health indicators like earthworm activity and water infiltration rates to gauge the success of your no-till practices.
Quick answer: Transitioning a tilled garden to no-till involves suppressing weeds with cardboard and mulch, adding compost, and implementing permaculture principles like plant guilds. This method builds soil organic matter steadily and improves soil health.
For many gardeners across the United States, from the fertile river valleys of Iowa (USDA Zone 5) to the warmer climates of California (USDA Zone 9), traditional tillage has been the standard practice for preparing vegetable beds. This method, involving turning and breaking up the soil, was once considered essential for seedbed preparation and weed control, a practice documented in gardening manuals as far back as 1877 [4]. However, decades of research and observation have highlighted the drawbacks of repeated soil disturbance, including significant organic matter loss and increased erosion rates, which can exceed 5 tons per acre annually in tilled fields [6].
The good news is that converting a tilled vegetable garden to a no-till system is achievable within a single growing season, offering substantial benefits. This approach, rooted in permaculture design principles, focuses on building soil health, conserving water, and fostering a more resilient garden ecosystem. By following a structured plan, you can transform your garden into a thriving, low-maintenance food production area. Soil organic matter builds up steadily over a few seasons, particularly in temperate regions like USDA Zone 6.
Understanding the impact of traditional tillage on garden soil
For generations, gardeners have turned soil with shovels, hoes, and rototillers, believing it was the best way to prepare for planting. This practice aims to aerate the soil and incorporate amendments. However, repeated tillage breaks down soil aggregates, which matter for a healthy soil structure. This disturbance leads to a rapid decline in soil organic matter, reducing the soil’s capacity to hold water and nutrients. Studies have shown that tilled soils often lose up to 50% of their organic carbon over several decades compared to undisturbed soils [6].
the hidden costs of soil disturbance
Beyond organic matter loss, tillage exposes soil to wind and water erosion, especially in regions with heavy rainfall or strong winds, like the plains states. The loosened soil particles are easily carried away, leading to a loss of valuable topsoil. This also compacts the soil layers beneath the tilled zone, creating a hardpan that restricts root growth and water infiltration. Furthermore, tillage interrupts the complex soil food web, destroying fungal networks and beneficial microbial communities that are vital for plant health and nutrient cycling. For example, a 1994 corn trial comparing tilled and no-till plots found differences in pest populations and in insecticide performance between the two systems [3].
- Reduced water infiltration by up to 30% in compacted soils.
- Loss of beneficial fungi, which can extend plant root systems by 100 to 1,000 times.
- Increased fuel consumption for machinery by 50% or more compared to no-till.
- Greater weed seed germination due to exposure to light and oxygen.
- Elevated soil temperatures, potentially stressing plant roots during summer heat waves.
Initial steps: preparing your garden for a no-till season
The first step in transitioning your tilled garden to a no-till system over one season involves suppressing existing weeds and preparing the soil surface. This process should ideally begin in late fall or early spring, before active growth starts. In a typical USDA Zone 7 garden, this might mean starting in March. Begin by mowing down any existing vegetation as low as possible. Next, lay down a weed barrier of overlapping cardboard or several layers of newspaper directly onto the garden beds. This smothers weeds and prevents their regrowth, while also decomposing over time to add organic matter to the soil.
building the foundation: mulch and compost
Once the weed barrier is in place, spread a 4- to 6-inch layer of finished compost directly onto the cardboard. This compost layer is what you plant into for the first season, and it stays in capillary contact with the ground beneath, so roots move down through the softening cardboard into the soil. Keep coarse material such as wood chips on the paths, and add mulch on top of the compost around established plants rather than underneath it. This method significantly reduces the need for digging and allows the soil food web to begin its work undisturbed, potentially increasing microbial biomass by 20% within the first year.
- Clear existing vegetation down to 2 inches.
- Apply overlapping cardboard or newspaper layers, ensuring no gaps.
- Keep coarse wood chips for the paths; mulch goes on top of the compost once plants are in.
- Spread a 4- to 6-inch layer of finished compost directly on the cardboard and plant into that.
- Allow at least two weeks for the initial layers to settle before planting.
Integrating permaculture principles: zones and guilds
As your garden beds are prepared, consider how permaculture principles can guide your planting strategy. The concept of zones helps organize your garden based on frequency of visits and intensity of care. Zone one, closest to your home, is ideal for herbs like garden sage and frequently harvested vegetables, requiring daily attention. Zone two might host perennial vegetables, small fruit bushes, and more self-sufficient annuals, needing attention a few times a week. This zoning meaningfully cuts the walking you do for daily tasks.
designing productive plant guilds
Planting in guilds is another powerful permaculture strategy. A guild is a group of plants that support each other, mimicking natural ecosystems. For example, a classic “three sisters” guild of corn, beans, and squash provides structural support, nitrogen fixation, and ground cover, respectively. In a no-till system, these guilds help build soil, suppress weeds, and attract beneficial insects. Consider a tomato guild in USDA Zone 6 with basil, marigolds and borage. Borage genuinely draws pollinators. Marigolds only suppress root-knot nematodes when they are grown as a dense stand and turned in as a cover crop (a few plants dotted among tomatoes will not do it), and the claim that basil repels tomato pests is not well supported. Plantings like this mainly buy diversity and continuous flowering rather than a measurable yield increase. For more on structuring these systems, explore a permaculture garden plan.
- Map your garden into zones based on access and care frequency.
- Identify the main plants for each zone, prioritizing perennial options for outer zones.
- Research compatible plant guilds for your climate and desired crops.
- Select nitrogen-fixing plants like garden peas or clover for every guild.
- Include sterile Bocking 14 comfrey, which does not set seed, as a chop-and-drop mulch plant, not common comfrey, which self-sows and regrows from every root fragment. Comfrey is mulch, not food or fodder: its pyrrolizidine alkaloids are hepatotoxic.
Water management: designing for efficiency with swales
Efficient water management is a cornerstone of a productive no-till garden, especially when transitioning over one season. Traditional tilled gardens often suffer from rapid water runoff and evaporation, requiring frequent irrigation. By contrast, a no-till system with its improved soil structure can absorb and retain significantly more moisture. To further improve this, consider incorporating simple swales into your garden design. Swales are shallow ditches dug along contours, with a mound (berm) on the downhill side. They capture rainfall, allowing it to slowly infiltrate the soil rather than running off, which can reduce irrigation needs by 30% to 50% in arid regions.
constructing and placing your swales
For a home garden, swales don’t need to be massive. A small, hand-dug swale 6 to 12 inches deep and 18 to 24 inches wide can be highly effective. Place them on slight slopes to intercept runoff, keeping them well clear of house foundations, basements, retaining walls and septic drainfields, and check local grading rules first. A swale concentrates water; put one uphill of a structure and you move the flooding rather than the water. The berm can then be planted with water-loving or deep-rooted plants, creating a microclimate. For instance, in a USDA Zone 8 garden receiving 40 inches of annual rainfall, a well-placed swale system can store thousands of gallons of water annually in the soil profile. This passive water harvesting technique supports the overall health of your no-till beds and helps establish a resilient garden ecosystem. More details on such design elements can be found in resources like permaculture design: how to read a site before you plant it.
- Identify natural contours and slopes in your garden for swale placement.
- Dig swales 6 to 12 inches deep and 18 to 24 inches wide.
- Use the excavated soil to create a berm on the downhill side of the swale.
- Plant the berm with perennial herbs, small shrubs, or nitrogen fixers.
- Observe water flow during rain events and adjust swale placement as needed.
Planting and ongoing care in your no-till garden
With your beds prepared and permaculture principles in mind, it’s time for planting. In a no-till system, avoid digging holes larger than necessary for transplants or seeds. For larger plants, a transplanter designed for no-till soils, as described in a 2019 study, can be highly effective [2]. For smaller seeds, simply make a shallow furrow in the compost layer. When planting, ensure minimal disturbance to the underlying soil layers. Regularly replenish the mulch layer as it breaks down, aiming to maintain a consistent 4- to 6-inch depth. This continuous mulching suppresses weeds, conserves moisture, and feeds the soil food web, leading to a 25% reduction in weed pressure compared to tilled gardens.
nurturing soil life and fertility
Ongoing care in a no-till garden shifts from intensive labor to observation and gentle intervention. Focus on feeding the soil, not just the plants. Incorporate cover crops in any beds that will be fallow for more than a few weeks. Legumes like crimson clover or hairy vetch fix atmospheric nitrogen, adding up to 100 pounds of nitrogen per acre, while their roots break up compaction. Chop and drop these cover crops in place before they go to seed, leaving their biomass as mulch. This continuous cycling of organic matter is what builds rich, living soil that can support abundant harvests year after year, often increasing yields by 15% to 20% after the initial transition period.
- Plant directly into the compost layer with minimal soil disturbance.
- Maintain a 4- to 6-inch layer of organic mulch at all times.
- Use cover crops in fallow beds to build soil and fix nitrogen.
- Chop and drop cover crops in place rather than tilling them in.
- Observe soil moisture and plant health to guide watering and nutrient needs.
Comparison of Tilled vs. No-Till Garden Practices
Feature | Traditional Tillage | No-Till Gardening |
|---|---|---|
Soil Disturbance | High (annual digging/tilling) | Minimal (surface planting only) |
Organic Matter | Decreases by 1-2% annually | Increases by 0.5-1% annually |
Weed Control | Relies on cultivation, herbicides | Relies on mulch, cover crops |
Water Retention | Low (rapid evaporation, runoff) | High (mulch, improved soil structure) |
Labor Intensity | High (tilling, weeding) | Low (mulching, less weeding) |
Soil Erosion | Significant (up to 5 tons/acre/year) | Minimal (soil protected by cover) |
Soil Organic Matter: No-till practices can increase soil organic matter by 0.5% to 1% annually, leading to healthier soil over time [6].
Water Savings: No-till gardens with adequate mulch can reduce irrigation needs by 30% to 50% compared to tilled plots, especially in dry regions.
Weed Suppression: A 6-inch layer of organic mulch in a no-till system can suppress up to 90% of annual weeds, significantly reducing weeding time.
Frequently asked questions
How quickly can I see results from switching to no-till?
You can observe initial improvements in soil moisture retention and reduced weed growth within the first growing season. Significant increases in soil organic matter, sometimes up to 1% annually, and enhanced soil structure typically become noticeable within one to three years, especially in well-managed systems.
What’s the best way to suppress weeds without tilling?
The most effective method for weed suppression in a no-till garden is a combination of a cardboard or newspaper barrier followed by a thick, 6-inch layer of organic mulch. This smothers existing weeds and prevents most new seeds from germinating, sharply reducing weed pressure.
Can I use a rototiller just once to start my no-till garden?
While some gardeners choose to do a ‘one-time till’ to break up compacted soil, it’s generally counterproductive to the no-till philosophy. The goal is to minimize soil disturbance. Instead, focus on layering organic materials like compost and mulch, which will naturally improve soil structure over the first season and noticeably increase earthworm activity.
How do I add nutrients to a no-till garden?
Nutrients are primarily added through regular applications of compost, typically a 1- to 2-inch layer annually, and by using organic mulches that break down over time. Incorporating nitrogen-fixing cover crops like clover or vetch can also supply up to 100 pounds of nitrogen per acre to your soil, reducing the need for external fertilizers.
What are plant guilds, and why are they important in no-till?
Plant guilds are groups of mutually beneficial plants grown together, mimicking natural ecosystems. They are important in no-till because they improve nutrient cycling, suppress weeds, attract beneficial insects, and maximize space without disturbing the soil. A well-designed guild makes fuller use of the same ground.
References
- The World’s Vegetable Garden (2017). The World’s Vegetable Garden.
- A Field Vegetable Transplanter for Use in Both Tilled and No-Till Soils (2019). A Field Vegetable Transplanter for Use in Both Tilled and No-Till Soils.
- Corn Rootworm Granular Insecticide Performance, No Till Vs Tilled, 1994 (1995). Corn Rootworm Granular Insecticide Performance, No Till Vs Tilled, 1994.
- The vegetable garden (1877). The vegetable garden.
- THE VEGETABLE GARDEN (1942). THE VEGETABLE GARDEN.
- USDA Natural Resources Conservation Service (2024). USDA Natural Resources Conservation Service.