Key takeaways
- Seed viability naturally declines over time, with many vegetable seeds losing significant germination capacity after three to five years of storage.
- The paper towel method provides a reliable and cost-effective way to assess seed viability, often showing results within seven to ten days for many common vegetables.
- A germination rate below 50% for most common vegetables suggests the need to acquire new seeds, or significantly increase planting density.
- Proper storage conditions — cool, dry, and dark environments with consistent temperatures between 35°F and 50°F — can extend seed viability for several years.
- Adjusting planting density based on germination test results can prevent sparse stands and ensure a productive harvest, especially for crops like corn or beans.
- Consider the specific requirements of each seed type, as some seeds need light to germinate while others need darkness.
Quick answer: The paper towel method is a simple, cost-effective way to test old seed viability, helping gardeners determine germination rates before planting. This prevents wasted effort and ensures a productive harvest by allowing adjustments to planting density or seed acquisition.
For growers in USDA zone 7 and across the US, ensuring seed viability is a critical first step toward a productive garden. Many of us have a collection of seed packets, some dating back several seasons, tucked away in a drawer or shed. While the allure of planting those forgotten seeds is strong, their germination rate likely declines significantly with each passing year. For instance, a packet of tomato seeds stored for five years might only achieve a 60% germination rate, compared to 90% or more when fresh.
Before you commit valuable garden space and effort, it is prudent to test these older seeds. This simple process can save you weeks of waiting for sprouts that never appear, and prevent the frustration of sparse rows. A quick germination test can tell you exactly what percentage of your seeds are still viable, allowing you to make informed decisions about planting density or whether to purchase fresh stock, ensuring your spring planting efforts in regions like the Pacific Northwest or the humid Southeast are well-spent.
Why testing old seeds matters for your harvest
Every seed has a natural lifespan, and its ability to sprout — its viability — diminishes over time. This decline is not uniform across all species; some seeds, like lettuce, typically remain viable for only three years, while others, such as cucumber, can last up to ten years under ideal conditions. Improper storage, such as exposure to fluctuating temperatures or high humidity, can drastically shorten these periods. Seeds held in fluctuating conditions lose germination capacity faster than seeds kept in stable storage.
Testing your old seeds before planting them can prevent several common gardening frustrations. Without a test, you might plant an entire row of what you believe are viable seeds, only to find a meager 20% germination rate after two weeks. This leads to wasted effort, delayed harvests, and potentially bare patches in your garden that could have been filled with productive plants. Knowing your germination rate allows you to adjust your planting strategy, ensuring a fuller, more successful crop from the outset, whether you are in the arid Southwest or the fertile Midwest.
Understanding seed viability and storage
Seed viability is influenced by several factors, primarily storage temperature, humidity, and light exposure. Seeds stored in cool, dry, and dark conditions generally retain their viability much longer. For most vegetable seeds, an ideal storage temperature is between 35°F and 50°F, with the storage air kept dry — around 30% relative humidity — so seed moisture content settles below 8%. Keeping seeds in airtight containers, perhaps with a desiccant packet, can help maintain these conditions. For instance, many commercial seed banks store seeds at -4°F to ensure long-term preservation, extending viability for decades.
- Cool temperatures: Slow metabolic processes, preserving seed energy reserves.
- Low humidity: Prevents premature germination and fungal growth.
- Darkness: Reduces light-induced degradation of seed components.
- Airtight containers: Protects against moisture and pests.
- Consistent conditions: Avoids stress from environmental fluctuations.
The paper towel method: a simple and effective test
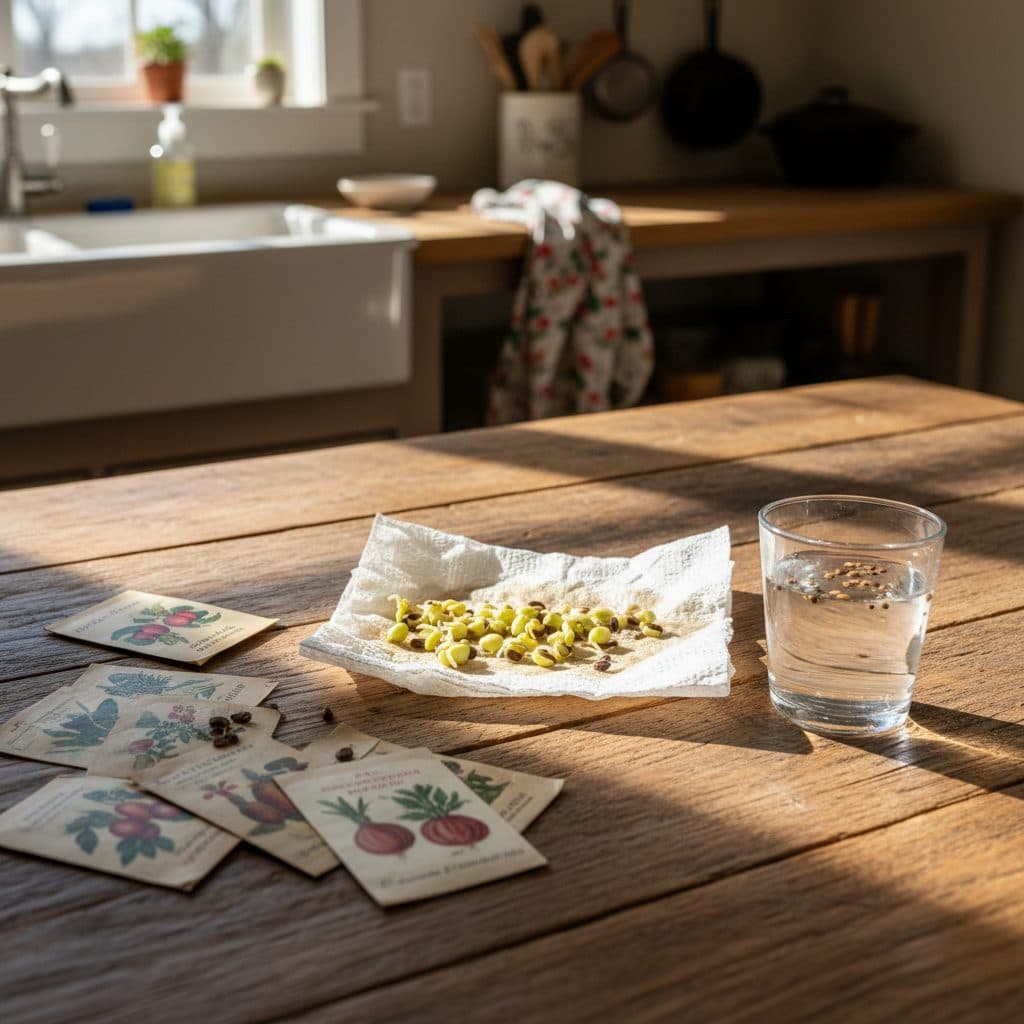
The paper towel method is perhaps the easiest and most common way to test seed germination at home, requiring minimal supplies and effort. This technique provides a controlled environment that mimics ideal germination conditions, allowing you to quickly assess the viability of your seeds. For example, a batch of corn seeds might show sprouts in as little as three to five days, while pepper seeds could take up to two weeks. This method is particularly useful for small seeds or when you only have a limited number of seeds to test.
To begin, gather your supplies: paper towels, a spray bottle with water, a resealable plastic bag, and your seeds. Select ten to twenty seeds from each packet you wish to test. Using a larger sample size, such as twenty seeds, provides a more statistically reliable result, especially if you suspect low viability. This method is adaptable for various seed types, from small radish seeds to larger bean seeds, making it a versatile tool for any gardener in regions like the Great Plains or the Northeast.
Step-by-step guide to the paper towel test
First, moisten a paper towel until it is damp but not dripping wet. Lay out your chosen ten to twenty seeds evenly across one half of the paper towel. Fold the other half over the seeds, creating a neat packet. Place this packet into a resealable plastic bag, ensuring there is some air trapped inside to allow for respiration. Label the bag clearly with the seed type and date of the test; this is important for accurate tracking, especially if you are testing multiple varieties.
- Moisten paper towel: Ensure it’s damp, not soaking, to prevent mold.
- Place seeds: Arrange ten to twenty seeds evenly for an accurate sample.
- Fold and bag: Create a humid environment in a resealable plastic bag.
- Label clearly: Include seed type and test date for record-keeping.
- Monitor daily: Check for sprouts and maintain consistent moisture.
The soil test method: simulating real-world conditions
While the paper towel method is convenient, the soil test method offers a more realistic assessment of how your seeds will perform in actual garden conditions. This approach involves planting a small sample of seeds in a sterile seed-starting mix, replicating the environment they will encounter outdoors. This is particularly useful for seeds that may have specific light or temperature requirements for germination, or for larger seeds like beans and peas. For example, some ornamental plant seeds have specific requirements that are better met in a soil medium [2].
To conduct a soil test, fill a small tray or pots with a good quality, sterile seed-starting mix. Plant ten to twenty seeds at their recommended depth, typically two to three times their diameter. Water thoroughly, ensuring the soil is consistently moist but not waterlogged. Cover the tray with a clear dome or plastic wrap to maintain humidity, and place it in a warm location, ideally between 65°F and 75°F. This method is especially valuable for gardeners in diverse climates, from the cold winters of USDA zone 4 to the mild conditions of USDA zone 9, as it accounts for local soil and environmental factors.
Advantages of a soil-based germination test
The primary advantage of the soil test is its ability to provide a more accurate prediction of field performance. Seeds that germinate well on a paper towel might struggle in soil due to factors like soil compaction, pathogens, or inconsistent moisture levels. A soil test helps identify these potential issues early. For instance, wild plant seeds often exhibit thermal germination responses that are best observed in a soil-like medium [4]. You can also observe the vigor of the seedlings as they emerge, which is an important indicator of their overall health and potential for vigorous growth. This method also allows you to test the effectiveness of your seed-starting mix and watering techniques, refining your approach before you commit to large-scale planting.
- Realistic conditions: Mimics actual garden soil environment.
- Vigor assessment: Allows observation of seedling strength and health.
- Depth testing: Ensures seeds can emerge from their planting depth.
- Pathogen exposure: Reveals susceptibility to common soil-borne issues.
- Moisture management: Tests your ability to maintain optimal soil moisture.
The water float test: a quick preliminary check
For a very quick, albeit less precise, preliminary check of seed viability, the water float test can be used. This method is based on the principle that viable seeds are typically denser and will sink, while non-viable seeds, often hollow or dried out, will float. While not a definitive germination test, it can quickly help you discard a large percentage of truly dead seeds, saving you time and resources for more thorough testing. This method is particularly useful for larger seeds like beans, peas, or corn, where a substantial number of seeds might be questionable.
To perform the test, simply place a handful of seeds into a container of water. Let them sit for 15 to 30 minutes. After this time, observe which seeds have sunk to the bottom and which remain floating on the surface. The seeds that sink are generally considered viable, while those that float are likely not. For example, if 70% of your bean seeds sink, you can proceed with a more detailed test on that 70% with higher confidence. This can be a useful first pass before committing to a paper towel or soil test; however, the seeds you float have taken up water and can no longer be dried and returned to storage. Only float-test the quantity you intend to sow or test straight away.
Limitations and best practices for the float test
It is important to understand that the water float test is not 100% accurate. Some viable seeds may float due to air pockets within their structure, and conversely, some non-viable seeds may sink if they are heavy enough. Therefore, always follow up a float test with a more reliable method like the paper towel or soil test for a definitive answer. Think of it as a first-pass filter, not a final verdict. Direct germination testing remains the only reliable check on a specific seed lot.
- Not definitive: Provides a rough estimate, not a precise germination rate.
- Best for large seeds: More effective for larger, denser seeds like beans or squash.
- Quick discard: Helps remove many clearly non-viable seeds quickly.
- Follow-up needed: Always combine with paper towel or soil test for accuracy.
- Moisture absorption: Seeds that absorb water and sink are generally viable.
Interpreting results and calculating your germination rate
Once your germination test is complete (typically after seven to fourteen days, depending on the seed type), it is time to interpret the results. Carefully count the number of seeds that have successfully sprouted. A seed is considered germinated once its radicle (the embryonic root) has emerged, usually measuring at least one-eighth of an inch long. For instance, if you tested ten pea seeds and eight of them sprouted, your germination rate is 80%. This calculation is straightforward and provides a clear picture of your seed batch’s viability.
To calculate the germination rate, use this simple formula: (Number of germinated seeds / Total number of seeds tested) × 100. So, if you tested twenty lettuce seeds and twelve sprouted, your rate is (12 / 20) × 100 = 60%. This percentage is your primary metric. A germination rate of 80% or higher is generally considered excellent for most vegetable seeds, while anything below 50% suggests significant viability issues. This precise data allows you to make informed decisions for your planting season, whether you are in USDA zone 5 or zone 10.
What your germination rate means for planting
Your calculated germination rate directly informs your planting strategy. If your seeds show a high germination rate, say 90% for a batch of carrot seeds, you can plant them at their standard spacing with confidence. However, if the rate is lower, for example, 60% for a packet of old spinach seeds, you will need to adjust your planting density to achieve a full stand. This often means planting two or three seeds for every one plant you desire, or planting seeds much closer together than recommended. For a 60% rate, you might plant 1.5 to two seeds for every one you want to grow.
- High rate (80%+): Plant at standard spacing.
- Medium rate (50-79%): Plant 1.5 to 2 seeds per desired plant.
- Low rate (below 50%): Consider acquiring new seeds or planting 2-3 seeds per desired plant.
- No germination: Discard seeds and purchase fresh stock.
- Record keeping: Note germination rates on seed packets for future reference.
Adjusting planting strategies for success
Once you have a clear understanding of your seeds’ germination rates, you can adjust your planting strategy to maximize your garden’s productivity. For seeds with a low germination rate, say 40%, you’ll need to plant significantly more seeds than usual to achieve the desired number of plants. This might mean sowing three or four seeds where you would normally sow one, and then thinning the weaker seedlings later. This proactive approach ensures you don’t end up with sparse rows and wasted garden space, a common issue for growers in all USDA zones.
Consider integrating your germination test results into your overall garden planning, including practices like succession planting and crop rotation. If you know a batch of seeds has a 70% germination rate, you can plan to sow a second batch a week or two later to fill any gaps, or simply plant more densely from the start. This foresight is particularly valuable for crops with a short harvest window, like radishes or lettuce, where every day counts. For example, in USDA zone 6, a second sowing of bush beans can extend the harvest by three to four weeks.
Thinning and transplanting considerations
When you plant more densely to compensate for lower germination rates, you will inevitably need to thin your seedlings once they have established their first true leaves. Thinning is essential for healthy plant development because it reduces competition for light, water, and nutrients. Aim to thin seedlings to their recommended final spacing, removing the weakest or smallest plants. For example, if you planted three corn seeds per spot and two germinated, select the stronger of the two to allow it to thrive, so each plant has at least 12 inches of space. This practice is vital for strong yields, especially in nutrient-rich soils.
- Over-sow: Plant 1.5 to 3 times the desired number of seeds for low viability.
- Thin early: Remove weaker seedlings once they develop true leaves.
- Succession plant: Plan follow-up sowings to fill gaps or extend harvest.
- Record results: Note adjusted planting densities on seed packets.
- Monitor soil moisture: Use a soil moisture meter to ensure consistent hydration for new seedlings.
Beyond germination: seed health and vigor
While germination rate tells you if a seed will sprout, it doesn’t always tell you about the seedling’s overall health and vigor. A seed might germinate but produce a weak, stunted seedling that struggles to thrive. This is particularly important for crops like squash or melons, which require strong initial growth to produce abundant fruit. Factors like the age of the seed, its storage conditions, and even its genetic background can influence vigor. For example, seeds that have been stored for many years, even if they germinate, might produce less vigorous plants than fresh seeds.
Observing the health of your sprouted seeds during the germination test provides useful information. Look for strong, white radicles and healthy cotyledons (seed leaves). Weak, discolored, or slow-growing sprouts are indicators of low vigor. Some seeds, like basil, have been shown to benefit from specific light conditions during their initial stages [3], potentially leading to more vigorous seedlings. This assessment helps you make better choices for your garden to support strong, productive plants throughout the growing season, whether you are in a humid climate like Florida or a dry one like Arizona.
Factors influencing seedling vigor
Several factors contribute to seedling vigor beyond mere germination. The seed’s genetic quality plays a significant role; some varieties are naturally hardier than others. Maternal plant health during seed production also impacts vigor, as well-nourished parent plants produce healthier seeds. Furthermore, environmental conditions during germination (consistent temperature, adequate moisture, and appropriate light or darkness) are essential. For example, maintaining a consistent soil temperature of 70°F for tomatoes can significantly improve the vigor of emerging seedlings, leading to stronger plants.
- Genetic quality: Inherited traits for strong growth.
- Maternal plant health: Healthy parent plants yield vigorous seeds.
- Optimal environment: Consistent temperature and moisture are essential.
- Proper light: A few species need light to germinate; check the seed packet.
- Nutrient availability: Adequate nutrients for initial growth.
Integrating seed testing into your annual garden plan
Making seed germination testing a regular part of your annual garden preparation can significantly improve your overall success and reduce wasted effort. By dedicating a week or two in late winter or early spring to testing your stored seeds, you gain useful information that informs your entire planting schedule. This proactive step allows you to order new seeds well in advance if necessary, avoiding last-minute rushes and ensuring you have viable stock when planting season arrives. For example, starting your tests in February for a May planting in USDA zone 5 gives you ample time to react.
Consider creating a simple seed inventory system that includes the purchase date, estimated viability, and actual germination test results. This record-keeping can help you track which seed varieties store well and which tend to lose viability quickly. For instance, you might find that your onion seeds consistently perform poorly after two years, while your kale seeds remain strong for five years. This data-driven approach allows you to refine your seed purchasing and storage habits year after year, leading to more efficient and productive gardening, from the humid Southeast to the dry Southwest. You can also integrate this with planning for drought-tolerant plants or plants for clay soil to select the right seeds for your specific conditions.
Long-term benefits of consistent seed testing
The long-term benefits of consistent seed testing extend beyond a single growing season. Over several years, you will develop a comprehensive understanding of your seed collection’s performance, allowing you to prioritize planting newer, more viable seeds and make informed decisions about discarding older, less reliable batches. This practice also encourages better seed storage habits, as you’ll see a direct correlation between proper storage and higher germination rates. For instance, maintaining a consistent storage temperature near 40°F extends the viability of many common vegetable seeds well beyond what fluctuating room-temperature storage allows.
- Informed purchasing: Buy new seeds only when genuinely needed.
- Optimized planting: Adjust sowing rates for maximum yield.
- Reduced waste: Avoid planting non-viable seeds, saving time and space.
- Better storage habits: Encourages ideal conditions for seed longevity.
- Data-driven decisions: Build a personal database of seed performance.
Comparing common seed germination test methods
Method | Pros | Cons | Best for |
|---|---|---|---|
Paper Towel Test | Simple, inexpensive, quick results (3-14 days), high accuracy for viability. | Doesn’t simulate soil conditions, can miss vigor issues, prone to mold if too wet. | Most small to medium vegetable seeds (e.g., lettuce, radish, tomato). |
Soil Test | Realistic conditions, assesses seedling vigor, good for larger seeds, accounts for depth. | Slower results (7-21 days), requires sterile soil mix, more space needed. | Larger seeds (e.g., beans, peas, corn), seeds with specific light/dark needs. |
Water Float Test | Very quick, no special supplies, good for initial culling of clearly dead seeds. | Not accurate for all seeds, doesn’t measure germination rate, can discard viable seeds. | Large, dense seeds (e.g., beans, squash, pumpkin) as a preliminary check. |
Typical Viability: Most common vegetable seeds maintain good viability for three to five years when stored properly at 40°F.
Germination Threshold: A germination rate below 50% for most crops indicates a need to either plant significantly more seeds or acquire new stock.
Ideal Storage: Storing seeds in cool, dry conditions, ideally between 35°F and 50°F at around 30% relative humidity, can extend their life by several years.
Frequently asked questions
How long do seeds typically remain viable?
The viability of seeds varies significantly by species and storage conditions. Most common vegetable seeds, like tomatoes or beans, remain viable for three to five years when stored in cool, dry conditions. However, some, like onions, may only last one to two years, while others, such as cucumbers, can last up to ten years.
What is a good germination rate?
For most common vegetable seeds, a germination rate of 80% or higher is considered excellent. A rate between 50% and 79% is acceptable but may require planting more densely. If your seeds show a germination rate below 50%, it’s often more efficient to acquire new seeds.
Can I plant seeds that float in the water test?
While the water float test is a quick preliminary check, it’s not entirely accurate. Seeds that float are often non-viable, but some viable seeds may float due to internal air pockets. It’s best to set aside seeds that float and conduct a more reliable paper towel or soil test on the seeds that sink to confirm their viability.
How do I store seeds to extend their viability?
To extend seed viability, store them in a cool, dark, and dry environment. Ideal conditions include consistent temperatures between 35°F and 50°F and relative humidity around 30%. Airtight containers, possibly with a desiccant packet, help maintain these conditions and can extend viability by several years.
What if my seeds have a low germination rate, but I still want to use them?
If your seeds have a low germination rate, say 40%, you can still use them by significantly increasing your planting density. For example, plant two to three seeds for every one plant you desire, or sow them much closer together than recommended. You will then thin the weaker seedlings once they establish, down to your target spacing.
Does light affect seed germination?
For many seeds, light is not a primary factor, and some even prefer darkness for germination. However, certain species, like basil and some ornamental plants, have been shown to respond positively to specific light exposure, such as LED light, during germination [3]. Always check the specific requirements for your seed type; most common garden vegetables germinate well in darkness.
References
- STUDIES ON THE ENVIRONMENTAL FLUCTUATION OF GERMINATION HABITS OF RICE SEEDS, AND TEST AND SELECTION METHOD FOR THEM. : II. Preliminary Studies on the Method to (1968). STUDIES ON THE ENVIRONMENTAL FLUCTUATION OF GERMINATION HABITS OF RICE SEEDS, AND TEST AND SELECTION METHOD FOR THEM. : II. Preliminary Studies on the Method to.
- Germination of Ornamental Plant Seeds, XXII IHC (1987). Germination of Ornamental Plant Seeds, XXII IHC.
- The Influence of LED Light on Basil Seeds Before Sowing and its Effects on Growing and Germination (2012). The Influence of LED Light on Basil Seeds Before Sowing and its Effects on Growing and Germination.
- A convenient screening test system and a model for thermal germination responses of wild plant seeds: behaviour of model and real seeds in the system (1987). A convenient screening test system and a model for thermal germination responses of wild plant seeds: behaviour of model and real seeds in the system.
- PLANT INDEX (1982). PLANT INDEX.
- USDA Natural Resources Conservation Service (2024). USDA Natural Resources Conservation Service.