Key takeaways
- Harvest peppers at their peak ripeness for optimal flavor and nutrient content; letting bell peppers color up fully can raise marketable yield by up to 30%.
- Drying reduces moisture to below 10%, concentrating flavors and extending shelf life for up to one year.
- Freezing peppers, either raw or blanched, preserves their texture and taste for 8 to 12 months.
- Fermentation creates complex flavors and beneficial microbes, extending pepper usability for several months.
- Pickling with vinegar and salt offers a quick preservation method, keeping peppers safe for one to two years.
- Always follow USDA guidelines for food safety, especially when canning or fermenting, to prevent spoilage.
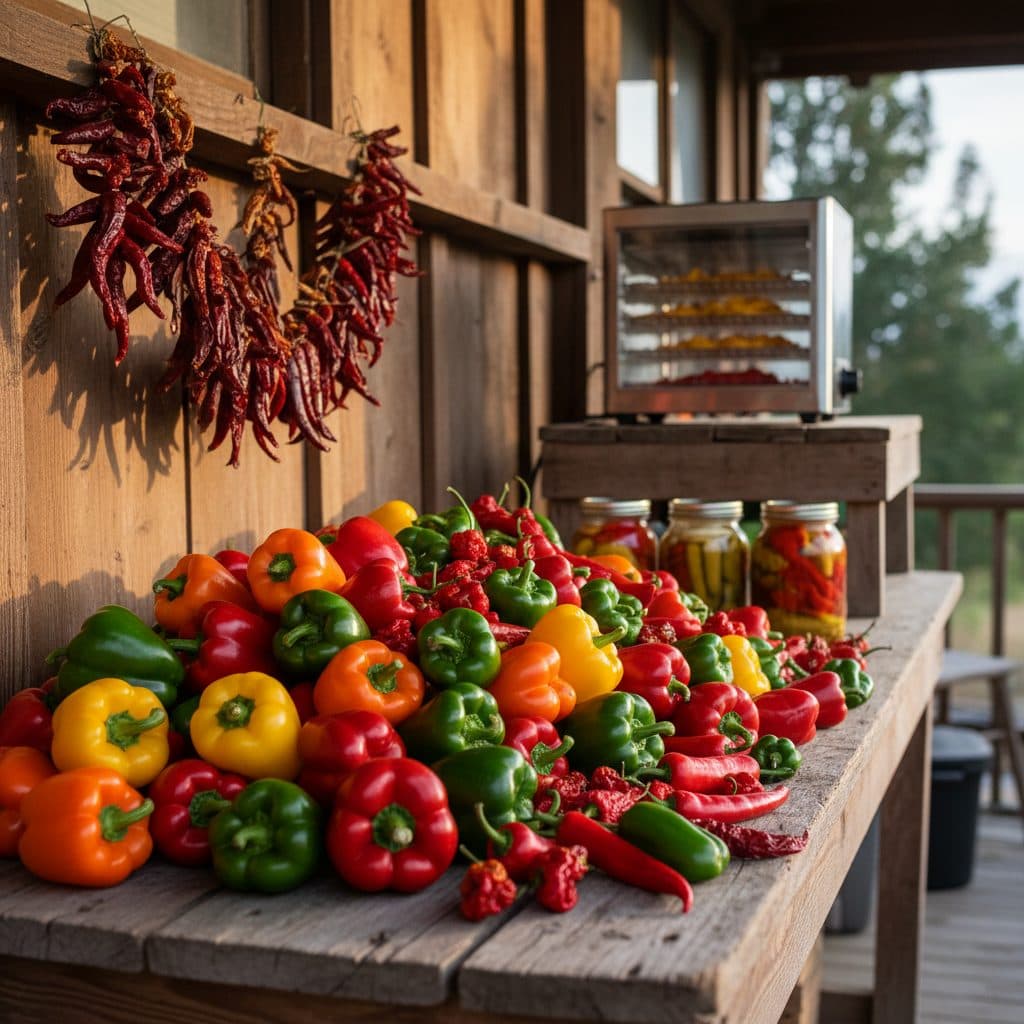
Quick answer: Peppers can be preserved through drying, freezing, fermenting, and pickling. These methods extend their shelf life from several months to over a year, allowing you to enjoy your harvest long after the growing season.
In regions like the Mid-Atlantic, where USDA zone 7 gardens often produce abundant bell peppers and chili peppers, managing the late-season harvest can be a rewarding challenge. A single healthy pepper plant can yield 15 to 25 peppers, sometimes even more, during its growing season, leading to a surplus that fresh consumption alone cannot handle. This guide covers practical methods for preserving excess peppers, extending their storage life for 6 to 12 months after the season ends.
Peppers, especially bell peppers, can increase their marketable yield by up to 30% when allowed to ripen fully to their colored stage, rather than being picked green (1996) [3]. This improves both flavor and nutritional value. After harvest, careful handling helps minimize microbial contamination, which can occur at various pre-harvest stages from soil or irrigation water (2015) [1].
Harvesting peppers for maximum yield and quality
Timing your pepper harvest matters for both fresh eating and preservation. While green bell peppers are common, allowing them to mature to red, yellow, or orange can increase their total marketable yield by up to 30% and increase their vitamin C content significantly [3]. In a typical garden in USDA zone 6, bell pepper plants can produce fruit for 60 to 90 days after transplanting. For chili peppers, like jalapeños or serranos, harvesting when they reach their characteristic size and color, often 2 to 4 inches long, ensures peak flavor and heat. Picking peppers regularly, every one to two weeks, encourages the plant to set more fruit over the season.
Proper harvesting techniques
When harvesting, use sharp pruning shears or a knife to cut the stem about one inch above the pepper, leaving a small piece of stem attached. This method prevents tearing the plant and reduces the risk of spoilage in storage, as a torn stem can be an entry point for pathogens. For large-scale operations, mechanical harvesters can process up to 1.5 acres of green chile peppers per hour, but they often result in more damaged fruit compared to hand-picking, which is preferred for quality preservation [4]. After harvesting, cool peppers quickly to 50-55°F to extend their fresh shelf life by several days. For more details on pepper varieties, see Chili Pepper.
- Inspect peppers for damage or disease before storage.
- Harvest in the morning after dew has dried, reducing surface moisture.
- Handle peppers gently to avoid bruising, which can lead to early spoilage.
- Wash peppers thoroughly under cool running water before processing.
- Wear nitrile gloves whenever you cut or seed hot chili peppers, and keep your hands away from your eyes. Dry, roast or blend hot peppers with a window open or outdoors, since heating and blending capsaicin releases fumes that burn eyes and airways in a closed kitchen.
Drying peppers for long-term storage
Drying is one of the oldest and most effective methods for preserving peppers, reducing their moisture content to below 10% and concentrating their flavors. This method is particularly suitable for chili peppers, which can be strung on a line and air-dried in a warm, well-ventilated area with humidity below 60%. In arid regions like Arizona, peppers can dry naturally outdoors in 2 to 4 weeks. For bell peppers, which have thicker walls and higher moisture content (around 92% water), a food dehydrator is often necessary. A dehydrator maintains a consistent temperature, typically between 125°F and 135°F, and provides good air circulation, drying slices in 8 to 12 hours.
Dehydrator preparation and process
Before drying, wash peppers thoroughly and remove stems and seeds. For bell peppers, cut them into uniform strips or rings, about one-quarter inch thick, to ensure even drying. Spread the prepared pieces in a single layer on dehydrator trays, leaving space for air circulation. The drying time will vary depending on the pepper’s thickness and moisture content, but properly dried peppers will be brittle and snap when bent. Store dried peppers in airtight containers in a cool, dark place, where they can last for up to one year. For more information on drying various produce, consult Dehydrating food.
- Wash peppers and remove stems and seeds thoroughly.
- Slice peppers into uniform pieces, ideally one-quarter inch thick.
- Arrange pieces in a single layer on dehydrator trays, avoiding overlap.
- Set dehydrator temperature between 125°F and 135°F for 8 to 12 hours.
- Check for brittleness; dried peppers should snap easily when bent.
Freezing peppers for fresh flavor
Freezing is an excellent way to preserve the fresh taste and texture of peppers for an extended period, typically 8 to 12 months. This method works well for both bell peppers and chili peppers, preserving their flavor for use in cooked dishes. Unlike some vegetables, peppers do not require blanching before freezing, which simplifies the process. However, blanching for 2 to 3 minutes helps preserve color in peppers you plan to hold near the end of that range. Frozen peppers of any kind soften on thawing and belong in cooked dishes, not salads. A typical bell pepper contains about 92% water, so some softening will occur upon thawing.
Freezing methods and storage
To freeze peppers, first wash them thoroughly, remove the stems and seeds, and then cut them into desired shapes (strips, diced pieces, or halves). For individual pieces that won’t stick together, spread them in a single layer on a baking sheet and freeze for 1 to 2 hours until solid. This step, called flash freezing, prevents clumping. Once frozen, transfer the pepper pieces to freezer bags or airtight containers, removing as much air as possible to prevent freezer burn. Label bags with the date and contents. Peppers frozen this way can be added directly to stir-fries, soups, or stews without thawing, making meal preparation convenient. A 10 lb bag of fresh bell peppers can yield approximately 8-9 lbs of frozen product.
- Wash and dry peppers thoroughly before processing.
- Remove stems, seeds, and any white membranes.
- Cut peppers into uniform pieces, such as strips or dice.
- Flash freeze pieces on a baking sheet for 1 to 2 hours.
- Transfer to airtight freezer bags, removing excess air, and label with the date.
Fermenting peppers for complex flavors
Fermentation transforms peppers into tangy, complex condiments like hot sauce or fermented pepper mash, extending their shelf life for several months, sometimes up to a year if properly stored. This process relies on beneficial lactic acid bacteria, which thrive in an anaerobic, salty environment, converting sugars into lactic acid. A common brine ratio for fermenting peppers is 2% to 5% salt by weight of the peppers and water combined. For example, 100 grams of peppers and 100 grams of water would require 4 grams of salt for a 2% brine. This method is particularly popular in regions like Louisiana for making hot sauces.
Brine fermentation process
To ferment peppers, wash them thoroughly and remove stems. You can ferment whole small peppers, sliced larger peppers, or a finely chopped pepper mash. Pack the prepared peppers tightly into a clean glass jar, leaving at least one inch of headspace. Pour a prepared brine (non-chlorinated water mixed with pickling salt) over the peppers so they are fully submerged. Use a fermentation weight or a small, clean bag filled with brine to keep the peppers below the liquid surface. Seal the jar with an airlock lid or burp it daily to release gases. Ferment at room temperature, ideally between 60°F and 75°F, for 1 to 4 weeks, or until the desired tanginess is achieved. Once fermented, store in the refrigerator, where they can last for 6 months or more. For more details, refer to Fermenting and pickling vegetables.
- Wash peppers and remove stems; chop or slice as desired.
- Prepare a 2% to 5% salt brine using non-chlorinated water.
- Pack peppers tightly into a clean jar, leaving one inch of headspace.
- Pour brine over peppers, ensuring all pieces are submerged with a weight.
- Ferment at 60-75°F for 1 to 4 weeks, then refrigerate for storage.
Pickling peppers for a tangy crunch
Pickling is a quick and effective way to preserve peppers, yielding a tangy, crunchy product that can last for one to two years in a cool, dark pantry. This method uses an acidic brine, typically made with vinegar, water, salt, and sometimes sugar and spices, to inhibit bacterial growth. The acidity level of the brine is critical; a minimum of 5% acetic acid vinegar is recommended for safe canning. Common pickling peppers include jalapeños, banana peppers, and bell peppers, all of which retain some of their crispness after processing. A typical recipe might use a 1:1 ratio of vinegar to water.
Hot water bath canning for pickled peppers
To pickle peppers, wash them thoroughly and slice or chop them as desired. Pack the prepared peppers tightly into clean, hot canning jars, leaving one-half inch of headspace. Bring your pickling brine to a boil. Carefully pour the hot brine over the peppers, ensuring all air bubbles are removed and peppers remain submerged. Wipe jar rims clean, center new lids, and apply bands finger-tight. Process the jars in a boiling water canner for 10 minutes at 0 to 1,000 feet, 15 minutes from 1,001 to 6,000 feet, and 20 minutes above 6,000 feet. After processing, remove jars and let them cool undisturbed for 12 to 24 hours. Check seals before storing. This method is a reliable way to preserve many pounds of peppers from a substantial harvest, such as 20 lbs of bell peppers.
- Wash and prepare peppers, slicing or chopping them uniformly.
- Prepare a pickling brine with at least 5% acetic acid vinegar.
- Pack hot peppers into hot, clean canning jars, leaving one-half inch headspace.
- Pour hot brine over peppers, remove air bubbles, and seal jars.
- Process jars in a boiling water canner for 10-15 minutes, adjusting for altitude.
Ensuring safety and quality in pepper preservation
Food safety is paramount when preserving any produce, including peppers. Microbial contamination can occur pre-harvest from soil or irrigation water, making thorough washing essential [1]. Always start with clean equipment and fresh, undamaged peppers. For canning, using a pressure canner for low-acid foods or following tested recipes for high-acid foods like pickled peppers is critical. The USDA provides extensive guidelines for safe home canning practices, recommending specific processing times and temperatures to eliminate harmful bacteria. Improperly canned low-acid foods can pose a risk of botulism, a serious illness.
Storage conditions and shelf life
Once preserved, proper storage conditions maximize shelf life and maintain quality. Dried peppers should be stored in airtight containers in a cool, dark pantry, ideally below 70°F, where they can last for up to one year. Frozen peppers maintain their quality for 8 to 12 months at 0°F or colder. Fermented peppers, once active fermentation slows, should be refrigerated at 34-40°F and will keep for 6 months or more. Pickled peppers, properly processed and sealed, can be stored in a cool, dark pantry for one to two years. Regularly check stored goods for signs of spoilage, such as off-odors, mold, or bulging lids, and discard anything suspicious. For alternatives to electricity-dependent storage, consider Root cellaring.
- Always use clean equipment and fresh, undamaged peppers.
- Follow USDA guidelines for canning, especially for processing times.
- Store dried peppers in airtight containers below 70°F for up to one year.
- Keep frozen peppers at 0°F or colder for 8 to 12 months.
- Refrigerate fermented peppers at 34-40°F for 6 months or longer.
Comparison of Pepper Preservation Methods
Method | Shelf Life | Best For | Key Benefit |
|---|---|---|---|
Drying | Up to 1 year | Chili peppers, bell pepper flakes | Concentrated flavor, lightweight |
Freezing | 8-12 months | Bell peppers, diced chili peppers | Retains fresh flavor and texture |
Fermenting | 6 months+ | Chili peppers for hot sauce, mash | Complex flavor development |
Pickling | 1-2 years | Jalapeños, banana peppers, bell pepper strips | Tangy flavor, crunchy texture |
Increased Yield: Delaying bell pepper harvest until full color can increase marketable yield by up to 30% [3].
Mechanical Harvest: Mechanical harvesters can process 1.5 acres of green chile peppers per hour, though with more damage [4].
Frequently asked questions
What is the best way to store fresh peppers before preservation?
Fresh, unwashed peppers keep in the refrigerator in a perforated bag for one to two weeks. Bell peppers hold up best, often a full two weeks, while thinner-skinned chili peppers run 5 to 7 days. Keeping them at 45 to 50°F helps maintain their crispness; below about 45°F peppers pit and soften from chilling injury.
Do I need to blanch peppers before freezing?
No, blanching is not strictly necessary for freezing peppers. You can freeze them raw, which simplifies the process. However, blanching for 2 to 3 minutes can help retain their color and firmer texture, especially in peppers you plan to store for close to a year. Frozen peppers soften on thawing either way, so use them in cooked dishes rather than salads.
What kind of salt should I use for fermenting and pickling?
For both fermenting and pickling, use pickling salt or canning salt, which is pure granulated sodium chloride without anti-caking agents or iodine. These additives can make brine cloudy or affect fermentation, so a pure salt is necessary for a clear and effective brine, typically at a 2% to 5% concentration.
How can I tell if my preserved peppers have gone bad?
Signs of spoilage in preserved peppers include off-odors, mold growth, discoloration, or a slimy texture. For canned goods, look for bulging lids or leakage. Any preserved food showing these signs should be discarded immediately to prevent health risks. Properly stored dried peppers should remain brittle for up to one year.
Is it safe to reuse lids for canning pickled peppers?
No, it is not safe to reuse canning lids for hot water bath canning. Flat metal lids with sealing compound are designed for single use to ensure a proper vacuum seal. Reusing them significantly increases the risk of seal failure and potential food spoilage. Bands, however, can be reused if they are in good condition and not rusted.
Can I use a regular oven to dry peppers if I don’t have a dehydrator?
Yes, you can use a regular oven to dry peppers, though it requires more attention and can be less efficient than a dedicated dehydrator. Set your oven to its lowest temperature, typically around 150-170°F, and prop the door open by 2 to 4 inches to allow moisture to escape. Drying times will be longer, potentially 6 to 12 hours, and you’ll need to rotate trays frequently to ensure even drying.
References
- Pre-harvest Microbial Contamination of Tomato and Pepper Plants: Understanding the Pre-harvest Contamination Pathways of Mature Tomato and Bell Pepper Plants Us (2015). Pre-harvest Microbial Contamination of Tomato and Pepper Plants: Understanding the Pre-harvest Contamination Pathways of Mature Tomato and Bell Pepper Plants Us.
- Pepper harvest technology. (2012). Pepper harvest technology..
- Delaying Harvest Improves Bell Pepper Yield (1996). Delaying Harvest Improves Bell Pepper Yield.
- Green Chile Pepper Harvest Mechanization (2009). Green Chile Pepper Harvest Mechanization.