Key takeaways
- Select native berry shrubs appropriate for your USDA zone, such as highbush blueberry or serviceberry for zones 4-7.
- Implement permaculture principles like plant guilds and zone design to maximize benefits and minimize maintenance.
- Design for water management with swales or contour planting to keep rainfall on site and in the root zone.
- Choose species that provide year-round food and shelter for local wildlife, including birds and beneficial insects.
- Prepare your site by improving soil health with organic matter, aiming for 3-5% organic content.
- Consider the fence’s primary purpose: wildlife habitat, erosion control, or a physical barrier, to guide plant selection.
Quick answer: To design a wildlife-friendly living fence in USDA Zone 6, select native berry shrubs like highbush blueberry or serviceberry, implement permaculture principles for water management, and improve soil health. This creates a low-maintenance, high-yield system that supports local wildlife and provides food.
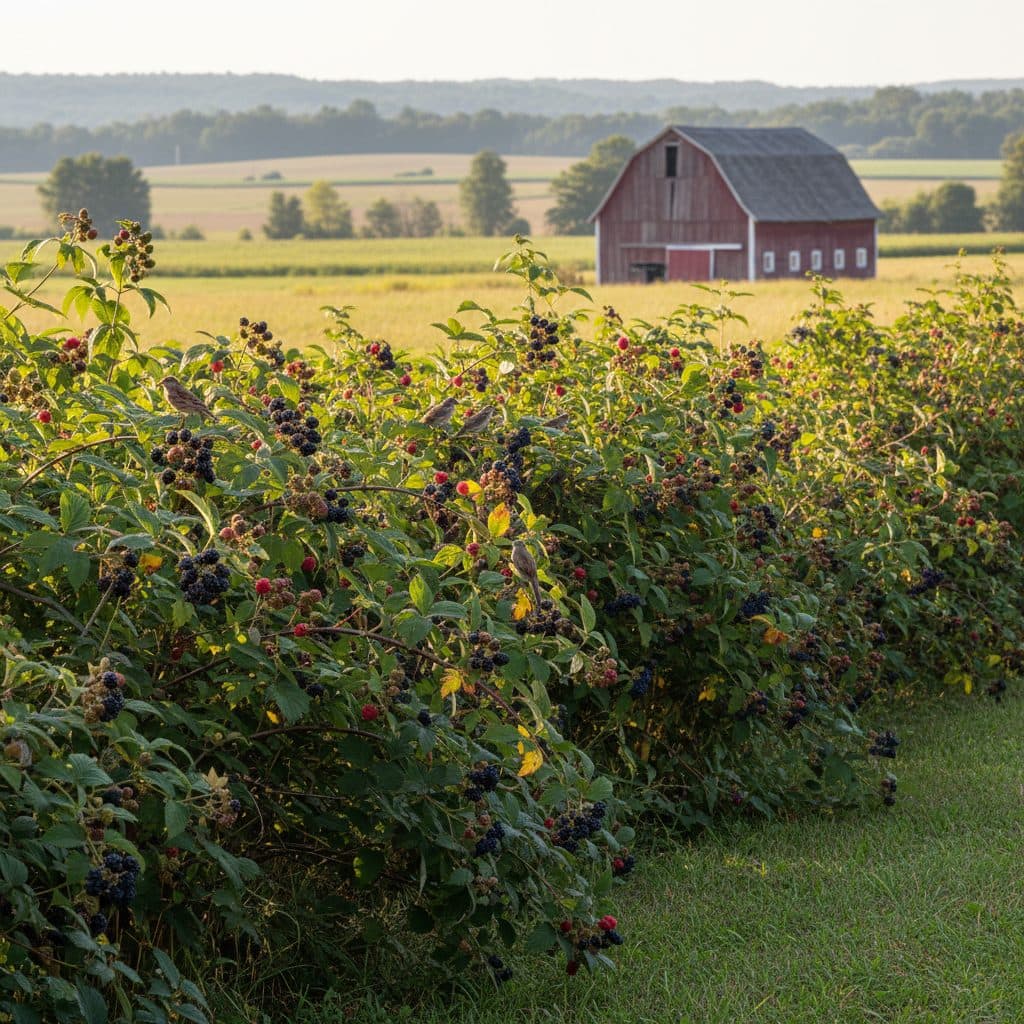
In the Appalachian foothills of western North Carolina, growers use living fences to provide food, shelter, and erosion control. A living fence built with native berry shrubs turns a property boundary into productive habitat for songbirds, beneficial insects, and household fruit harvest.
A successful living fence can reduce wind speeds significantly for a distance of 10-20 times its height, offering protection to adjacent gardens or homes.
Understanding your site and primary purpose
Before planting a single shrub, assess the site. Consider the fence’s primary purpose: Is it a windbreak, a privacy screen, an erosion control measure, or primarily wildlife habitat? For example, a living fence designed to slow runoff on a 15-degree slope will require different plant choices and spacing than one intended to provide a visual screen in a flat backyard. Observe sun exposure throughout the day, prevailing wind directions, and existing soil conditions. A soil test through your local extension office can reveal pH levels and nutrient deficiencies, guiding your plant selection and soil amendments. Fees and sampling instructions vary from state to state, so check your extension office's current price list before you send anything in.
Mapping your microclimates and water flow
Walk your property and identify microclimates, areas that are consistently warmer, cooler, wetter, or drier than the surrounding landscape. Note where water naturally flows after a 1-inch rain event. On a 1-acre property in USDA zone 6, you might observe significant runoff after a heavy spring rain, carrying away valuable topsoil. Designing with swales or contour planting intercepts runoff and directs it into the root zones of your living fence plants instead of letting it leave the property. This passive water harvesting reduces the need for supplemental irrigation, especially during dry summer months when rainfall might drop below 2 inches per week. Key considerations include:
- Sunlight exposure: Note hours of direct sun.
- Soil type: Sandy, clay, or loam.
- Slope and drainage: Identify wet or dry spots.
- Existing vegetation: What grows well naturally?
- Wind patterns: Prevailing directions and intensity.
Understanding these factors allows you to choose species that will thrive without excessive intervention, aligning with permaculture’s goal of minimal maintenance. For instance, a site with 6 hours of direct sun is ideal for most berry-producing shrubs.
Selecting native berry shrubs for your zone
Choosing suitable native plants is important for a living fence, especially in regions like USDA zone 6, which experiences winter lows between -10 and 0 degrees Fahrenheit. Native species are adapted to local climate and soil conditions, requiring less water, fertilizer, and pest control compared to non-native alternatives. For a living fence, prioritize shrubs that offer multiple benefits: edible berries for wildlife and humans, dense growth for a barrier, and strong root systems for erosion control. For instance, a 100-foot section of living fence could incorporate 20-30 individual shrubs, providing a substantial habitat.
Top native berry shrubs for USDA zone 6
Several excellent choices thrive in USDA zone 6 and provide abundant berries. Highbush blueberry (Vaccinium corymbosum) is a fantastic option, growing 6-12 feet tall and producing sweet fruit. It needs acidic soil, pH 4.5 to 5.5, and at least 6 hours of sun. That pH requirement is strict enough to shape the whole design: serviceberry, elderberry and hazelnut all want pH 5.5-7.0, so blueberry does not belong mixed into the same run unless you are prepared to acidify and maintain a dedicated section for it. Plant at least two different highbush cultivars together as well — a single variety sets a much lighter crop. Serviceberry (Amelanchier spp.), also known as Juneberry, grows 15-25 feet tall and offers early spring flowers followed by delicious, purplish-red berries in June. It tolerates a wider range of soil pH (5.5-7.0) and partial shade. Black chokeberry (Aronia melanocarpa) is a smaller shrub, 3-8 feet tall, known for its extremely hardy nature and nutrient-dense berries, which are excellent for jams and jellies, as well as wildlife forage. These plants contribute to the biodiversity of your property, drawing in a wide range of fruit-eating and insect-eating birds through the season. Other good choices include:
- Elderberry (Sambucus canadensis): Fast-growing, 5-12 feet tall, tolerates wet feet.
- Red Osier Dogwood (Cornus sericea): 6-10 feet tall, bright red stems in winter, berries for birds.
- American Hazelnut (Corylus americana): 8-16 feet tall, provides nuts and dense cover.
- Native Raspberries/Blackberries (Rubus spp.): Fast-spreading, thorny, excellent for barrier and food.
When sourcing plants, look for local nurseries that specialize in native species to ensure genetic suitability for your specific microregion. Purchasing 1-gallon plants, typically costing $15-25 each, offers a good balance between cost and establishment speed.
Implementing permaculture design principles
Permaculture design focuses on self-sustaining ecosystems rather than simple linear rows. For a living fence, this means integrating plant guilds, mimicking natural forest edges, and designing for water efficiency. Consider a 50-foot section of fence in a suburban backyard in Ohio. Instead of a monoculture, you can create a guild around each primary berry shrub. This involves planting complementary species that provide various functions: nitrogen fixation, pest deterrence, groundcover, or dynamic accumulation of nutrients. For example, planting sterile Bocking 14 comfrey (Symphytum x uplandicum ‘Bocking 14’) around a serviceberry gives you a deep-rooted living mulch that shades out weeds and produces bulky chop-and-drop material. Use Bocking 14 rather than common comfrey (Symphytum officinale), which sets seed and self-sows; both regrow from any root fragment, so put comfrey where you want it permanently. It is mulch, not food or fodder — its pyrrolizidine alkaloids are hepatotoxic.
Designing with plant guilds and zones
A typical guild might include a central berry shrub (e.g., elderberry), surrounded by nitrogen-fixing plants like clover or lupine, dynamic accumulators such as yarrow or dandelion, and groundcovers like wild strawberry. These plants work together, reducing the need for external inputs and enhancing the overall health of the system. For more on this, consider reading Permaculture gardening: no-dig beds, guilds, and zones. When planning your layout, consider permaculture zones. Zone 1 is closest to your home, receiving the most attention, while Zone 5 is wild and untended. A living fence often falls into Zone 2 or 3, requiring moderate interaction. Key guild components often include:
- Support species: Nitrogen fixers like clover, legumes.
- Pest deterrents: Herbs like mint, garlic chives.
- Dynamic accumulators: Bocking 14 comfrey (mulch only, not edible), yarrow, dandelions.
- Groundcovers: Wild strawberry, creeping thyme.
- Pollinator attractors: Coneflower, bee balm.
Designing these guilds creates a resilient planting that requires less maintenance over its 20-30 year lifespan. The USDA National Agroforestry Center notes the long-term benefits of such integrated systems [5].
Soil preparation and water management
Healthy soil is the foundation of any successful planting, and a living fence is no exception. In many parts of the US, including the Midwest, soil compaction and low organic matter are common issues. Before planting, amend your soil to create an optimal environment for root growth. Incorporate 4-6 inches of high-quality compost or aged manure into the top 12 inches of soil. This can increase soil organic matter from a typical 1-2% to a healthier 3-5%, significantly improving water retention and nutrient availability. For a 100-foot fence line, this might mean incorporating 2-3 cubic yards of compost.
Implementing passive water harvesting
Effective water management is critical, especially in regions with unpredictable rainfall patterns. Permaculture often employs passive water harvesting techniques to maximize the use of natural precipitation. Digging shallow swales or berms along the contour of your land can capture rainwater and slowly infiltrate it into the soil, preventing runoff and directing moisture to your plants. A swale holds storm water and lets it soak in where roots can reach it, cutting how much you need to irrigate in a dry spell. How much it holds depends on how long a run you dig as much as on its cross-section, so size the run to the slope you are catching. The USDA Natural Resources Conservation Service documents how these practices improve soil health and water quality [1]. Consider integrating:
- Swales: Shallow ditches on contour to catch water.
- Berms: Raised mounds to direct water flow.
- Keyline design: A system of furrows and ridges that follows the natural contours of the land to optimize water distribution.
- Mulching: A 4-6 inch layer of wood chips or straw around plants, kept back from the stems, to conserve soil moisture.
- Rain gardens: Depressions planted with water-loving species to absorb runoff from impervious surfaces.
For areas with less slope, a simple drip irrigation system can provide targeted water delivery during establishment. You can learn more about this at Designing a drip irrigation system. These systems can reduce water usage by 30-50% compared to overhead sprinklers, making them a cost-effective solution for long-term plant health.
Long-term care and wildlife integration
Once established, a living fence requires less maintenance than a traditional garden, but some ongoing care ensures its health and productivity. Pruning is essential for berry shrubs, typically performed in late winter or early spring before new growth appears. For example, elderberries benefit from removing 20-25% of their oldest canes each year to encourage new, more productive growth. This helps maintain vigor and fruit production, which can be 10-15 pounds per mature shrub. Regular observation for pests and diseases is also important, though native plants are generally more resistant. The SARE program promotes these low-input management strategies for sustainable agriculture [3].
Enhancing wildlife habitat and monitoring progress
A key benefit of a native berry living fence is its contribution to local wildlife. The berries provide food for dozens of bird species, including robins, cedar waxwings, and mockingbirds, especially from June through October. The dense structure offers nesting sites and protective cover from predators. To further enhance habitat, consider adding a small brush pile at one end of the fence, providing shelter for small mammals and beneficial insects. A 3-foot by 3-foot brush pile can house several beneficial insect species, contributing to natural pest control. To monitor the success of your wildlife integration, keep a simple log:
- Bird sightings: Note species and frequency.
- Insect activity: Observe pollinators and beneficial predators.
- Berry production: Estimate yields per plant or per section.
- Plant health: Look for signs of stress or disease.
- Water infiltration: Check soil moisture after rain using a Soil Moisture Meter.
As the living fence matures, it supports more wildlife and takes on a real share of pest control as beneficial insects and birds settle in. The ATTRA program outlines how biodiversity builds resilient farm and garden systems [4].
Comparison of traditional fences vs. native berry living fences
Feature | Traditional Fence (e.g., Chain Link) | Native Berry Living Fence |
|---|---|---|
Cost (per 100 ft) | $500 to $1500 | $300 to $800 (plants & compost) |
Maintenance | Repair, painting, cleaning | Pruning, occasional weeding, mulching |
Wildlife Habitat | Minimal | High (food, shelter for 20+ species) |
Erosion Control | Minimal | High (dense roots, water retention) |
Food Production | None | High (berries for humans and wildlife) |
Lifespan | 15-25 years | 20-50+ years |
Water Capture: A well-sized swale keeps rainfall on the property and in the root zone, reducing how often you need to irrigate a living fence.
Soil Health: Raising soil organic matter toward 3-5% improves water retention, nutrient availability and root growth.
Wildlife Support: A diverse native berry living fence can support 10-20 different bird species and numerous beneficial insects throughout the year.
Frequently asked questions
How long does it take for a living fence to become established?
A living fence typically takes 3-5 years to become fully established and provide significant benefits like dense cover and substantial berry production. During the first 2 years, consistent watering (about 1 inch per week) is needed for root development.
Can a living fence truly replace a traditional fence for privacy?
Yes, a well-designed living fence with dense, tall native shrubs can provide excellent privacy, often reaching heights of 8-15 feet. Species like serviceberry or American hazelnut, planted in staggered rows, create an opaque barrier within 5-7 years.
What kind of maintenance does a native berry living fence require?
Maintenance is generally low after establishment, focusing on annual pruning (removing 20-25% of oldest canes in late winter) and occasional mulching to suppress weeds. You might spend 1-2 hours per 100 feet of fence annually on these tasks.
Are the berries safe for human consumption?
Highbush blueberry and serviceberry produce berries that are good eaten straight off the bush. Elderberry is different and needs its own rule: the ripe fruit must be cooked before eating, and the leaves, stems, bark, roots and unripe green berries contain cyanogenic glycosides that cause nausea, vomiting and diarrhea. Cook elderberries, strip them off the green stems first, and never eat them raw. Always positively identify the plant and its fruit before consuming, as some berries are only suitable for wildlife. A mature highbush blueberry can yield 10-15 pounds of fruit per year.
How does a living fence help with erosion control?
The dense root systems of native shrubs bind soil particles, preventing erosion caused by wind and water. On a moderate slope, a dense-rooted living fence holds soil far better than bare ground, especially when combined with contour planting or swales.
What is the best time of year to plant a living fence?
The ideal time to plant a living fence in most USDA zones, including zone 6, is in the fall after the first frost or in early spring before new growth emerges. This allows plants to establish their root systems without the stress of summer heat, which markedly improves the odds of a planting taking.
References
- USDA Natural Resources Conservation Service (2024). USDA Natural Resources Conservation Service.
- EPA — Soak Up the Rain (2024). EPA — Soak Up the Rain.
- SARE — Sustainable Agriculture Research & Education (2023). SARE — Sustainable Agriculture Research & Education.
- ATTRA / NCAT Sustainable Agriculture (2023). ATTRA / NCAT Sustainable Agriculture.
- USDA National Agroforestry Center (2023). USDA National Agroforestry Center.