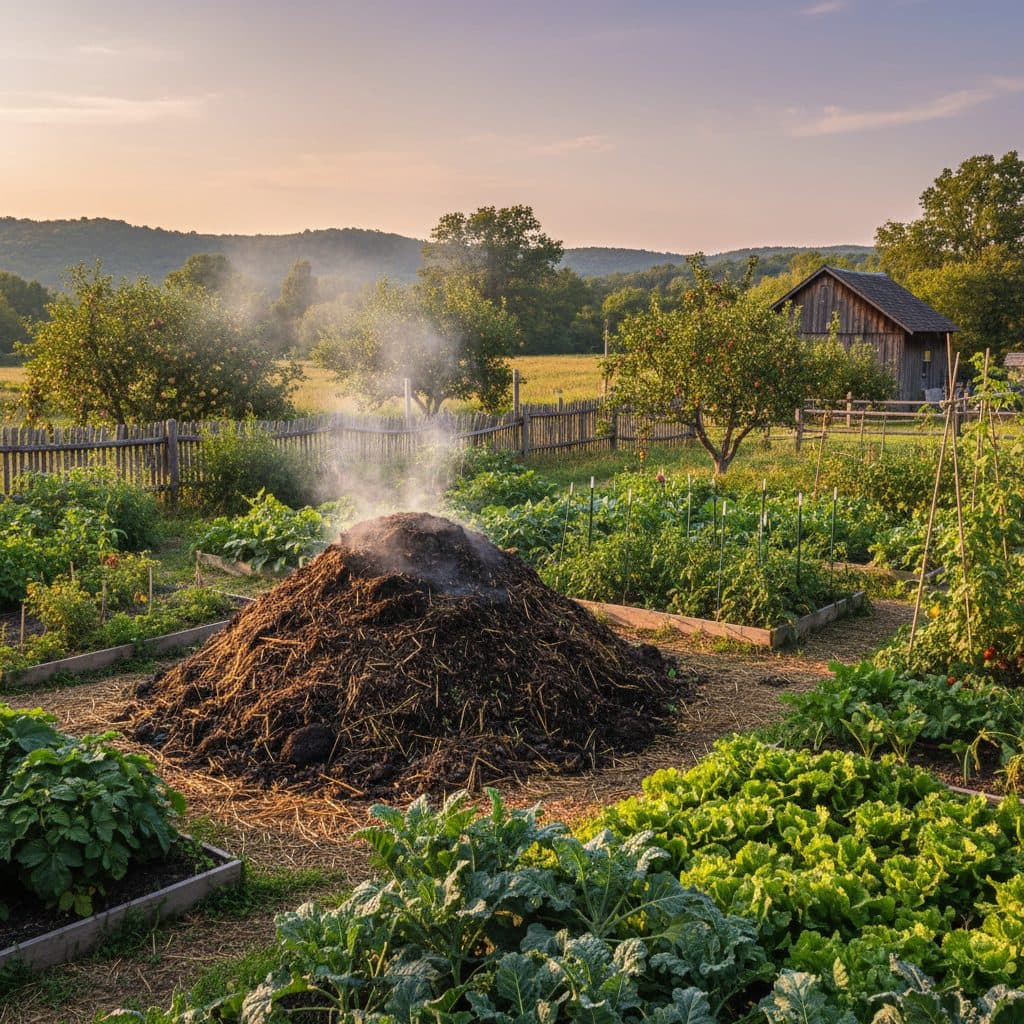
Key takeaways
- Hot composting rapidly breaks down organic matter, producing finished compost in 18-21 days.
- Maintaining pile temperatures between 130-160°F is crucial for pathogen and weed seed destruction.
- The ideal carbon-to-nitrogen ratio for hot composting is 25:1 to 30:1, requiring careful material selection.
- Regular turning, typically every one to two days after the initial heating phase, ensures proper aeration and even decomposition.
- A minimum pile size of 3 ft x 3 ft x 3 ft (27 cubic feet) is necessary to generate and retain sufficient heat.
- Finished compost improves soil structure, water retention, and nutrient availability for plants across various US regions.
Quick answer: Hot composting involves maintaining a pile temperature of 130-160°F for rapid decomposition, typically achieved in 18-21 days using methods like the Berkeley method. This process requires a 25:1 to 30:1 carbon-to-nitrogen ratio, 40-60% moisture, and regular turning of a minimum 27 cubic foot pile.
In many parts of the United States, from the humid summers of USDA zone 7 in North Carolina to the arid landscapes of zone 9 in Arizona, gardeners and farmers consistently seek ways to improve soil fertility. One of the most effective and fastest methods for creating nutrient-rich soil amendments is hot composting. This process, which can transform raw organic materials into finished compost in as little as 18 days, relies on maintaining specific temperature ranges, typically between 130°F and 160°F, to accelerate decomposition and eliminate unwanted pathogens and weed seeds.
The Berkeley method, developed at the University of California, Berkeley, offers a structured approach to achieving these high temperatures and rapid results. It emphasizes precise material ratios, adequate moisture, and frequent turning to ensure aerobic conditions throughout the pile. For growers aiming to produce substantial quantities of high-quality compost quickly, perhaps for a spring planting in USDA zone 6 in Ohio or preparing fall beds in zone 8 in Oregon, understanding and applying this method can significantly reduce the time and effort traditionally associated with composting.
The science behind hot composting: why temperature matters
Hot composting is a controlled biological decomposition process, relying on thermophilic microorganisms that thrive at elevated temperatures. These microbes efficiently break down organic materials, converting them into stable humus. For instance, in a well-managed pile in USDA zone 5, temperatures can reach 130°F to 160°F, which is critical for several reasons. This heat range effectively kills most plant pathogens, such as those causing early blight in tomatoes, and many weed seeds, which reduces their spread in your garden beds. Research from EB Agriculture (2009) indicates that sustained temperatures above 130°F for at least three days are sufficient to sterilize common weed seeds like crabgrass.
Achieving and maintaining these temperatures requires a careful balance of four components: carbon-rich materials, nitrogen-rich materials, water, and air. An ideal carbon-to-nitrogen (C:N) ratio of 25:1 to 30:1 is often cited as optimal for microbial activity, as detailed in Composting Design (1996). Too much carbon slows decomposition, while too much nitrogen can lead to ammonia odors and nutrient loss. The moisture content should be similar to a wrung-out sponge, around 40% to 60%, to support microbial life without creating anaerobic conditions. Proper aeration, achieved through regular turning, prevents compaction and ensures oxygen availability for the aerobic bacteria, which are far more efficient at decomposition than their anaerobic counterparts.
- Maintain a C:N ratio between 25:1 and 30:1 for optimal microbial activity.
- Ensure moisture content is 40% to 60%, like a damp sponge.
- Build a pile at least 3 ft x 3 ft x 3 ft (27 cubic feet) to retain heat.
- Turn the pile regularly to introduce oxygen and distribute moisture.
- Monitor temperatures to ensure they remain between 130°F and 160°F.
Building your Berkeley method hot compost pile
The Berkeley method begins with careful preparation and layering of materials to achieve the correct C:N ratio and pile size. For a successful hot compost pile, you will need a volume of at least 27 cubic feet, typically a 3 ft x 3 ft x 3 ft cube, to ensure sufficient mass for heat generation and retention. In a region like USDA zone 7 in Virginia, where garden waste can be abundant, gathering enough materials is often straightforward. You’ll need a mix of ‘greens’ (nitrogen-rich, like fresh grass clippings, food scraps, or fermented soybean meal) and ‘browns’ (carbon-rich, like dried leaves, straw, or wood chips).
Putting it into practice
A common approach is to layer these materials, aiming for approximately two parts brown to one part green by volume, or a 30:1 C:N ratio by weight. For example, you might use 6 inches of shredded leaves followed by 3 inches of grass clippings, then a thin layer of soil or finished compost to introduce beneficial microbes. Each layer should be thoroughly moistened to 40-60% water content, which can be checked by squeezing a handful of material—it should feel damp but not drip. Once built, the pile should heat up within 24 to 48 hours, reaching temperatures of 130°F to 160°F. If it doesn’t, check your C:N ratio and moisture levels, as these are the two most common culprits for a cold pile in any climate, including the cooler USDA zone 4 in Minnesota.
- Gather enough ‘brown’ and ‘green’ materials to create a 3 ft x 3 ft x 3 ft pile.
- Shred or chop materials into 1-2 inch pieces for faster decomposition.
- Layer materials, aiming for a 30:1 carbon-to-nitrogen ratio.
- Moisten each layer thoroughly to a 40-60% water content.
- Add a thin layer of finished compost or soil to introduce microbes.
The 18-day turning schedule and monitoring
The core of the Berkeley method is its rigorous turning schedule, designed to maintain aerobic conditions and distribute heat and moisture evenly throughout the pile. After the initial build, allow the pile to heat for two to four days until it reaches 130°F to 160°F. Once it hits this range, the 18-day clock begins. For the next 14 days, you will turn the pile every one to two days. This frequent turning, described in Accelerated Composting in Tunnels (1996), exposes all parts of the material to the high temperatures needed to kill pathogens and weed seeds. When turning, aim to move the outer, cooler material to the center of the new pile and vice versa. This ensures uniform decomposition across the entire 27 cubic feet.
Putting it into practice
Monitoring the pile’s temperature is essential. A long-stemmed compost thermometer, inserted 12 to 18 inches into the pile, will give you an accurate reading. If the temperature drops below 130°F, it’s a sign that the microbes are slowing down, likely due to a lack of oxygen or moisture. You might need to add a bit more water or turn the pile more frequently. Conversely, if the pile exceeds 160°F, it can inhibit some beneficial microbes; a quick turn will cool it down. After the 14 days of turning, allow the pile to cure for another four to seven days without turning. This curing phase, often done in a shaded area in USDA zone 9 in Florida, allows the compost to stabilize and mature, resulting in a richer, more beneficial product for your garden beds.
- Allow the pile to heat for two to four days until it reaches 130-160°F.
- Turn the pile every one to two days for the next 14 days.
- Use a compost thermometer to monitor internal temperatures, aiming for 130-160°F.
- Move cooler outer material to the center during each turn.
- After 14 days of turning, cure the pile for four to seven days.
Troubleshooting common issues and knowing when it’s ready
Even with careful planning, compost piles can present challenges. If your pile isn’t heating up, the most common culprits are an incorrect C:N ratio or insufficient moisture. For instance, a pile in USDA zone 6 in Pennsylvania that is too dry will show little microbial activity, while one with too much carbon (e.g., mostly wood chips) will decompose very slowly. Adding more ‘greens’ like fresh grass clippings or a nitrogen source like fermented soybean meal, along with thorough watering, can often kickstart a cold pile. Conversely, if your pile smells like ammonia, it indicates too much nitrogen; adding more ‘browns’ like shredded cardboard or dry leaves will help balance the ratio and reduce odors.
Putting it into practice
Another common issue is a pile that becomes too wet and anaerobic, often indicated by a foul, rotten egg smell. This happens when there isn’t enough air, which can occur if the pile is too dense or overwatered. Turning the pile more frequently and adding bulky ‘brown’ materials like straw or wood chips can improve aeration. Knowing when your compost is ready is crucial. Finished compost will have a dark brown, crumbly texture, an earthy smell, and its original components will be unrecognizable. The temperature inside the pile will have returned to ambient air temperature, typically below 90°F, and it will no longer heat up significantly after turning. This stable product is then ready to be incorporated into your garden beds, whether you’re growing okra in the southern US or cool-season crops in the northern states.
- If the pile is cold, check C:N ratio and moisture; add greens/water or browns as needed.
- An ammonia smell indicates too much nitrogen; add more carbon-rich materials.
- A rotten egg smell suggests anaerobic conditions; turn more and add bulky browns.
- Compost is ready when it’s dark, crumbly, smells earthy, and is at ambient temperature.
- Original materials should be unrecognizable in the finished product.
Applying your finished hot compost
Once your compost has completed its 18-day cycle and subsequent curing period, it is a stable, nutrient-rich amendment ready for your garden. Finished compost, often referred to as ‘black gold,’ significantly improves soil structure, increasing its ability to retain water and nutrients. For example, adding a 2-inch layer of compost to sandy soils in USDA zone 9 in Florida can dramatically improve water retention, reducing the need for frequent irrigation by up to 30%. In heavy clay soils, common in parts of USDA zone 6 in Kentucky, compost helps break up compaction, improving drainage and aeration for plant roots.
You can incorporate compost into your garden beds by spreading a 1-inch to 3-inch layer over the soil surface and lightly tilling it into the top 6 inches. For established plants, a 1-inch topdressing around the base provides a slow-release source of nutrients. Compost is particularly beneficial for vegetable gardens, promoting vigorous growth and higher yields. For instance, a study in California found that tomato plants grown with composted soil amendments yielded 20% more fruit than those grown without. Remember to check your soil’s pH and moisture levels regularly with a 3-in-1 soil meter to ensure optimal conditions for your plants. This practice supports healthy plant development and reduces reliance on synthetic fertilizers, which builds a more resilient garden ecosystem.
- Spread a 1-inch to 3-inch layer of compost over garden beds.
- Lightly till compost into the top 6 inches of soil.
- Use a 1-inch topdressing around established plants for nutrient release.
- Compost improves water retention by up to 30% in sandy soils.
- It enhances drainage and aeration in heavy clay soils.
Hot composting vs. cold composting
Feature | Hot Composting (Berkeley Method) | Cold Composting |
|---|---|---|
Time to finish | 18-21 days | 6 months to 2 years |
Temperature | 130-160°F (55-71°C) | Ambient (below 90°F) |
Pathogen/weed kill | Yes, effective | No, limited |
Material prep | Chopped, layered, specific C:N ratio | Minimal, add as available |
Turning frequency | Every 1-2 days | Infrequent or none |
Pile size | Minimum 3 ft x 3 ft x 3 ft | Any size |
Optimal C:N Ratio: For rapid decomposition, maintain a carbon-to-nitrogen ratio between 25:1 and 30:1, which is critical for microbial activity.
Moisture Level: The ideal moisture content for a hot compost pile is 40% to 60%, feeling like a wrung-out sponge.
Minimum Pile Volume: A compost pile needs to be at least 27 cubic feet (3 ft x 3 ft x 3 ft) to generate and retain sufficient heat for hot composting.
Frequently asked questions
What is the ideal temperature range for hot composting?
The ideal temperature range for hot composting is between 130°F and 160°F (55-71°C). Maintaining these temperatures for several days helps to kill most weed seeds and plant pathogens, ensuring a cleaner final product for your garden beds. Temperatures above 160°F can inhibit beneficial microbes, while below 130°F slows the decomposition process significantly.
How often should I turn a Berkeley method compost pile?
After the initial two to four days of heating, a Berkeley method compost pile should be turned every one to two days for the next 14 days. This frequent turning ensures proper aeration, distributes moisture, and moves cooler outer materials to the hot center, promoting uniform decomposition across the entire 27 cubic feet of the pile.
What materials are considered ‘greens’ and ‘browns’ for composting?
‘Greens’ are nitrogen-rich materials like fresh grass clippings, fruit and vegetable scraps, coffee grounds, and fresh manure. ‘Browns’ are carbon-rich materials such as dried leaves, straw, wood chips, shredded paper, and cardboard. An optimal mix typically involves two parts brown to one part green by volume to achieve a 25:1 to 30:1 carbon-to-nitrogen ratio.
How do I know if my compost pile has enough moisture?
Your compost pile has enough moisture if it feels like a wrung-out sponge, with a moisture content between 40% and 60%. If you squeeze a handful of material, only a few drops of water should emerge. If it’s too dry, decomposition will slow; if it’s too wet, it can become anaerobic and smell foul, inhibiting microbial activity.
Can I hot compost in a small backyard in USDA zone 5?
Yes, you can hot compost in a small backyard in USDA zone 5, provided you can build a pile that is at least 3 ft x 3 ft x 3 ft (27 cubic feet). This minimum size matters for generating and retaining the necessary heat, even in cooler climates. You’ll need to gather sufficient materials and commit to the regular turning schedule to maintain optimal temperatures.
What are the benefits of using finished hot compost in my garden?
Finished hot compost offers several benefits, including better soil structure, more water retention (up to 30% in sandy soils), and improved nutrient availability for plants. It also helps suppress plant diseases and reduces the need for synthetic fertilizers. Incorporating a 1-inch to 3-inch layer into your garden beds can significantly boost plant health and yields.
References
- EB Agriculture for Composting (2009). EB Agriculture for Composting.
- Composting Process (1996). Composting Process.
- Composting: A Prospective (2017). Composting: A Prospective.
- Composting Design (1996). Composting Design.
- Accelerated Composting in Tunnels (1996). Accelerated Composting in Tunnels.
- USDA Natural Resources Conservation Service (2024). USDA Natural Resources Conservation Service.