Key takeaways
- Install a 16 mm UV-stabilized LDPE main line connected to an overhead water tank or garden tap, branched with 4 mm micro-tubes to individual pots.
- Use adjustable 0 to 70 litres-per-hour emitter drippers so individual water flow can be matched to grow bag volume and plant species.
- Include a 120-mesh disc or screen filter immediately downstream of the water source to prevent particulate clogging of fine emitter nozzles.
- Automate watering using an electronic tap timer with dual cycles during peak summer (March to May) to prevent midday heat stress.
- Elevate gravity-fed storage tanks on beam or column lines, verifying slab load limits with an engineer before installing heavy storage barrels.
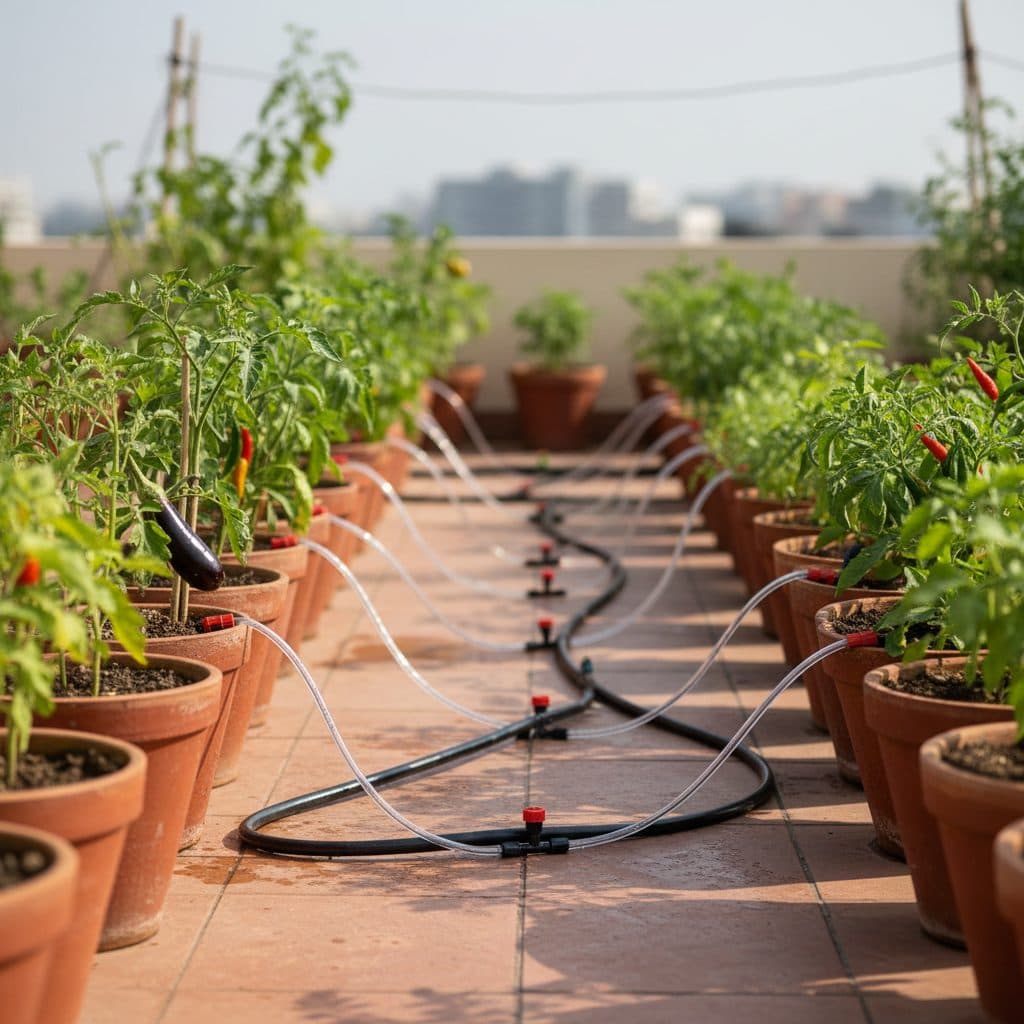
Quick answer: A drip irrigation system for an Indian terrace garden delivers precise, slow water directly to the root zone of container plants using a network of 16 mm main lines, 4 mm feeder tubes, and adjustable drippers. Operating either by gravity from an overhead Sintex tank or via an automated tap timer on pressurized mains, drip systems cut water use substantially compared with hand watering because water is applied slowly to the root zone rather than the whole bag surface, prevent nutrient leaching, and protect plants during 40°C+ summer heatwaves.
Maintaining a thriving terrace garden in India during peak summer demands consistent, twice-daily watering. Concrete roofs absorb immense solar radiation, driving container soil temperatures high and causing moisture to evaporate rapidly. Hand watering with buckets or hoses is time-consuming, prone to uneven saturation, and washes soluble nutrients out of grow bag drainage holes.
A dedicated terrace drip irrigation system delivers targeted hydration straight to root zones without wetting plant leaves or splashing soil. This slow, uniform moisture delivery reduces the risk of blossom-end rot in tomatoes, stops leaf scorching, and keeps plants hydrated even when you travel away from home.
Setting up a robust terrace drip kit requires understanding water pressure dynamics, selecting durable UV-stabilized fittings, calculating flow rates, and scheduling seasonal run times across kharif, rabi, and zaid seasons.
System layout: tap pressure vs gravity feed
Before purchasing components, determine whether your terrace garden will run on pressurized municipal/overhead supply or a standalone gravity-fed tank.
+------------------------+-----------------------------------+-----------------------------------+
| Parameter              | Pressurized Tap / Pump System     | Gravity-Fed Overhead Tank System  |
+------------------------+-----------------------------------+-----------------------------------+
| Water Source           | Terrace bib tap / Pressure booster| Overhead Sintex tank (1.5 to 3 m)|
| Operating Pressure     | 1.0 to 2.5 bar (15 to 35 psi)     | 0.15 to 0.3 bar (2 to 4.5 psi)    |
| Dripper Compatibility  | Pressure-compensating or adjustable| Low-pressure adjustable / open jet|
| Maximum Line Length    | 30 to 50 metres per run           | 15 to 20 metres per branch        |
| Automation Mechanism   | Battery-operated tap timer        | Ball valve or low-pressure timer  |
+------------------------+-----------------------------------+-----------------------------------+
Gravity-fed systems
A filled 200-litre tank weighs about 200 kg concentrated on the stand's footprint. Have the slab's load capacity confirmed by a structural engineer or the building's builder before installing an elevated tank, and site it over a beam or column line, not mid-span.
If connecting directly to a dedicated 200-litre blue barrel or overhead building storage tank, remember that water pressure depends entirely on elevation head (every 1 metre of elevation above the terrace provides roughly 0.1 bar of pressure). For gravity setups, choose 8-hole adjustable drippers that function reliably at low head pressure rather than pressure-compensating drippers that typically need around 0.5 bar (about 5 m of head) before they enter their compensating range.
+-------------------------------------------------------------------+
|               TERRACE DRIP IRRIGATION SYSTEM LAYOUT               |
+-------------------------------------------------------------------+
| [Water Source / Tap]                                              |
|      |                                                            |
| [Battery Tap Timer]                                               |
|      |                                                            |
| [120-Mesh Screen Filter]                                          |
|      |                                                            |
| [16 mm LDPE Main Line] ===================================== (End)|
|      |               |               |               |            |
|   [4mm Tube]      [4mm Tube]      [4mm Tube]      [4mm Tube]      |
|      |               |               |               |            |
| [Dripper #1]    [Dripper #2]    [Dripper #3]    [Dripper #4]      |
| (Grow Bag 1)    (Grow Bag 2)    (Grow Bag 3)    (Grow Bag 4)      |
+-------------------------------------------------------------------+
Essential drip irrigation components
To assemble a reliable system that withstands Indian sun without leaking or degrading, source high-grade irrigation components:
- 16 mm Main Supply Pipe: Black UV-stabilized Low-Density Polyethylene (LDPE) pipe forms the backbone running along terrace perimeter walls.
- 4 mm Micro Feeder Tube (Feeder Line): Flexible vinyl or polyethylene tubes branching from the 16 mm main line to individual containers.
- Barbed Connectors and Joiners: 16 mm elbows, tees, and end caps (figure-8 closures) to configure the loop.
- 4 mm Punch Tool: Handheld tool that creates clean, leak-free holes in the 16 mm pipe for inserting 4 mm barbed adapters.
- Adjustable Drippers (Emitters): Screw-cap emitters allowing flow adjustment from 0 to 70 litres per hour (LPH) to match pot sizes.
- Support Stakes: Plastic stakes that hold 4 mm drippers firmly in place above the potting mix.
- 120-Mesh Inline Filter: Essential for trapping fine silt and sand before it clogs emitter nozzles.
Step-by-step installation guide
Setting up a terrace drip network takes a few hours using basic hand tools.
Step 1: layout and main line routing
Lay your 16 mm LDPE pipe along the perimeter walls of the terrace, looping past all grow bag clusters. Avoid sharp bends that kink the pipe; use 16 mm elbow fittings at 90-degree corners. Secure the pipe along parapet walls using plastic pipe saddles or zip ties.
Step 2: filter and timer assembly
Connect your battery-operated digital timer directly to the terrace tap. Attach the 120-mesh screen filter immediately after the timer. Connect the 16 mm pipe to the filter outlet using a female compression adapter.
Step 3: punching and feeder line installation
Position each grow bag in its permanent place on drain cells or stands. Use the 4 mm punch tool to pierce the 16 mm pipe adjacent to each container. Push a 4 mm double-barbed connector firmly into the hole until it snaps into place. Cut a length of 4 mm tube to reach the center of the pot, connect it to the barb, and attach an adjustable dripper at the opposite end. Secure the dripper into the soil with a support stake.
For specialized container sizing and placement, reference our companion guide on grow bags for terrace garden.
Calibrating flow rates and seasonal watering schedules
Different vegetables require varying volumes of water depending on root depth, container volume, and ambient temperature.
+-------------------+-----------------------+-------------------+-------------------------------+
| Season            | Daily Frequency       | Runtime per Cycle | Target Volume per 30 cm Bag   |
+-------------------+-----------------------+-------------------+-------------------------------+
| Zaid (Summer)     | Twice (06:30 & 17:30) | 15 to 20 minutes  | 1.5 to 2.5 L/bag/day (total)  |
| Kharif (Monsoon)  | As needed (Dry days)  | 10 minutes        | 0.5 to 1.0 litre (manual run) |
| Rabi (Winter)     | Once (07:30 Morning)  | 10 to 15 minutes  | 1.0 to 1.5 litres per bag     |
+-------------------+-----------------------+-------------------+-------------------------------+
During hot summer months (March to May) across northern and central India, never irrigate during the peak heat of midday (11:00 to 15:00). Water standing in exposed black pipes heats up rapidly, and hot water applied to roots causes severe thermal shock. Schedule automated runs in early morning and late afternoon. For detailed timer configurations during holiday travel, review long absence drip timer strategies.
Maintenance, descaling and winterization
Even well-designed drip systems require routine maintenance to prevent mineral scaling and blockages.
Cleaning inline filters
Unscrew the filter housing once every fortnight, remove the stainless steel mesh or disc cartridge, and rinse away accumulated sediment under a running tap.
Flushing main lines
Every month, open the figure-8 end caps on all 16 mm branch lines and run the water at full pressure for two minutes. This flushes out fine silt and organic debris before it reaches the drippers.
Clearing hard water salt buildup
Groundwater in many Indian cities contains high total dissolved solids (TDS) and calcium carbonates that leave white crusts on dripper nozzles. If an emitter becomes clogged, unscrew the top cap and soak it in household white vinegar for thirty minutes to dissolve mineral scale.
For small container layouts or alternative localized watering methods, compare setups with ollas vs drip irrigation and explore container arrangements in rooftop patio container gardening.