Key takeaways
- Tropical hibiscus (Hibiscus rosa-sinensis, locally known as Gudhal) requires a minimum of six hours of direct sunlight daily to initiate flower buds.
- The most common causes of a hibiscus not flowering are too little direct sun and too much nitrogen; potassium shortage is a further contributor.
- Feed potassium separately (sulphate of potash or wood-ash extract used sparingly), and use mustard cake only in small amounts and only on plants that are actually short of nitrogen, since mustard cake is a nitrogen feed, not a potassium one.
- Yellowing leaves usually indicate overwatering in heavy monsoon soil, iron chlorosis in high-pH water, or severe dry-to-wet soil moisture fluctuations.
- Perform annual hard pruning in late winter (February) to stimulate vigorous new branches, as hibiscus only sets flower buds on fresh seasonal growth.
- Inspect tender flower buds and branch tips weekly for white cottony mealybugs, spot-treating immediately with isopropyl alcohol swabs or organic neem oil sprays.
Quick answer: For healthy hibiscus plant care in India, place your potted gudhal plant in full sun receiving 6 hours of direct light, in free-draining cocopeat and vermicompost potting soil. Feed every 15 days with potassium-rich organic fertiliser (such as sulphate of potash or wood-ash extract), water thoroughly when topsoil feels dry, prune in February, and spray neem oil to prevent mealybugs.
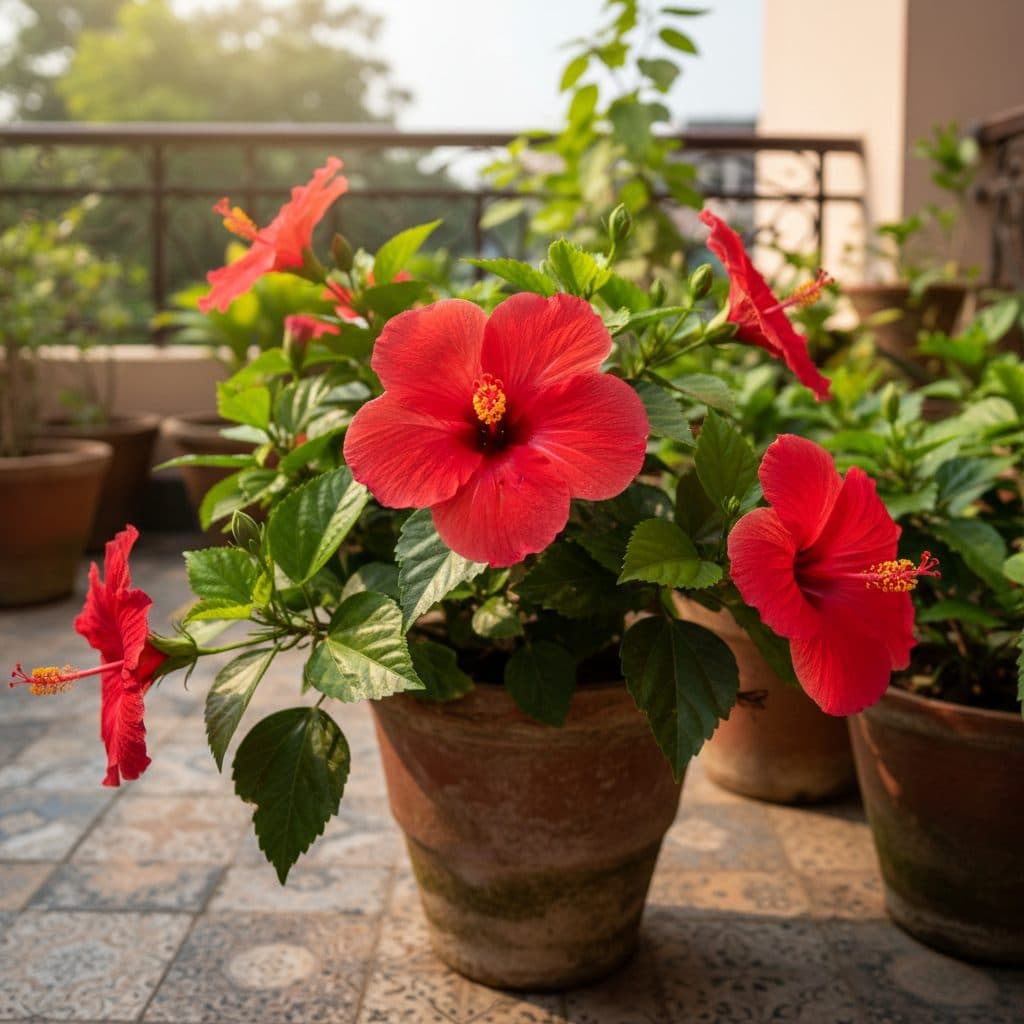
The tropical hibiscus (Hibiscus rosa-sinensis), revered across India as Gudhal, Jaba, or Dasavala, is one of the most cherished flowering shrubs in Indian home and terrace gardens. Valued for its massive blossoms in shades of crimson, pink, yellow, orange, and white, a healthy hibiscus plant can produce fresh blooms almost year-round across tropical and subtropical regions.
However, many Indian container gardeners face common frustrations: lush green bushes that refuse to produce flower buds, unopened buds dropping onto the floor, yellowing foliage, or dense clusters of white cottony mealybugs. Mastering hibiscus plant care comes down to balancing sunlight exposure, dialling in high-potassium organic nutrition, providing seasonal pruning, and maintaining clean pest-free foliage.
+-------------------------------------------------------------+
|              TROPICAL HIBISCUS (GUDHAL) CARE PROFILE        |
|                                                             |
|   Sunlight: 6+ Hours Unobstructed Direct Sunlight Daily     |
|   Soil Blend: 40% Garden Soil + 30% Vermicompost + 30% Sand |
|   Soil pH: 6.0 to 6.8 (Slightly Acidic)                     |
|   Feeding Ratio: High Potassium, LOW Phosphorus, Low N      |
|   Pruning Window: Late Winter / Spring (February)           |
|   Key Pests: Mealybugs, Aphids, Spider Mites                |
+-------------------------------------------------------------+
Troubleshooting: why is my hibiscus not flowering?
When a healthy-looking gudhal plant produces abundant dark green foliage but zero flower buds, it is experiencing a physiological imbalance.
+-------------------------------------------------------------+
|             ROOT CAUSES OF NON-FLOWERING IN HIBISCUS        |
|                                                             |
|   1. EXCESS NITROGEN (Lush Leaves, Zero Buds):              |
|   - Chemical urea or excessive fresh cow manure             |
|   - Fix: Stop high-N feeds; apply sulphate of potash        |
|                                                             |
|   2. INSUFFICIENT SUNLIGHT (< 5 Hours Direct Sun):          |
|   - Plant stretches; leggy stems; drops unopened buds       |
|   - Fix: Move container to an open, sunny terrace location  |
|                                                             |
|   3. POTASSIUM & MICRONUTRIENT DEFICIENCY:                  |
|   - Buds form but turn yellow and drop before opening       |
|   - Fix: Apply sulphate of potash + Epsom salt spray        |
|                                                             |
|   4. IRREGULAR MOISTURE STRESS:                             |
|   - Soil drying completely to dust, followed by flooding    |
|   - Fix: Maintain steady, consistent moisture beneath mulch |
+-------------------------------------------------------------+
1. The nitrogen-to-potassium imbalance
Nitrogen fuels leafy green stem growth, while potassium drives flower bud initiation and bloom development. Hibiscus is sensitive to excess phosphorus, so avoid high-phosphate bloom boosters. If you feed your hibiscus with high-nitrogen chemical fertilisers or fresh uncomposted manure, the plant channels all its metabolic energy into making giant leaves, suppressing flower bud development. Switch to high-potash organic feeds with low phosphorus to trigger bud set.
2. Lack of direct sunlight
Hibiscus is a sun-loving tropical plant. If grown in semi-shaded balconies, under deep tree canopies, or behind tinted glass where it receives only two or three hours of filtered light, it cannot generate enough carbohydrate energy to open blooms.
To explore botanical genetics and growing requirements, review our detailed profile on Hibiscus rosa-sinensis.
Diagnosing and fixing yellowing leaves (Pattiya Peeli Hona)
Yellow leaves on a hibiscus plant signal that root or vascular function has been disrupted.
Symptom Pattern | Underlying Cause | Corrective Treatment |
|---|---|---|
Uniform yellowing across entire lower leaves | Overwatering or waterlogged container | Improve bottom drainage; allow top 2.5 cm soil to dry before watering |
Interveinal yellowing on NEW upper growth | Iron deficiency / Alkaline soil or hard water | Apply chelated iron spray; top-dress with compost |
Interveinal yellowing on OLD lower leaves | Magnesium deficiency | Spray foliage with 2 grams Epsom salt (magnesium sulphate) per litre |
Yellow leaves with fine webbing on undersides | Spider mite infestation in dry heat | Spray undersides of leaves with cold water and horticultural oil |
Sudden mass leaf yellowing after moving pot | Environmental transplant shock | Keep in stable location; avoid moving pot repeatedly |
+-------------------------------------------------------------+
|                 IRON CHLOROSIS VS OVERWATERING              |
|                                                             |
|   OVERWATERING (Root Suffocation):                          |
|   - Entire leaf turns soft, pale yellow                     |
|   - Affects older lower leaves first                        |
|   - Soil smells musty and stays soggy for days              |
|                                                             |
|   IRON DEFICIENCY (Chlorosis):                              |
|   - Interveinal yellowing on NEW upper growth first         |
|   - Common in alkaline soil or hard tap water areas         |
|                                                             |
|   MAGNESIUM DEFICIENCY:                                     |
|   - Interveinal yellowing on OLD lower leaves first         |
+-------------------------------------------------------------+
Overwatering and poor container drainage
During the Indian monsoon (July to September), heavy rainfall can saturate heavy clay potting soils. When container drainage holes clog, water fills pore spaces, depriving roots of oxygen. The suffocated fine feeder roots die, cutting off moisture to the foliage and causing lower leaves to turn bright yellow and drop. Always ensure container drainage holes remain unobstructed.
For broader container drainage techniques on Indian rooftops, read our guide on terrace gardening in Chandigarh.
The organic fertilizer schedule for continuous blooming
To maintain a heavy flush of large flowers, feed your potted hibiscus every two to three weeks with targeted organic nutrients.
+-------------------------------------------------------------+
|                 ORGANIC HIBISCUS FEEDING RECIPES            |
|                                                             |
|   1. MUSTARD CAKE LIQUID (*Sarson Ki Khali Tea*):           |
|   - Ferment 100g mustard cake in 2L water for 4 days        |
|   - Use sparingly only on nitrogen-deficient plants         |
|                                                             |
|   2. BANANA PEEL SUPPLEMENT TEA:                            |
|   - Soak 4 fresh chopped banana peels in 1L water for 48 hrs|
|   - Supplies small soluble potassium boost; pour onto soil  |
|                                                             |
|   3. MONTHLY DRY ROOT-ZONE DRESSING:                        |
|   - 2 handfuls well-aged vermicompost                       |
|   - 2 tablespoons neem cake powder (*Neem Khali*)           |
|   - 1 teaspoon sulphate of potash or wood ash extract       |
|   - 1 teaspoon Epsom salt (*Magnesium sulphate*)            |
+-------------------------------------------------------------+
How to apply fertilizers:
- Loosen the top 2.5 cm (1 in) of topsoil around the perimeter of the pot using a small hand trowel (khurpi), taking care not to disturb the main root ball.
- Work the dry organic fertilizer blend into the loosened soil around the pot rim. Feed potassium separately (sulphate of potash or wood ash extract used sparingly), and use mustard cake only in small amounts and only on plants that are actually short of nitrogen, since mustard cake is a nitrogen feed, not a potassium one.
- Banana peel tea supplies a small amount of soluble potassium — useful as a supplement, not as your main potassium source. Chopping the peels into the pot surface or into compost returns more of the nutrient than soaking them does.
To integrate container flowers into wider domestic food systems, see our foundational advice in what is a kitchen garden.
Annual pruning and repotting guide
Hibiscus blooms exclusively on new season's growth. If you leave a hibiscus plant unpruned for several seasons, branches become long, woody, and leggy, with only a few small flowers forming at the very tips of tall stems.
+-------------------------------------------------------------+
|                 HIBISCUS PRUNING ARCHITECTURE               |
|                                                             |
|   Before Pruning (February): Leggy, sparse, woody branches  |
|                                                             |
|         \       |       /                                   |
|          \      |      /                                    |
|   --------[ CUT POINT: Prune back by 1/3 to 1/2 ]--------   |
|            \    |    /                                      |
|             \   |   /   Make 45° angled cut above           |
|              \  |  /    an outward-facing leaf node         |
|               \ | /                                         |
|                \|/                                          |
|             [ TRUNK ]                                       |
|                                                             |
|   Result (4-6 Weeks Later): 3 to 4 dense new flowering shoots|
+-------------------------------------------------------------+
When and how to prune
- Timing: The best time to prune tropical hibiscus in India is in late winter (February) as temperatures begin to rise and new growth buds swell, or immediately following the monsoon in early October.
- Method: Using sharp, sterilized bypass secateurs, cut back all main branches by one-third to one-half of their length. Make cuts at a 45-degree angle approximately 1 cm above an outward-facing growth node. Remove any weak, crossing, or dead interior twigs to open the centre of the shrub to sunlight and air circulation.
Repotting and root pruning
Every two years, potted hibiscus plants become root-bound. In February, lift the plant from its container, trim away the outer 20 percent of circling roots with clean shears, and repot into fresh potting soil amended with compost and neem cake.
Organic control of mealybugs and aphids
Mealybugs, chiefly the pink hibiscus mealybug (Maconellicoccus hirsutus) and the cotton mealybug (Phenacoccus solenopsis), are the most destructive insect pests attacking hibiscus in India. These soft, oval insects cover themselves in a white, cottony wax and cluster on tender flower buds, leaf axils, and stem tips, sucking plant sap and excreting sticky honeydew that leads to black sooty mold.
+-------------------------------------------------------------+
|                3-STEP ORGANIC MEALYBUG ERADICATION          |
|                                                             |
|   Step 1: ALCOHOL SPOT TREATMENT                            |
|   - Dip a cotton earbud or toothbrush in 70% rubbing alcohol|
|   - Dab directly on white clusters to dissolve waxy coating |
|                                                             |
|   Step 2: HIGH-PRESSURE WATER JET                           |
|   - Blast stems with a strong hose nozzle to dislodge bugs  |
|                                                             |
|   Step 3: NEEM OIL FOLIAR BARRIER                           |
|   - Spray 5 ml pure cold-pressed neem oil + 2 ml soap per 1L|
|   - Spray in early morning or after sunset (not midday heat)|
+-------------------------------------------------------------+
Spray thoroughly every 7 days for three weeks. Spray in the early morning or after sunset, never in the midday heat, and test on a few leaves first during hot, dry weather.
For a comprehensive guide on identifying mealybug lifecycles and botanical treatment formulations, follow our detailed walkthrough on how to get rid of mealybugs on plants and discover general garden spraying protocols in neem oil for plants.