Key takeaways
- Harvest herbs in the morning after dew evaporates to maximize essential oil content.
- Air dry herbs in a dark, well-ventilated space with humidity below 60% for best results.
- Use a dehydrator at low temperatures, typically 95-115°F, to preserve volatile compounds.
- Store dried herbs whole in airtight containers away from light and heat for up to one year.
- Understand that a 10:1 fresh to dry ratio is common, requiring significant fresh material.
- Avoid high heat methods like oven drying unless carefully monitored to prevent flavor loss.
Quick answer: To preserve the aroma and color of fresh herbs, harvest them in the morning after dew evaporates, then dry them using methods like air drying in a dark, well-ventilated space or a dehydrator at low temperatures (95-115°F). Store dried herbs whole in airtight containers away from light and heat.
For growers across the United States, from the fertile valleys of California to the humid summers of USDA zone 7, preserving the bounty of a herb garden is a rewarding effort. Fresh herbs offer strong flavors and aromas, but their season is often fleeting. Proper drying extends that freshness into the colder months. The challenge lies in retaining their color, potent flavor, and beneficial essential oils, which can degrade quickly with improper handling.
Successful herb drying requires removing moisture while minimizing the loss of delicate aromatic compounds. For instance, basil’s characteristic aroma, influenced by compounds like linalool and methyl chavicol, diminishes if dried at excessive temperatures. Using proper drying methods helps dried herbs maintain their quality for up to twelve months.
Harvesting for peak flavor and oil content
The foundation of flavorful dried herbs begins with the harvest. Harvest timing determines the concentration of essential oils, which carry the herb’s distinct aroma and taste. In regions like USDA zone 6, where summer mornings are often cool and dry, the best time to harvest is just after the morning dew has evaporated, but before the sun’s intense heat begins to dissipate volatile oils. This typically falls between 8:00 AM and 10:00 AM.
Selecting the right plants and parts
When harvesting, select healthy, mature leaves and stems that show no signs of disease or pest damage. For most herbs, like oregano or thyme, cutting stems about 6-8 inches long is ideal. Avoid harvesting more than one-third of the plant at a time to ensure continued growth. After harvesting, gently rinse the herbs under cool water to remove any dirt or insects, then pat them thoroughly dry with a clean cloth or paper towel. Excess moisture can lead to mold during the drying process, compromising the entire batch and potentially wasting hours of effort.
- Harvest in the morning after dew dries, before 10:00 AM.
- Select healthy, mature leaves and stems, typically 6-8 inches long.
- Avoid harvesting more than one-third of the plant at once.
- Rinse gently and pat completely dry to prevent mold.
Air drying: the traditional, gentle approach
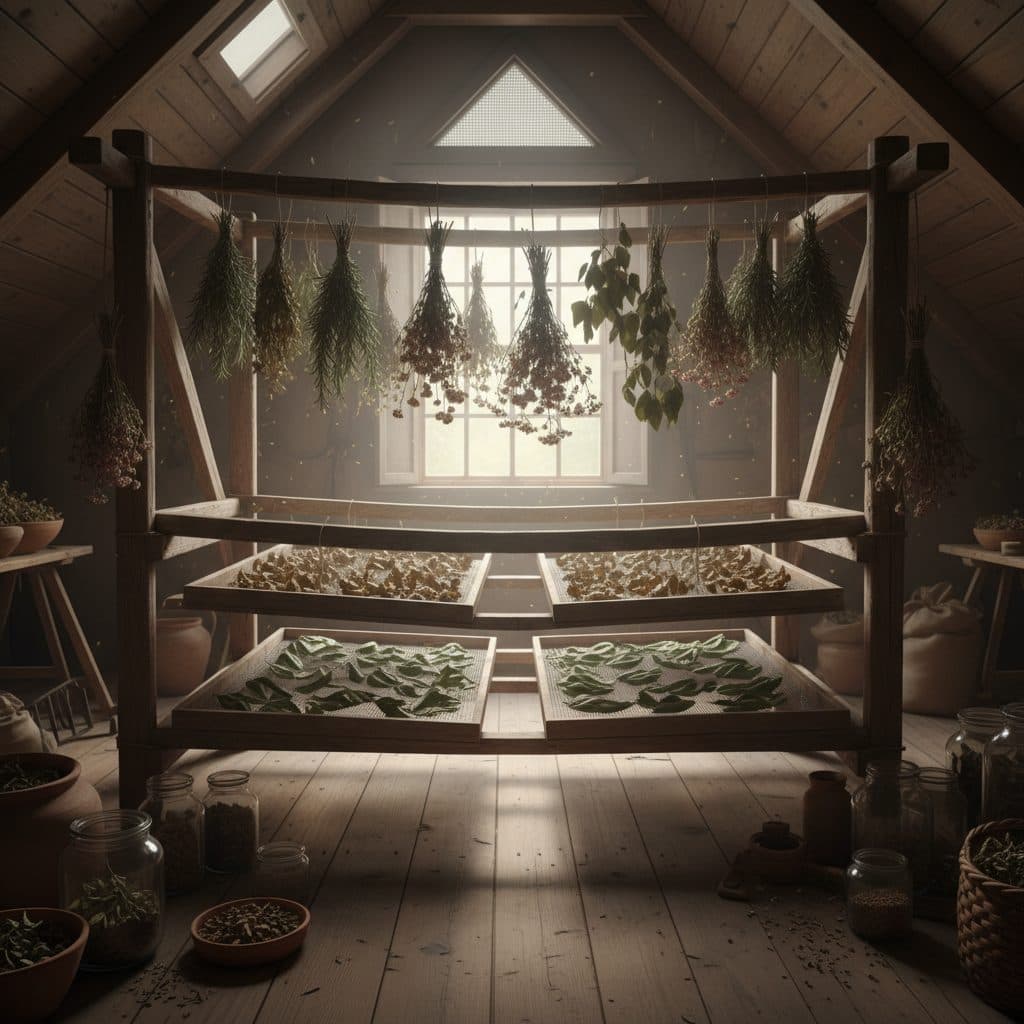
Air drying is a time-honored method, especially effective for herbs with lower moisture content and sturdy stems, such as rosemary, thyme, oregano, and marjoram. This method relies on good air circulation and low humidity to slowly draw out moisture, preserving the herbs’ natural color and aromatic compounds. The ideal environment for air drying is a dark, well-ventilated room with consistent temperatures between 65°F and 75°F and relative humidity below 60%. High humidity, common in regions like the Gulf Coast, can lead to mold growth and spoilage.
Bundling and rack drying techniques
For herbs with long stems, gather small bunches of 4-6 stems and tie them securely with twine. Hang these bundles upside down from a clothesline or drying rack, leaving at least 2 inches of space between each bundle for air to circulate freely. For herbs with smaller leaves or those prone to crumbling, like bay leaves, spreading them in a single layer on a fine-mesh screen or a clean window screen works well. Turn the herbs every one to two days to ensure even drying. The process typically takes one to three weeks, depending on the herb and ambient conditions.
- Bundle herbs in small groups of 4-6 stems for hanging.
- Ensure at least 2 inches of space between bundles for airflow.
- Spread delicate herbs in a single layer on mesh screens.
- Turn herbs every 1-2 days to promote even drying.
Dehydrator drying: controlled precision for optimal results
For consistent and reliable results, especially with herbs that have higher moisture content like basil, mint, or chives, a food dehydrator is an excellent tool. Dehydrators allow precise control over temperature and airflow, preserving delicate volatile oils and natural color. The goal is to dry them quickly enough to prevent spoilage, but slowly enough to avoid cooking them, which can lead to a significant loss of flavor and aroma. Basil’s aroma leans heavily on volatile compounds such as linalool, and those are the first thing lost when a herb is dried too warm.
Setting the right temperature and time
Most herbs dry best at low temperatures, typically between 95°F and 115°F. Higher temperatures, above 120°F, can cause the herbs to ‘cook,’ resulting in a dull color and a diminished flavor profile. Spread herbs in a single layer on the dehydrator trays, ensuring no pieces overlap, which can impede airflow and lead to uneven drying. The drying time can vary significantly, from 2-4 hours for delicate herbs like mint to 8-12 hours for denser herbs like bay leaves. Check herbs periodically; they are fully dry when they crumble easily between your fingers and stems snap rather than bend.
- Set dehydrator temperature between 95°F and 115°F.
- Spread herbs in a single layer on trays, avoiding overlap.
- Drying times range from 2 hours for mint to 12 hours for bay leaves.
- Check for complete dryness by crumbling leaves and snapping stems.
Oven and microwave drying: quick, but with caveats
While air drying and dehydrators are preferred for their gentle approach, oven and microwave drying offer quicker alternatives, though they come with significant caveats. These methods can be harsh, often leading to a loss of color, flavor, and essential oils if not managed with extreme care. High heat can ‘cook’ the herbs, resulting in a dull, brownish product with a significantly diminished aroma.
Careful heat management
To oven dry, spread a single layer of herbs on a baking sheet lined with parchment paper. Set your oven to its lowest possible temperature and prop the door open slightly with a wooden spoon to allow moisture to escape. Many ovens will not go low enough to avoid cooking the herbs, so check your lowest available setting first: anything much above 120°F will dull the color and flavor the rest of this guide is trying to protect. Check and turn the herbs every 15-20 minutes. This process can take 1-4 hours. For microwave drying, place a single layer of herbs between two paper towels. Microwave on high for 30 seconds, then check. Continue in 15-30 second intervals, flipping the herbs, until they are brittle. Do not walk away from the microwave: nearly dry leaves and paper towels can scorch or catch fire within seconds, so stop the moment the herbs crumble. This usually takes 1-3 minutes total. These methods are best for small batches and when time is a critical factor, but expect some compromise on quality compared to slower drying techniques.
- Use the lowest oven temperature, ideally under 180°F, with the door ajar.
- Check and turn oven-dried herbs every 15-20 minutes.
- Microwave herbs in 15-30 second bursts, checking between each.
- Expect a drying time of 1-4 hours for oven, 1-3 minutes for microwave.
Freezing herbs: an alternative for delicate varieties
While drying is excellent for many herbs, some delicate varieties, particularly those with high water content like basil, parsley, cilantro, and chives, retain their flavor and color better through freezing. Freezing preserves the fresh taste and vibrant green color that can sometimes be lost during the drying process. This method is particularly effective for herbs destined for cooked dishes, where their texture will soften anyway.
freezing methods for optimal retention
One popular method is to chop the fresh herbs finely and pack them into ice cube trays. Cover the chopped herbs with a small amount of water or olive oil—about 1 tablespoon per cube—then freeze until solid. Once frozen, pop the herb cubes out and transfer them to freezer bags, removing as much air as possible before sealing. These cubes can be stored for 6-12 months and easily dropped into soups, stews, or sauces. Oil-packed cubes must stay frozen and go straight from freezer to pot; herbs held in oil at room temperature can support Clostridium botulinum, so never thaw a batch and leave it sitting on the counter. Another simple approach is to spread whole leaves or sprigs on a baking sheet, freeze until firm (about 1-2 hours), then transfer to freezer bags. This flash-freezing prevents them from clumping together.
- Chop herbs and pack into ice cube trays.
- Cover with water or olive oil, about 1 tablespoon per cube.
- Freeze until solid, then transfer to airtight freezer bags.
- Alternatively, flash-freeze whole leaves on a baking sheet for 1-2 hours.
Storing dried herbs: maintaining potency and shelf life
Once herbs are thoroughly dried, proper storage maintains their potency, flavor, and color. If herbs are not stored correctly, they can quickly lose their volatile oils, absorb moisture, or become susceptible to pantry pests. The goal is to protect them from light, heat, air, and moisture, which are the primary enemies of dried herb quality. A 10:1 fresh to dry ratio is typical, meaning ten pounds of fresh herbs will yield about one pound of dried product, so storage space should be planned accordingly.
Airtight containers in a cool, dark place
Store dried herbs in airtight containers, such as glass jars with tight-fitting lids, or vacuum-sealed bags. Avoid plastic bags or containers that are not truly airtight, as they can allow air and moisture to degrade the herbs. Label each container with the herb name and the drying date. Place these containers in a cool, dark pantry or cupboard, away from direct sunlight, stoves, or other heat sources. Ideal storage temperatures are below 70°F. When stored correctly, most dried herbs will retain their quality for six to twelve months. After this period, their potency will gradually diminish, though they may still be safe to use. Crushing or grinding herbs just before use helps release their remaining essential oils, maximizing flavor.
- Use airtight containers like glass jars or vacuum-sealed bags.
- Label containers with the herb name and drying date.
- Store in a cool, dark place, ideally below 70°F.
- Expect a shelf life of six to twelve months for optimal potency.
Comparison of herb drying methods
Method | Ideal Herbs | Pros | Cons | Typical Time |
|---|---|---|---|---|
Air Drying | Rosemary, Thyme, Oregano | Low cost, gentle, good flavor retention | Slow, requires specific conditions (low humidity, dark), mold risk | 1-3 weeks |
Dehydrator | Basil, Mint, Chives, all herbs | Consistent, controlled, excellent flavor/color retention | Initial equipment cost, uses electricity | 2-12 hours |
Oven Drying | Small batches, sturdy herbs | Faster than air drying, no special equipment | Risk of ‘cooking’ herbs, flavor/color loss, uses energy | 1-4 hours |
Microwave Drying | Very small batches, quick need | Fastest method, no special equipment | Highest risk of flavor/color loss, uneven drying, burning | 1-3 minutes |
Freezing | Basil, Parsley, Cilantro, Chives | Excellent color and fresh flavor retention, good for cooking | Requires freezer space, texture changes for raw use | 2-4 hours (prep + freeze) |
Optimal Drying Temp: Maintain dehydrator temperatures between 95°F and 115°F to preserve delicate essential oils and prevent ‘cooking’ herbs.
Storage Lifespan: Properly stored dried herbs in airtight containers can retain their peak potency and flavor for six to twelve months.
Frequently asked questions
How do I know when my herbs are fully dry?
Herbs are fully dry when their leaves crumble easily between your fingers and their stems snap rather than bend. This typically indicates that moisture content has dropped below 10%, which prevents mold during storage.
Can I dry all types of herbs?
Most herbs can be dried, but some, like basil, mint, parsley, and cilantro, retain their color and flavor better when frozen due to their higher moisture content. Sturdier herbs like rosemary, thyme, and oregano are excellent candidates for air drying.
What is the best temperature for drying herbs in a dehydrator?
For optimal preservation of essential oils and color, set your dehydrator to a low temperature, ideally between 95°F and 115°F. Temperatures above 120°F can ‘cook’ the herbs, leading to significant flavor loss and a dull appearance.
How long do dried herbs last?
When stored correctly in airtight containers in a cool, dark place, dried herbs will maintain their peak potency and flavor for six to twelve months. After this period, their strength will gradually decrease, but they generally remain safe to consume.
Why do my dried herbs turn brown?
Herbs often turn brown during drying due to exposure to too much light, excessive heat, or slow drying that allows oxidation. Ensuring a dark drying environment and maintaining appropriate low temperatures, typically under 115°F, helps preserve their green color.
Is it better to dry herbs whole or chopped?
It is generally better to dry herbs whole or in large pieces, then crush or chop them just before use. This method helps to protect the delicate essential oils within the leaves, extending their shelf life and maximizing flavor when you finally use them in a recipe.
References
- How do I keep my fruit, veggies and herbs fresh longer? Are there any ‘hacks’? (2024). How do I keep my fruit, veggies and herbs fresh longer? Are there any ‘hacks’?.
- Re-creating the flavor of soy sauce, and squeezing guacamole to keep it fresh (2022). Re-creating the flavor of soy sauce, and squeezing guacamole to keep it fresh.
- Aroma as a Factor in the Breeding Process of Fresh Herbs – The Case of Basil (2008). Aroma as a Factor in the Breeding Process of Fresh Herbs – The Case of Basil.
- Aroma as a factor in the breeding process of fresh herbs – the case of basil (2016). Aroma as a factor in the breeding process of fresh herbs – the case of basil.
- Changes in Flavor Components in γ-Irradiated Fresh Ginger (<i>Zingiber officinale</i>) Rhizomes During Storage (2007). Changes in Flavor Components in γ-Irradiated Fresh Ginger (<i>Zingiber officinale</i>) Rhizomes During Storage.
- USDA Natural Resources Conservation Service (2024). USDA Natural Resources Conservation Service.