Key takeaways
- A DIY egg incubator built from an insulated styrofoam cooler provides the thermal stability needed to hatch healthy poultry at home.
- Forced-air incubators equipped with a small 12V circulation fan require a constant temperature of 37.5°C (99.5°F) throughout the incubation cycle.
- Relative humidity must be held between 45% and 50% for days 1 through 18, then raised to 65% to 70% during the final three-day lockdown phase.
- Eggs must be turned by hand three to five times daily until day 18 to prevent developing embryos from sticking to the inner shell membrane.
- Using a reliable digital proportional or relay thermostat eliminates dangerous temperature swings that cause embryo mortality.
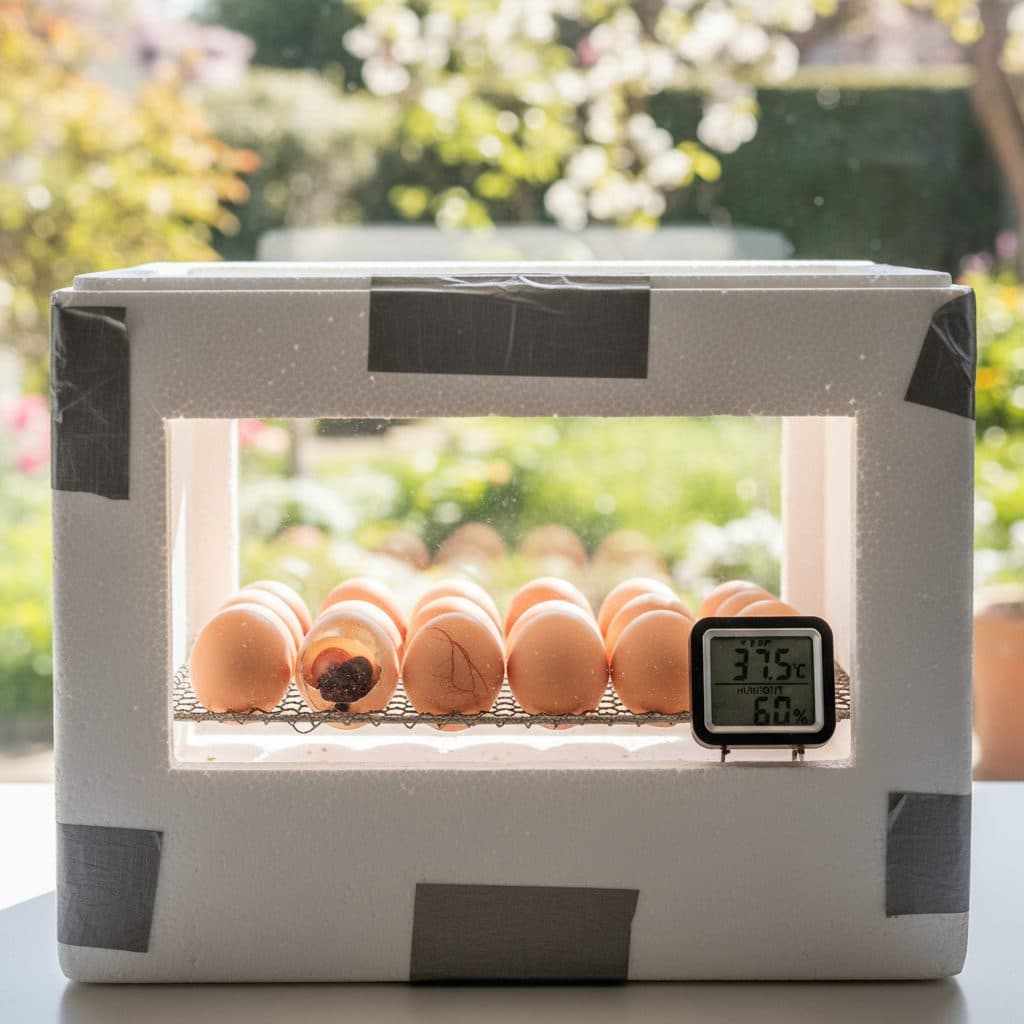
Quick answer: To build a DIY egg incubator, fit an insulated styrofoam cooler with a 25-watt to 40-watt heat bulb, a 12V computer fan for air circulation, and a digital thermostat wired to regulate the heat source. Place eggs on a raised wire mesh platform over shallow water trays to maintain 37.5°C (99.5°F) and 45% to 50% relative humidity.
Hatching chicks from your own flock is a practical milestone for homesteaders. While commercial incubators can be expensive, building a DIY egg incubator using accessible materials delivers dependable hatch rates while giving you control over breeding.
Embryonic development requires three essential conditions: precise temperature regulation, controlled relative humidity, and regular turning. In cooler Canadian and northern climates, maintaining these parameters requires an enclosure with excellent thermal insulation so ambient room fluctuations do not affect the internal chamber.
A dense styrofoam shipping cooler or an insulated plastic storage container provides good thermal insulation. Pairing these materials with an inexpensive digital temperature controller makes an incubator capable of hatching chicken eggs reliably. The build works for quail, duck and turkey eggs too, but the schedule below is for chickens only: quail hatch at 17-18 days with lockdown on day 14, ducks at 28 days (Muscovy 35) and turkeys at 28 days, and waterfowl need their own humidity regime. Look up the species-specific figures before you set anything but chicken eggs.
+-------------------------------------------------------------+
|              INCUBATION PARAMETERS (CHICKEN EGGS)           |
|                                                             |
|   PHASE             DAYS       TEMPERATURE    HUMIDITY      |
|   -----             ----       -----------    --------      |
|   Setting & Turning Days 1-18  37.5°C (99.5°F) 45% - 50% RH |
|   Lockdown & Hatch  Days 19-21 37.5°C (99.5°F) 65% - 70% RH |
+-------------------------------------------------------------+
What materials and tools do you need to build an incubator?
Gathering dependable, food-safe, and electrically safe components ensures consistent operation throughout the 21-day incubation window.
+-------------------------------------------------------------+
|              DIY INCUBATOR COMPONENT LIST                   |
|                                                             |
|   ITEM                    SPECIFICATION / PURPOSE           |
|   ----                    -----------------------           |
|   Insulated Body          Styrofoam cooler (min 3 cm walls) |
|   Heat Source             25W-40W incandescent or ceramic   |
|   Controller              Digital thermostat with probe     |
|   Circulation Fan         12V DC computer fan with adapter  |
|   Floor Grid              1/2-inch galvanized hardware cloth|
|   Viewing Window          Clear acrylic or picture frame glass|
|   Monitoring              Digital hygrometer / thermometer  |
+-------------------------------------------------------------+
Core components
- Insulated enclosure: A thick-walled styrofoam cooler (such as those used for shipping frozen food or pharmaceuticals) retains heat efficiently and does not rot from high internal humidity.
- Heat source: A ceramic porcelain lamp fixture mounted with a 25-watt to 40-watt incandescent bulb or mini ceramic heat emitter.
- Thermostat: A pre-wired digital temperature controller (such as an Inkbird or STC-1000 relay) with a waterproof probe. These display to 0.1°C but are typically only accurate to about plus or minus 1°C, and a relay controller cycles across a differential instead of holding a fixed point, so set the differential as narrow as the unit allows and always verify against a second thermometer at egg height.
- Ventilation and circulation: A small 80 mm or 120 mm 12V brushless computer fan wired to a 12V DC power plug. Constant gentle airflow prevents hot spots and thermal layering.
- Observation window: A small pane of clear glass or acrylic sheet (15 cm by 20 cm) taped into the lid.
How do you assemble the incubator step by step?
Follow this orderly build sequence to ensure safety and thermal efficiency:
+-------------------------------------------------------------+
|              INCUBATOR INTERNAL ASSEMBLY                    |
|                                                             |
|   [ VIEWING WINDOW (LID) ]                                  |
|   ========================================================= |
|   |  [Fan] ---> [Bulb + Guard]         [Temp Probe]       | |
|   |                                                       | |
|   |  ( O ) ( O ) ( O )  <- Fertile Eggs on Grid           | |
|   |  ---------------------------------------------------  | |
|   |  [ Water Reservoir Sponge ]                           | |
|   +-------------------------------------------------------+ |
+-------------------------------------------------------------+
Step 1: Install the viewing window
Cut a rectangular opening in the centre of the cooler lid, 2 cm smaller than your acrylic sheet. Secure the acrylic over the opening using silicone sealant or heavy-duty foil tape on both sides so the window itself does not leak warm, humid air. Ventilation should come from the drilled holes described below rather than gaps around the window. A clear window allows you to monitor hatching chicks without opening the lid and dumping humidity.
Step 2: Mount the lamp fixture and safety shield
Mount the porcelain light socket high on one internal end wall, standing it off the foam on a piece of sheet metal or ceramic tile and keeping at least 5 cm of clear air between the bulb and any polystyrene surface. Polystyrene scorches, melts and can ignite against a hot bulb. Fasten a cylindrical shield of 1/2-inch hardware cloth around the bulb so chicks and hands cannot touch the hot glass. Use a ready-made lamp cord and plug instead of splicing mains wiring, and never run the incubator unattended for the first 24 hours.
Step 3: Wire the circulation fan
Mount the 12V fan adjacent to the light bulb, angled so it blows air across the heat source. This distributes warmed air evenly throughout the chamber, maintaining uniform temperatures across all egg positions.
Step 4: Install the egg floor and water reservoir
Place two shallow plastic food containers in the bottom of the cooler to hold water for humidity. Cut a piece of 1/2-inch galvanized hardware cloth to fit snugly 5 cm above the bottom, resting on wooden blocks or PVC standoffs. This creates a flat, elevated floor that keeps eggs dry and safe above the water trays.
Step 5: Position the sensor probe and calibrate
Feed the thermostat sensor probe through a small hole in the side of the cooler. Position the probe tip so it rests at the exact height of the top of the eggs, midway between the heat source and the opposite wall.
How do you calibrate temperature and humidity before setting eggs?
Never place eggs into a newly built incubator immediately. Run the empty incubator for at least 48 to 72 hours to calibrate controls and verify stability.
- Temperature calibration: Set the digital thermostat to 37.5°C (99.5°F). Check readings against a secondary calibrated medical or glass laboratory thermometer placed on the egg rack.
- Ventilation holes: Drill four to six 8 mm ventilation holes around the top perimeter of the cooler, and two holes near the bottom. Passive gas exchange is necessary; developing embryos consume oxygen and exhale carbon dioxide through the porous eggshell. Cover or uncover holes with tape to fine-tune airflow.
- Humidity control: Fill the water reservoirs with warm water. Surface area determines evaporation rate and humidity levels. If humidity is below 45%, add a clean wet kitchen sponge to the water tray to increase surface area. If humidity exceeds 50%, reduce the water surface area.
+-------------------------------------------------------------+
|              HUMIDITY ADJUSTMENT MECHANICS                  |
|                                                             |
|   TARGET HUMIDITY    ADJUSTMENT ACTION                      |
|   ---------------    -----------------                      |
|   Increase RH        Add clean wet sponge / expand tray     |
|   Decrease RH        Remove water tray / open top vent hole |
|   Lockdown Boost     Add warm damp cloth / fill all trays   |
+-------------------------------------------------------------+
What is the daily management routine for chicken eggs?
Once the incubator maintains steady readings, set clean, unwashed fertile eggs that are no older than seven to ten days.
Daily egg turning (Days 1 to 18)
Mark opposite sides of each egg with an "X" and an "O" in soft pencil. Turn each egg 180 degrees three to five times per day at regular intervals. Always turn an odd number of times daily so the eggs rest on a different side each night. Turning prevents the embryo from adhering to the inner shell membrane.
Candling eggs (Days 7 and 14)
In a darkened room, shine a bright LED candling light through the blunt end of each egg.
- Day 7: Look for a dark central spot with spider-web blood vessels radiating outward. Clear eggs with no visible development are either infertile or early embryonic deaths, which candling cannot distinguish. Remove them to prevent spoilage, and if a large proportion are clear, check both your breeding ratio and your first-week temperature stability.
- Day 14: The embryo should occupy most of the egg, visible as a dark mass with a distinct, growing air cell at the blunt end.
Lockdown phase (Days 19 to 21)
At the end of day 18, initiate lockdown:
- Stop turning the eggs and lay them flat on the wire mesh.
- Add extra warm water and sponges to raise relative humidity to 65% to 70%. High humidity keeps the internal shell membranes soft, allowing chicks to break out without drying out.
- Keep the lid closed. Opening the lid during pip and hatch causes rapid humidity loss that can shrink-wrap chicks inside their shells.
+-------------------------------------------------------------+
|              21-DAY INCUBATION MILESTONES                   |
|                                                             |
|   Day 1:  Set eggs at 37.5°C (99.5°F), begin 3x daily turn  |
|   Day 7:  Candle eggs; discard clears (infertiles)          |
|   Day 14: Candle eggs; verify dark embryo and clear air cell|
|   Day 18: Enter lockdown: stop turning, raise RH to 65-70%  |
|   Day 21: Chicks pip, unzip, and hatch; leave to dry inside |
+-------------------------------------------------------------+
How do you transition hatched chicks to the brooder?
As chicks hatch, leave them inside the incubator for 12 to 24 hours until their down feathers are completely dry and fluffy. Chicks internalise the remaining yolk sac into the abdomen around days 19 to 20, before they pip, and that reserve sustains them for roughly 48 to 72 hours after hatching.
Prepare a heated brooder box bedded with clean pine shavings or paper towels, equipped with fresh water and chick starter crumbs. For flock nutrition guidelines, see our guides on what to feed chickens and what is in chicken feed.
Once birds feather out and transition outdoors, house them safely using mobile structures detailed in our chicken tractor plans, and protect pullets from wildlife using our guide on how to protect chickens from predators.