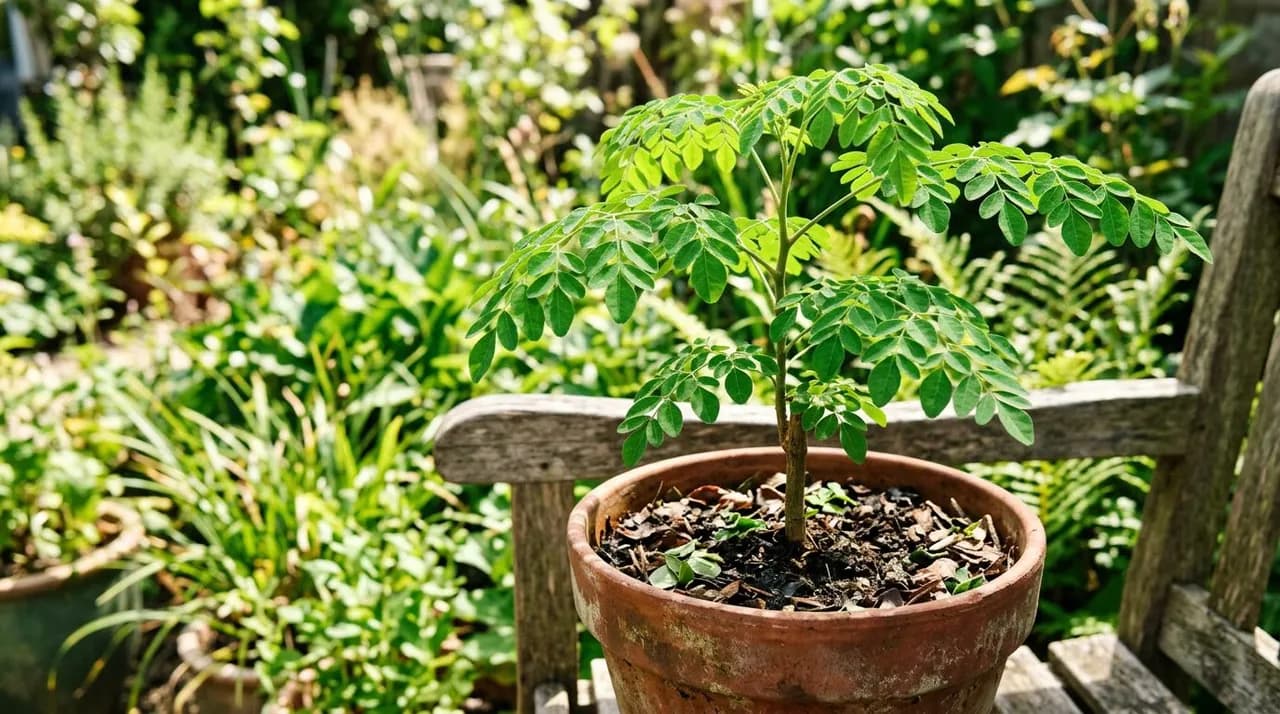
Key takeaways
- Gently dehull winged moringa seeds and soak in warm water for 24 hours to accelerate germination and prevent fungal seed decay.
- Sow seeds 2 cm to 2.5 cm (0.8 to 1 in) deep in loose, gritty, fast-draining potting soil; germination takes 7 to 14 days at 22°C to 30°C (72°F to 86°F).
- Provide unshaded, direct sunlight and avoid overwatering; moringa's fleshy taproot rots quickly in stagnant moisture.
- Pinch out the central leader when the seedling reaches 60 cm to 90 cm (2 to 3 ft) in height to stimulate bushier, multi-branched leaf production.
- Grow in deep 40 to 50 litre (10 to 13 gallon) containers in cool temperate climates, moving pots indoors before temperatures drop below 10°C (50°F).
Quick answer: To grow moringa from seed successfully, soak dehulled winged seeds in water for 24 hours, then plant 2.5 cm (1 in) deep in warm, freely draining sandy soil. Keep the medium moist in full sunlight to achieve sprouting in 7 to 14 days, pinching the main stem at 90 cm (3 ft) to encourage heavy foliage.
Knowing how to grow moringa from seed allows you to cultivate Moringa oleifera, widely celebrated as the miracle tree, drumstick tree, or horseradish tree. Native to the sub-Himalayan valleys of northern India, this fast-growing deciduous perennial is now cultivated across tropical, subtropical, and warm temperate zones worldwide for its nutrient-dense edible leaves, tender immature seed pods, and purifying seeds.
Moringa is one of the fastest-growing trees in the plant kingdom, capable of shooting up 3 to 5 metres (10 to 16 feet) in its first growing season under warm, sunny conditions. While large mature trees produce long, ribbed drumstick pods, home growers and permaculturists frequently manage moringa as a heavily pruned, multi-stemmed perennial shrub harvested continuously for fresh salad greens and stir-fry foliage.
Whether planting directly into warm tropical garden beds or raising an annual leafy shrub in a patio container in cooler temperate regions, starting a moringa tree from seed is straightforward when its heat and drainage needs are understood.
Seed anatomy, dehulling, and the 24-hour soaking method
Achieving rapid, uniform sprouting begins with understanding the structure of moringa seeds planting stock:
+---------------------------------------------------------+
|                  [Moringa Seed Preparation]             |
|                                                         |
|    (Winged Seed Husk)       (Cracking Outer Shell)      |
|           /---\                     /=====\             |
|          | (o) |        ===>       |  (o)  |            |
|           ---/                     \=====/             |
|                                                         |
|    (Pale Inner Kernel)      (24-Hour Warm Water Soak)   |
|            (o)          ===>     [Warm Water]           |
|                                  Enzymes Activated      |
+---------------------------------------------------------+
1. The anatomy of a moringa seed
Mature moringa seeds are round, brownish-black capsules featuring three papery, translucent wings. Inside the hard outer hull sits a creamy-white, oily kernel containing the plant embryo.
2. Dehulling the seed (optional but recommended)
While whole winged seeds germinate in nature, removing the brittle outer hull significantly accelerates water absorption and minimizes seed-borne fungal decay:
- Use your fingernails or a small pair of pliers to gently crack and peel away the dry papery shell.
- Take care not to crush, pierce, or bruise the soft pale kernel inside.
3. The 24-hour warm water soak
- Place the whole or dehulled seeds into a cup of warm water (around 25°C to 30°C / 77°F to 86°F) for 24 hours.
- Floating seeds are worth testing instead of immediately discarding; moringa kernels are oily and buoyant, so viable seed often floats. Sow floaters alongside the rest, or run a paper-towel test on a few seeds to check the batch before sowing.
For broader seed propagation fundamentals, review our guide to seed starting for beginners.
Soil requirements and container selection: preventing taproot rot
The single most critical factor in moringa survival is excellent soil drainage. Moringa oleifera develops a thick, tuberous taproot adapted to storing water through severe tropical droughts. If planted in dense, poorly draining clay or waterlogged potting soil, this fleshy taproot will rot within days.
Soil formulation for garden beds and pots
- Soil texture: Sandy loam or loamy sand with a slightly acidic to neutral pH (6.0 to 7.5).
- Potting mix blend: Combine 40% coarse horticultural sand or perlite, 40% coco coir or peat moss, and 20% aged compost or vermicompost. Learn more about media balance in our overview of organic gardening soil.
- Drainage: In garden beds, construct raised mounds or deep ridges to ensure water drains away rapidly from the crown during heavy downpours.
Container sizing for potted trees
Growing moringa in pots is an outstanding approach for gardeners living outside the tropics:
- Seedling stage: Start seeds in deep 10 cm (4 in) pots or root trainers to give the descending taproot room to stretch without circling.
- Permanent container: Transplant established seedlings into large 40 to 50 litre (10 to 13 gallon) fabric grow bags or wide terracotta pots (minimum 45 cm / 18 in diameter and depth). Fabric pots naturally air-prune roots, preventing root binding.
For urban container techniques, consult our guide on rooftop and patio container gardening.
Step-by-step planting and understanding moringa germination time
Follow these precise steps to plant your soaked seeds:
+---------------------------------------------------------+
|                  [Moringa Planting Steps]               |
|                                                         |
|   1. Fill deep container with sandy potting blend       |
|   2. Plant seed 2 cm - 2.5 cm (1 in) deep               |
|   3. Water once thoroughly; place on warm heat mat      |
|   4. Green shoot emerges in 7 - 14 days                 |
|   5. Move immediately to full, direct sunlight          |
+---------------------------------------------------------+
Sowing depth and temperature
- Fill your container with pre-moistened sandy potting mix, leaving 3 cm (1 in) of space below the top rim.
- Insert the soaked seed 2 cm to 2.5 cm (0.8 to 1 in) deep into the soil. Cover with loose mix and press down gently.
- Moringa germination time depends directly on soil temperature:
- At optimal warmth (24°C to 30°C / 75°F to 86°F), seeds sprout within 7 to 10 days.
- At cooler temperatures (18°C to 22°C / 64°F to 72°F), germination may take 14 to 21 days.
- In temperate regions starting seeds in spring, place seed trays on an electric seedling heat mat.
Regional planting schedules
In subtropical and tropical climates: Sow seeds directly outdoors into garden beds or food forest borders at the beginning of the warm rainy season (spring or early summer).
In cool temperate climates: Start seeds indoors on heat mats 4 to 6 weeks before your last expected spring frost, moving containers outdoors onto hot, sunny patios once night temperatures reliably exceed 15°C (59°F).
Essential moringa seedling care: light, watering, and pruning
Providing attentive moringa seedling care during the first 60 days transforms slender sprouts into sturdy, resilient trees:
1. Sunlight and heat
Moringa is a sun-worshipper. Move seedlings into full, unobstructed sunlight as soon as the first green shoot emerges. Indoors, position containers under full-spectrum LED grow lights for 12 to 14 hours daily to prevent leggy, weak stems.
2. Watering discipline
- Water thoroughly after sowing, then withhold further heavy watering until the green seedling breaks the surface.
- Once established, allow the top 5 cm (2 in) of soil to dry out completely between waterings.
- During hot summer weather, container plants require water every 2 to 3 days. In cooler autumn weather, scale back watering dramatically.
3. Pruning and pinching for heavy leaf production
If left unpruned, a moringa tree will shoot straight up into a single, tall, telephone-pole-like stem with foliage clustered high out of reach:
+---------------------------------------------------------+
|                  [Pinching for Branching]               |
|                                                         |
|       (Pinch Terminal Tip)                              |
|             \ | /  <-- Pinch when 60-90 cm (2-3 ft)     |
|              \|/                                        |
|               |                                         |
|          /----+----\  <-- Triggers 4-6 Lateral Branches |
|         /     |     \                                   |
|        /      |      \                                  |
|   ===========||=========== (Soil Level)                 |
+---------------------------------------------------------+- First pinch: When your young tree reaches 60 cm to 90 cm (2 to 3 feet) in height, pinch or snip off the top 10 cm (4 in) of the terminal growing tip.
- Secondary branching: This breaks apical dominance and forces 4 to 6 lateral side branches to erupt from lower leaf nodes.
- Ongoing coppicing: When side branches reach 60 cm (2 ft) in length, pinch their tips again. This creates a dense, bushy, umbrella-shaped shrub producing heavy harvests of tender leaves within arm's reach.
- For broader biomass management concepts, review our overview of pruning and pollarding tree species.
Overwintering container moringa and harvesting leaves
Managing your tree through seasonal shifts guarantees years of productivity:
Overwintering protection
Growth stalls and leaves drop as temperatures fall into single figures, and any frost kills the top growth. Where the soil itself does not freeze, a well-mulched root usually survives and resprouts from the base in spring; prolonged hard freezes kill the plant outright:
- In frost-free subtropical zones: Trees drop leaves naturally during dry or cool months and resprout vigorously in spring.
- In freezing temperate zones: Move container trees indoors to a warm, bright room or heated greenhouse before the first autumn frost. Cut stems back to 30 cm to 60 cm (1 to 2 feet) above the soil, withhold fertiliser, and water sparingly (once every 3 to 4 weeks) while the tree rests in semi-dormancy.
Harvesting and culinary use
- Harvesting leaves: Strip tender compound leaves by running your fingers along the green stems, or snip young 20 cm (8 in) shoot tips.
- Culinary applications: Cook fresh moringa leaves like spinach in soups, dals, and curries, or dry the leaves in a warm, shaded, well-ventilated room to grind into nutrient-rich green moringa powder.
Complement your warm-season container garden with other high-value perennial herbs like the curry leaf plant care bush.