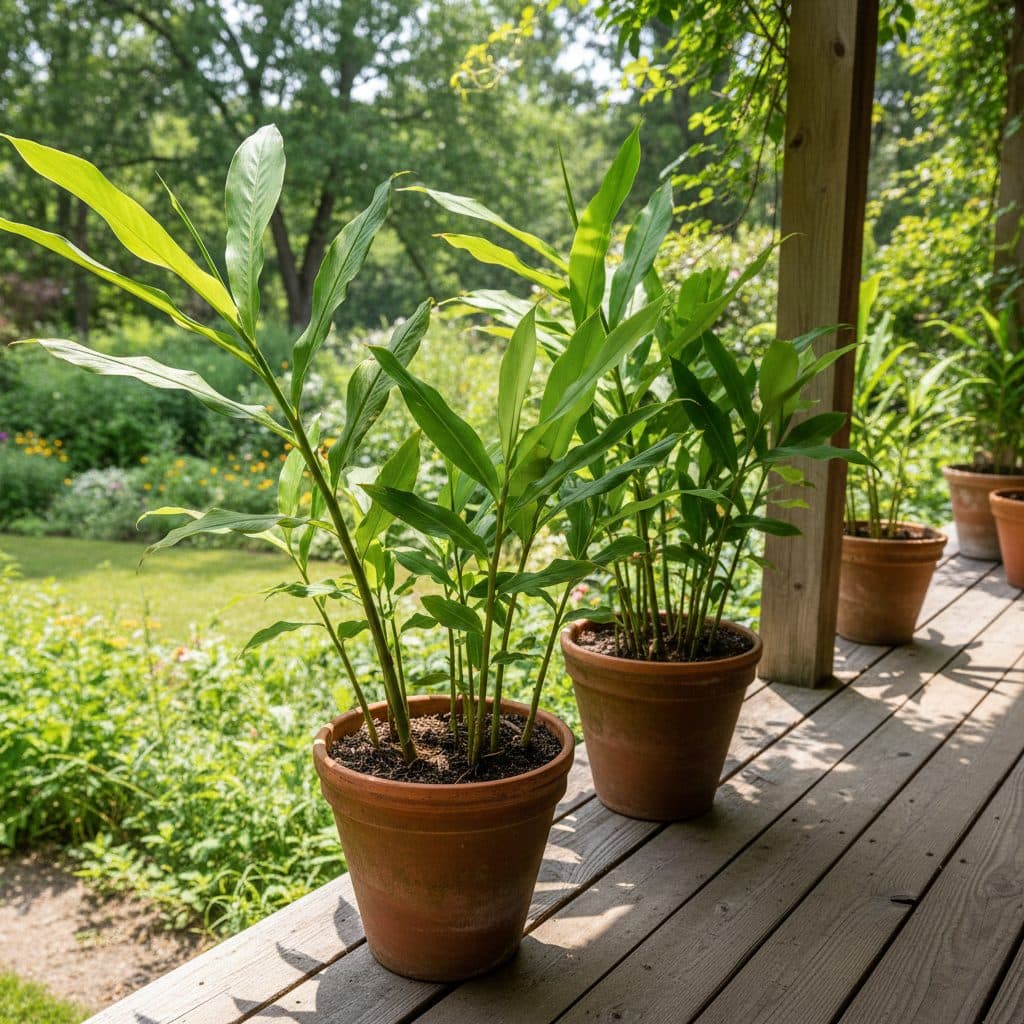
Key takeaways
- Select firm, plump ginger rhizomes from a grocery store, ideally with visible ‘eyes’ or growth buds, for best results.
- Plant ginger in wide, shallow pots at least 12 inches in diameter and 8 inches deep, ensuring good drainage.
- Use a well-draining, nutrient-rich potting mix, such as a blend of compost, perlite, and coco coir, to support healthy growth.
- Provide warm temperatures, ideally between 75°F and 85°F, and consistent moisture without waterlogging the soil.
- Harvest ginger rhizomes after eight to ten months, when the foliage begins to yellow and die back, for mature flavor.
Quick answer: You can successfully grow ginger in containers from grocery store rhizomes by selecting firm pieces with ‘eyes,’ planting them in wide, shallow pots with well-draining soil, and providing warm temperatures and consistent moisture. Harvest after eight to ten months when foliage yellows.
In many parts of the United States, particularly in USDA zones 5 through 7, growing tropical plants like ginger (Zingiber officinale) directly in the ground is not practical due to cold winter temperatures that drop below 32°F. However, with a container gardening approach, gardeners from regions as diverse as central Pennsylvania to northern California can successfully cultivate their own ginger, yielding flavorful rhizomes. This method allows for mobility, protecting plants from frost and extending the growing season significantly.
Cultivating ginger in a pot from grocery store rhizomes provides fresh ginger for culinary use. Selecting healthy rhizomes, planting them properly, and providing steady care can yield up to one pound of ginger per plant.
Selecting and preparing your ginger rhizomes
The first step to a successful ginger harvest begins at your local grocery store, a common source for home gardeners across the US. When choosing ginger rhizomes, look for pieces that are firm, plump, and free from soft spots or mold. Aim for rhizomes that are at least two to four inches long so they have sufficient energy reserves for initial growth. It’s ideal if they already show small, greenish “eyes” or growth buds, which are indicators of active growth potential, much like potato eyes. You might find these in the produce section, often costing around $3 to $5 per pound.
Once you have your ginger, prepare it for planting. If the rhizome doesn’t have visible eyes, place it in a warm, indirect light location, such as a kitchen counter, for a few days to encourage sprouting. This process can take anywhere from three to seven days. If your chosen piece is large, you can cut it into smaller sections, each at least one to two inches long and possessing at least one eye. Allow these cut sections to air-dry for 24 to 48 hours; this forms a protective callus over the cut surface, reducing the risk of fungal infections once planted in soil. Calloused cuts are far less likely to rot in damp mix than freshly cut surfaces.
Preparing your ginger for planting
To maximize your chances of success, especially if you’re starting with a larger rhizome, consider these preparation steps. Each section should ideally weigh at least one ounce to ensure it has enough stored energy for initial root and shoot development. For example, if you purchase a five-ounce rhizome, you could potentially get two to three planting pieces from it. This initial preparation supports steady growth, particularly in cooler climates. In zone 5 and similar cold-winter regions, start rhizomes indoors in late winter (February is about right) so the plant has most of its eight-to-ten-month season behind it before you bring the pot in ahead of frost.
- Select firm, blemish-free rhizomes, preferably with visible green growth buds.
- Cut large rhizomes into one- to two-inch pieces, ensuring each piece has at least one “eye.”
- Allow cut surfaces to air-dry for 24 to 48 hours to form a protective callus.
- Buy organic ginger where you can: conventionally grown supermarket ginger is sometimes treated with a sprout inhibitor and may be slow to sprout or fail entirely. Soak prepared pieces in warm water overnight before planting to rehydrate them and help wash off any residue.
- Store unplanted rhizomes in a cool, dry place, around 55°F, for up to two weeks.
Choosing the right container and potting mix
Ginger thrives in wide, shallow containers rather than deep ones, as its rhizomes grow horizontally just beneath the soil surface. A pot that is at least 12 inches in diameter and eight to ten inches deep is ideal for a single ginger plant, allowing ample space for rhizome development. For gardeners with limited space, such as those on a small balcony in an urban area like New York City, a 15-gallon fabric grow bag works well, offering excellent drainage and aeration. Ensure your chosen container has multiple drainage holes at the bottom to prevent waterlogging, which can quickly lead to rot. Terracotta pots can be effective but tend to dry out faster than plastic or glazed ceramic options, so expect to water more often.
The potting mix is just as critical as the container. Ginger prefers a rich, loose, and well-draining soil that retains some moisture. A good blend typically includes about 50% high-quality potting soil, 25% perlite or coarse sand for drainage, and 25% compost or aged manure for nutrient enrichment. This mixture provides the ideal balance for healthy root and rhizome expansion. You can also incorporate a slow-release organic fertilizer with an NPK ratio of 5-10-5 at planting to supply nutrients for the first three to four months.
Creating an optimal growing environment
To ensure your ginger plants flourish, consider the specific needs of this tropical perennial. A pH level between 6.0 and 6.8 is generally preferred, which most standard potting mixes will provide. If you’re mixing your own, a simple soil test kit, available for about $15, can help you confirm the pH. Using a soil moisture meter can also be incredibly helpful for maintaining consistent moisture levels without overwatering, particularly in larger containers that hold more moisture.
- Select a wide, shallow pot, at least 12 inches in diameter and 8 inches deep, with good drainage.
- Use a loose, well-draining potting mix containing 50% potting soil, 25% perlite, and 25% compost.
- Ensure the potting mix pH is between 6.0 and 6.8 for optimal nutrient uptake.
- Consider fabric grow bags for superior aeration and drainage, especially in humid climates.
- Avoid heavy garden soil, which compacts easily and restricts rhizome growth.
Planting and initial care for ginger
Once your rhizomes are prepared and your container is ready, it’s time to plant. Fill your chosen pot with the prepared potting mix, leaving about one to two inches of space from the rim. Place the ginger rhizome sections on top of the soil with the “eyes” pointing upwards, if visible. Space multiple pieces about four to six inches apart in a larger container. Then, cover the rhizomes with one to two inches of potting mix. After planting, water thoroughly until water drains from the bottom of the pot, ensuring the entire soil profile is moistened. This initial watering helps settle the soil around the rhizomes.
Ginger requires warmth to sprout and grow vigorously. Maintain a consistent soil temperature between 75°F and 85°F for optimal germination. In cooler climates, like USDA zone 6, you might need to use a heating mat, which can increase soil temperature by 10°F to 20°F, or place the pot in a warm, sunny window. Sprouting can take anywhere from a few weeks to several months, requiring patience. During this period, keep the soil consistently moist but not waterlogged. A good rule of thumb is to water when the top one inch of soil feels dry to the touch.
Encouraging early growth and establishment
To give your ginger the best start, especially during the first two to three months, ensure it receives adequate light. While ginger prefers partial shade in very hot climates, young plants need bright, indirect light for at least six hours a day. A south-facing window with a sheer curtain or a spot on a covered porch can work well. If natural light is limited, a grow light for 12 to 14 hours daily can supplement, ensuring robust initial growth. You can find useful tools like a soil moisture meter to help monitor conditions precisely.
- Plant rhizome sections one to two inches deep, with eyes facing up, four to six inches apart.
- Water thoroughly after planting to settle the soil around the rhizomes.
- Maintain soil temperatures between 75°F and 85°F for successful sprouting.
- Provide bright, indirect light for at least six hours daily to young plants.
- Keep the potting mix consistently moist but never soggy to prevent rot.
Ongoing care, light, and nutrients
Once your ginger plants have sprouted, their care shifts to consistent watering, appropriate light exposure, and regular feeding. Ginger is a tropical plant and appreciates consistent moisture, especially during its active growing season from spring through fall. In hot, dry climates like those in Arizona, you might need to water daily, while in more humid regions like the Gulf Coast, every two to three days might suffice. However, always ensure the top one inch of soil dries out slightly between waterings to prevent root rot. Overwatering is a common mistake that can easily kill a ginger plant.
Light requirements for ginger are nuanced. While it appreciates warmth, it generally prefers partial shade, especially during the hottest parts of the day in regions with intense summer sun, such as parts of Texas or California’s Central Valley. Aim for four to six hours of bright, indirect sunlight daily. If growing indoors, a location near a window that receives filtered light or under a grow light set for 12 to 14 hours can provide adequate illumination. Temperatures should ideally remain between 70°F and 85°F; temperatures below 50°F will slow or stop growth.
Feeding your ginger for steady growth
Ginger is a heavy feeder, particularly during its active growth phase. Begin fertilizing about six to eight weeks after planting, or once the plants are about six inches tall. Use a balanced liquid organic fertilizer, such as a 5-5-5 or 10-10-10 NPK formulation, diluted to half strength, every two to four weeks. Alternatively, you can top-dress with a one-inch layer of compost every two months. This consistent nutrient supply supports the development of both foliage and the underground rhizomes.
- Water consistently, allowing the top one inch of soil to dry out between waterings.
- Provide four to six hours of bright, indirect sunlight daily, avoiding harsh afternoon sun.
- Maintain ambient temperatures between 70°F and 85°F for optimal growth.
- Fertilize every two to four weeks with a diluted liquid organic fertilizer once plants are established.
- Monitor for pests like spider mites, especially in dry indoor environments, and treat with insecticidal soap.
Harvesting your homegrown ginger
Ginger rhizomes are typically ready for harvest eight to ten months after planting, though you can “snip” small pieces earlier for fresh use. The most common indicator that your ginger is mature is when the foliage begins to yellow and die back, usually in late fall or early winter. In zone 5 and other cold-winter regions that point falls well after your first frost, so move the pot indoors (such as to a bright room or a heated garage) once night temperatures approach 50°F, and let the foliage finish dying back under cover. A single hard freeze outdoors will kill the top growth and end an eight-to-ten-month crop early. At this point, the plant has directed most of its energy into developing the underground rhizomes, resulting in a more potent flavor and larger size. A single well-grown plant can yield between 0.5 to 1 pound of fresh ginger.
To harvest, carefully tip the entire pot onto a tarp or newspaper. Gently shake off the potting mix from the rhizomes. You will see a network of mature ginger pieces. Separate the larger, mature rhizomes for use, leaving some smaller pieces with “eyes” attached to the root ball if you wish to replant them for the next season. This practice of replanting small sections can extend your ginger supply indefinitely, provided you maintain suitable growing conditions.
Storing your fresh ginger harvest
After harvesting, clean the ginger rhizomes by gently brushing off any remaining soil. Avoid washing them until just before use, as moisture can encourage mold growth. For short-term storage of up to three weeks, place unpeeled ginger in a paper bag in the crisper drawer of your refrigerator at about 40°F. For longer storage, you have several options. You can freeze whole, unpeeled pieces for up to six months, making them easy to grate directly from frozen. Alternatively, peel and slice ginger, then store it in a jar covered with sherry or vodka in the refrigerator for several months.
- Harvest ginger eight to ten months after planting, when foliage yellows and dies back.
- Carefully remove the entire root ball from the pot and gently separate mature rhizomes.
- Save smaller rhizome pieces with eyes to replant for a continuous harvest.
- Store unpeeled ginger in a paper bag in the refrigerator for up to three weeks.
- Freeze whole ginger rhizomes for up to six months for long-term preservation.
Container vs. in-ground ginger cultivation in US climates
Feature | Container growing (USDA Zones 5-11) | In-ground growing (USDA Zones 8-11) |
|---|---|---|
Climate adaptability | Highly adaptable; can be moved indoors below 50°F. | Requires consistently warm temperatures, above 60°F. |
Space requirement | Ideal for small spaces like balconies or patios, minimum 12-inch pot. | Needs open garden space, minimum 1 sq ft per plant. |
Soil control | Complete control over potting mix composition and drainage. | Dependent on native soil quality; amendments may be needed. |
Watering frequency | Often requires more frequent watering, sometimes daily in hot climates. | Less frequent watering once established, especially in humid areas. |
Pest & disease management | Easier to isolate and treat individual plants. | Can be more challenging to manage spread in open garden beds. |
Harvesting ease | Very easy; simply tip the pot and collect rhizomes. | Requires digging, potentially damaging some rhizomes. |
Optimal Yield: A single well-maintained ginger plant in a 12-inch pot can produce between 0.5 to 1 pound of fresh rhizomes after eight to ten months of growth.
Temperature Range: Ginger thrives in temperatures between 70°F and 85°F, with growth significantly slowing below 50°F.
Frequently asked questions
Can I grow ginger from any grocery store rhizome?
Yes, you can typically grow ginger from any firm, plump rhizome purchased at a grocery store, though conventionally grown supermarket ginger is sometimes treated with a sprout inhibitor, so organic ginger is the safer bet. Look for pieces that are at least two inches long and ideally show small green “eyes” or growth buds for the best chance of successful sprouting within a few weeks.
How long does it take for ginger to sprout?
Ginger can take anywhere from a few weeks to several months to sprout, depending on conditions. Maintaining a consistent soil temperature between 75°F and 85°F significantly speeds up the process, often resulting in sprouts within four to eight weeks.
What kind of light does potted ginger need?
Potted ginger prefers bright, indirect light for about four to six hours a day. Direct, intense afternoon sun, especially in hot climates like those in the American Southwest, can scorch the leaves; filtered light is generally best for healthy growth and rhizome development.
How often should I water my container ginger?
Water your container ginger regularly to keep the soil consistently moist but not waterlogged. Allow the top one inch of soil to dry out between waterings; this might mean watering daily in hot, dry climates or every two to three days in more temperate regions.
When is the best time to harvest ginger?
The best time to harvest ginger is typically eight to ten months after planting, when the plant’s foliage starts to yellow and die back. At this stage, the rhizomes have fully matured and developed their characteristic flavor and size, often yielding up to one pound per plant.
Can I replant ginger from my harvest?
After harvesting, select smaller, healthy rhizome pieces with visible “eyes” and replant them in fresh potting mix. This allows you to continue your ginger cultivation cycle indefinitely, potentially providing a fresh supply for many years.
References
- USDA Natural Resources Conservation Service (2024). USDA Natural Resources Conservation Service.