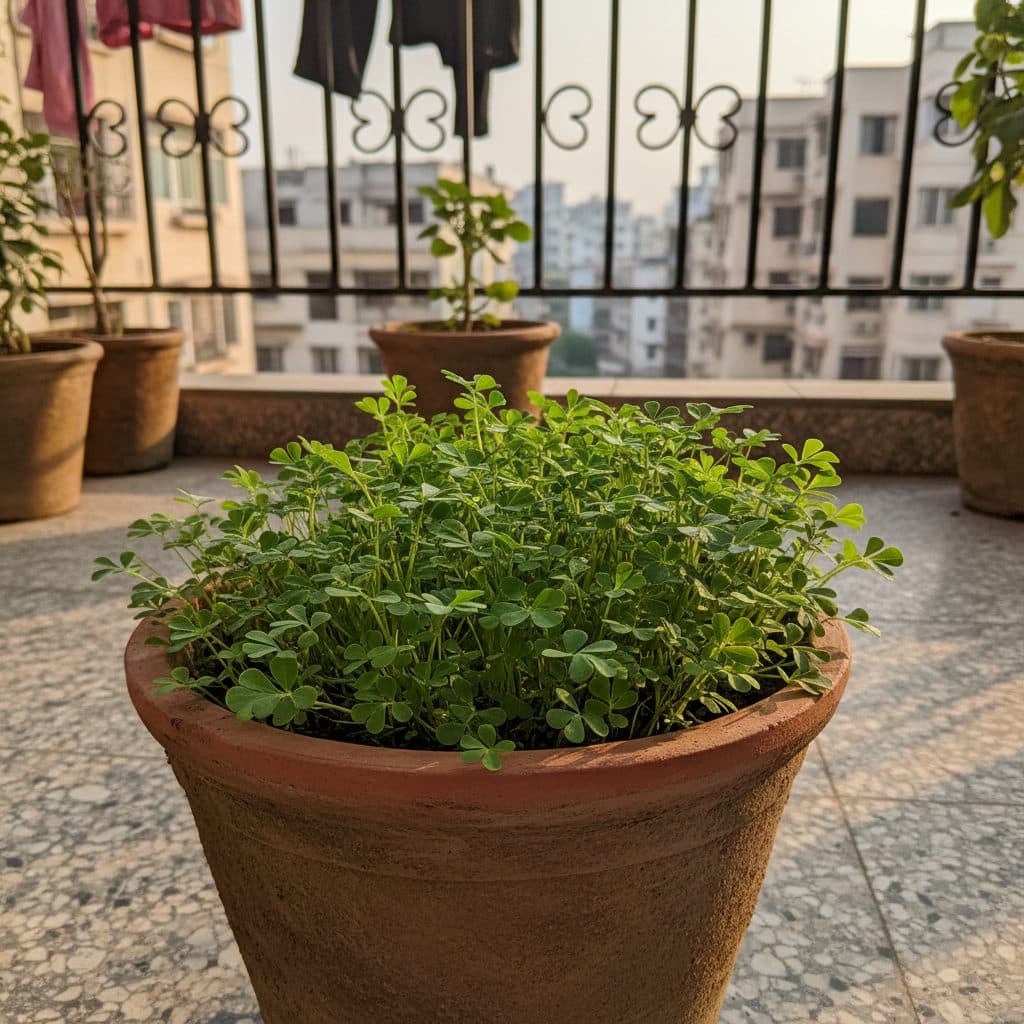
Key takeaways
- Grow fresh methi (Trigonella foenum-graecum) directly from culinary fenugreek seeds found in your kitchen spice box (masala dabba).
- October to February (the Indian rabi winter season) provides the optimal temperature window (15°C to 25°C) for fast growth without premature flowering.
- Choose wide, shallow containers such as 60x30x15 cm rectangular grow bags or broad terracotta bowls (gamlas) to accommodate methi's shallow root system.
- Prepare a lightweight, porous potting mix of 40% coco peat, 30% aged cow dung manure (gobar khad), 28-29% garden soil, and 1-2% neem cake.
- Pre-soak seeds for 6 to 8 hours, broadcast evenly across leveled soil, and cover lightly with 0.5 cm of fine compost.
- Harvest tender young leaves 21 to 28 days after sowing (20 to 25 days in warm weather) using the cut-and-come-again technique, leaving the lowest leaf node intact for a second harvest.
Quick answer: To grow methi in pots, soak whole kitchen fenugreek seeds for 6 to 8 hours and broadcast them evenly across a wide, shallow (15 cm deep) container filled with a coco peat, aged compost, and neem cake mix. Cover lightly with 0.5 cm of soil, place in 4 to 5 hours of morning sun, water gently with a spray bottle, and harvest tender leafy greens in 21 to 28 days.
Fresh fenugreek leaves, known across India as methi, are a winter staple used in dishes like methi thepla, aloo methi, and methi paratha. Packed with dietary fibre, iron, and minerals, home-grown methi offers an earthy, aromatic flavour that is fresher than market-bought bunches.
Growing methi in pots is a fast, reliable project for container gardening. Unlike long-season vegetables that require months of care and deep containers, methi matures from seed to harvest in three to four weeks on a windowsill or apartment balcony.
For wide rectangular grow bags on a rooftop terrace or terracotta pots on a sunny balcony, this guide explains pantry seed selection, container preparation, broadcasting methods, and multi-cut harvesting techniques.
+-------------------------------------------------------------+
|              METHI IN POTS: 25-DAY PRODUCTION CYCLE         |
|                                                             |
|   DAY               GROWTH STAGE                            |
|   ---               ------------                            |
|   Day 0             Soak pantry seeds (6-8 hours) & sow     |
|   Days 2 - 4        Rapid germination (white root tips)     |
|   Days 5 - 10       Cotyledons open (Microgreens stage)     |
|   Days 11 - 20      First true serrated leaves develop      |
|   Days 21 - 28      First Cut-and-Come-Again Leaf Harvest   |
|   Days 35 - 42      Second flush of tender green shoots     |
+-------------------------------------------------------------+
Can you grow methi from regular kitchen spice seeds?
A practical advantage of growing methi at home is that you do not need to buy specialised nursery seed packets:
+-------------------------------------------------------------+
|                 KITCHEN SEED SELECTION RULES                |
|                                                             |
|   SUITABLE FOR SOWING               UNSUITABLE SEED STOCK   |
|   -------------------               ---------------------   |
|   - Whole golden-yellow seeds       - Broken or powdered    |
|   - Fresh culinary spice batches    - Chemically polished   |
|   - Clean, untreated pantry jars    - Old stale seeds (>2yr)|
+-------------------------------------------------------------+- Pantry seed viability: Whole, untreated fenugreek seeds stored in kitchen spice jars (masala dabba) possess high germination rates (often exceeding 85%) provided they are under one to two years old.
- Pre-soaking protocol: Soak seeds in a bowl of room-temperature water for 6 to 8 hours before sowing. Soaking softens the hard outer seed coat, initiates cellular hydration, and speeds up germination by two to three days.
- Commercial cultivars: If buying packaged seeds instead of kitchen stock, 'Pusa Early Bunching' is a quick-growing, upright selection with bold leaves, well suited to cut-and-come-again harvesting in containers.
To coordinate leafy green beds with companion terrace layouts, consult our guide on kitchen garden layout for Indian homes.
When is the best season to grow methi in India?
Methi is a cool-season annual that thrives best when daytime temperatures range between 15°C and 25°C:
+-------------------------------------------------------------+
|                 SEASONAL SOWING WINDOWS (INDIA)             |
|                                                             |
|   SEASON         MONTHS         GROWING PERFORMANCE         |
|   ------         ------         -------------------         |
|   Rabi (Winter)  Oct - Feb      OPTIMAL - Lush, sweet leaves|
|   Zaid (Summer)  March - May    Partial shade needed; fast  |
|                                 bolting & bitter foliage    |
|   Kharif (Monsoon)July - Sept   Ensure sharp pot drainage   |
+-------------------------------------------------------------+- Rabi season (Peak window: October to February): This is the ideal time across the northern plains, central India, and southern plateaus. Mild sunshine and cool nights encourage succulent, broad green leaves with minimal bitterness.
- Managing summer heat: If growing during warm months (March to May), place pots in bright, indirect light or morning-only sun. Temperatures exceeding 32°C cause methi to bolt prematurely into yellow-white flowers, turning the foliage tough and astringent.
For gardeners managing hot, exposed afternoon spaces, review suitable selections in west-facing balcony plants.
What container size and potting mix does methi need?
Methi has a shallow, delicate fibrous root system that spreads horizontally within the top 10 to 15 cm of soil.
+-------------------------------------------------------------+
|                 CONTAINER & SOIL SPECIFICATIONS             |
|                                                             |
|   PARAMETER             SPECIFICATION                       |
|   ---------             -------------                       |
|   Container Depth       12 to 15 cm (Shallow is ideal)      |
|   Container Shape       Wide rectangular tray / broad bowl  |
|   Coco Peat (Washed)    40% by volume (Moisture retention)  |
|   Aged Gobar Khad       30% by volume (Slow-release nitrogen|
|   Garden Soil / Loam    28-29% by volume (Mineral structure)|
|   Neem Cake Powder      1-2% by vol (~100 g/50 L mix)       |
+-------------------------------------------------------------+
Container selection
- Avoid deep, narrow buckets. Choose wide, shallow rectangular HDPE grow bags (such as 60 cm length x 30 cm width x 15 cm depth) or shallow terracotta bowls (gamlas).
- Ensure the bottom of the container has multiple clear drainage holes to prevent waterlogging.
The ideal aerated potting mix
- 40% Washed Coco Peat: Retains essential moisture without compacting, allowing fine root hairs to navigate easily.
- 30% Aged Organic Manure: Well-rotted cow dung fertilizer (gobar khad) or vermicompost provides gentle organic nitrogen for lush vegetative leaf growth.
- 28% to 29% Red Soil or Local Garden Soil: Provides physical stability and trace minerals.
- 1% to 2% Neem Cake Powder (Neem Khali): Acts as a gentle bio-fungicide and pest barrier; avoid exceeding 2% as concentrated neem cake can burn tender methi roots.
+-------------------------------------------------------------+
|                 SHALLOW TRAY SOWING CROSS-SECTION           |
|                                                             |
|   .. . . .. . . 0.5 cm Light Coco Peat Top Layer . .. . . . |
|   -   *   *   *   * (Evenly Broadcast Methi Seeds) *   *   *|
|   ========================================================= |
|   [ Aerated Potting Mix: Coco Peat + Gobar Khad: 12-15 cm ] |
|   ========================================================= |
|   [ Drainage Holes Elevated on Bricks ]                     |
+-------------------------------------------------------------+
How do you sow and broadcast methi seeds in pots?
Sowing methi requires an even, gentle hand to avoid overcrowded seed clumps that rot:
+-------------------------------------------------------------+
|                 FIVE-STEP BROADCASTING METHOD               |
|                                                             |
|   STEP              ACTION                                  |
|   ----              ------                                  |
|   1. Fill & Level   Fill tray to 3 cm below rim; level flat |
|   2. Pre-Water      Moisten soil thoroughly before seeding  |
|   3. Scatter Seeds  Broadcast soaked seeds 1 cm apart       |
|   4. Top Cover      Sprinkle 0.5 cm fine coco peat over seed|
|   5. Mist Water     Spray gently with mist bottle           |
+-------------------------------------------------------------+- Prepare the surface: Fill your container with potting mix, leaving 3 cm of space below the rim. Gently press and level the soil surface with your palm.
- Broadcast evenly: Scatter the pre-soaked seeds evenly across the surface. Aim for a density where seeds sit approximately 1 cm apart. Avoid dumping seeds in dense clusters, which invites fungal damping-off.
- Cover lightly: Sprinkle a thin 0.5 cm layer of fine coco peat or sieved vermicompost over the seeds. Methi seeds need light soil cover; burying them too deeply exhausts their energy reserves.
- Gentle watering: Water the tray using a handheld spray bottle or a watering can fitted with a fine rose. A heavy jet of water will wash the seeds into corners and expose them.
- Sunlight placement: Place the pot in a bright, sheltered position. Seeds will germinate within 48 to 72 hours. Once green shoots emerge, move the container to receive 4 to 5 hours of direct morning sunlight.
To pair your greens with companion climbers, read our complete guide on how to grow bottle gourd.
How and when should you harvest methi for multiple flushes?
Methi can be harvested at two distinct stages depending on your culinary requirements:
+-------------------------------------------------------------+
|                 HARVEST STAGES & TECHNIQUES                 |
|                                                             |
|   STAGE             TIMING          METHOD                  |
|   -----             ------          ------                  |
|   Microgreens       8 to 12 Days    Snip at soil line       |
|   Maincrop Greens   21 to 28 Days   Cut 2-3 cm above base   |
|   Second Flush      35 to 42 Days   Cut regrowth            |
+-------------------------------------------------------------+- Microgreens (8 to 12 days): Harvest when the two rounded embryonic seed leaves (cotyledons) are fully open and green. Snip at soil level for nutrient-dense salad garnishes.
- Baby methi greens (21 to 28 days): The standard harvesting window. Plants will stand 10 to 15 cm tall with lush clusters of three-lobed, serrated true leaves.
- The cut-and-come-again technique: Never uproot the entire plant if you want multiple harvests. Use clean kitchen scissors to snip the stems 2 to 3 cm above the soil surface, leaving the lowest leaf node intact to regenerate new shoots.
- Regrowth care: After cutting, sprinkle a handful of vermicompost or apply a diluted liquid mustard cake fertilizer (sarson khali tea) and water lightly. A well-fed tray gives two to three cuttings; once the stems turn woody or start bolting, pull the batch and re-sow.
To deter common balcony insects organically, consider planting companion marigolds as outlined in how to grow marigold from seeds alongside fruiting crops like how to grow brinjal at home.