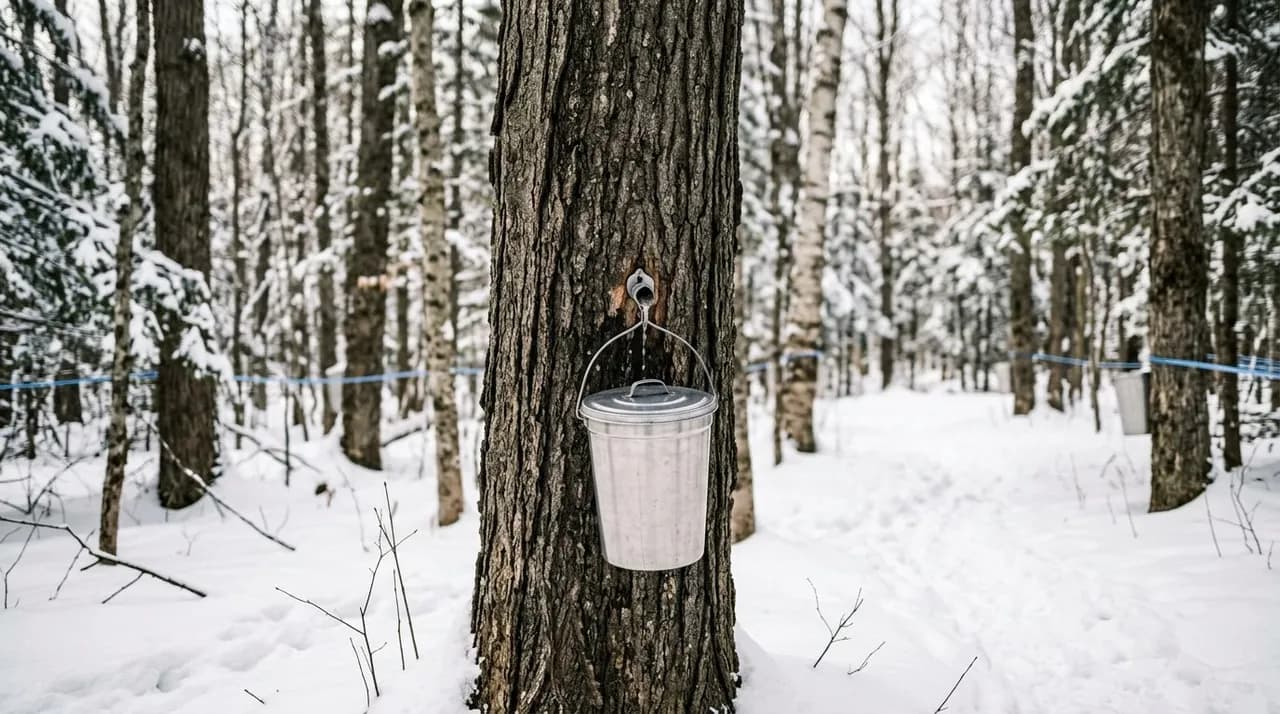
Key takeaways
- Tap mature maple trees measuring at least 10 to 12 inches (25 to 30 cm) in diameter at breast height (DBH) for a single tap.
- Tapping requires the late winter freeze-thaw cycle: freezing nights below 0°C (32°F) followed by sunny days above 0°C (32°F).
- Drill a 1.5 inch (3.8 cm) deep hole into the sapwood (excluding bark) using a 5/16-inch clean drill bit, angling slightly upward for sap drainage.
- Evaporate sap outdoors using the 40:1 ratio (approximately 40 litres of raw sap yields 1 litre of finished pure maple syrup).
- Finished syrup reaches completion at 104°C (219°F), exactly 4°C (7°F) above the boiling point of water, at roughly 66° Brix density.
Quick answer: To tap a maple tree, drill a 1.5 inch (3.8 cm) deep hole into sapwood on the sunny side of a mature maple tree (at least 10 inches in diameter) during late winter freeze-thaw cycles. Insert a spile, collect the clear sap daily in food-grade buckets, and boil down outdoors at a 40:1 ratio until it reaches 104°C (219°F).
For cold-climate homesteaders and woodland stewards across Canada and northern temperate regions, tapping maple trees marks the very first harvest of the agricultural year. As deep winter snow begins to melt under late-winter sunshine, the dormant hardwood forest awakens with internal hydraulic pressure.
Known botanically within the genus Acer, native maple trees convert stored starch in their root systems into sweet, sucrose-rich sap that flows upward through the xylem tissue to feed emerging leaf buds.
Boiling sap into maple syrup requires no industrial machinery. With accurate tree identification, sustainable tapping guidelines, and outdoor evaporation, you can produce syrup from your own trees.
Identifying maple species: sugar, black, and red maples
While any native maple species can technically be tapped, sugar concentration and flavor profiles vary significantly across species:
+-----------------------------------------------------------------------+
|                    MAPLE SPECIES COMPARISON FOR TAPPING               |
+-------------------+-----------------------+---------------------------+
| SPECIES           | SAP SUGAR CONTENT     | SAP-TO-SYRUP RATIO        |
+-------------------+-----------------------+---------------------------+
| Sugar Maple       | High (2.0% to 3.0%)   | ~35:1 to 40:1 (Gold Std)  |
| Black Maple       | High (2.0% to 2.8%)   | ~40:1                     |
| Red Maple         | Moderate (1.5% - 2.0%)| ~45:1 to 50:1 (Early Bud) |
| Silver Maple      | Low to Mod (1.5%)     | ~50:1 to 60:1             |
| Paper Birch       | Very Low (~1.0%)      | ~80:1 to 100:1 (Late Run) |
+-------------------+-----------------------+---------------------------+
1. Sugar maple (Acer saccharum)
Sugar maple is the primary tree used for syrup production. Sugar maple sap carries the highest natural sucrose concentration (typically 2% to 3% or higher), requiring the least boiling time per litre of finished syrup. It has deeply furrowed, dark grey bark on mature trunks and five-lobed leaves with rounded, U-shaped notches between lobes.
2. Black maple (Acer nigrum)
Closely related to the sugar maple and producing nearly identical high-sugar sap. It is distinguished by three-lobed drooping leaves with downy undersides.
3. Red maple (Acer rubrum)
Commonly found across moist soils and mixed woodlots. Red maple sap carries slightly lower sugar content (around 1.5% to 2%), meaning more sap must be evaporated. Red maples break winter dormancy earlier in spring; when leaf buds begin to swell and turn red, stop collecting immediately, as sap turns bitter ("buddy").
4. Tapping birch trees (Betula papyrifera)
Paper birch and yellow birch trees can also be tapped. However, birch sap runs later in spring (after the maple season concludes), contains fructose and glucose rather than sucrose, and carries a low sugar concentration (~1%), requiring an 80:1 to 100:1 boiling ratio to produce dark, molasses-like birch syrup.
Tree sizing, taphole counts, and the freeze-thaw weather cycle
Sustainable tapping protects the long-term health, structural timber value, and growth rate of the tree:
+-----------------------------------------------------------------------+
|                   SUSTAINABLE TAPHOLE GUIDELINES                      |
+-------------------+-----------------------+---------------------------+
| TRUNK DIAMETER    | TRUNK CIRCUMFERENCE   | MAXIMUM PERMITTED TAPS    |
+-------------------+-----------------------+---------------------------+
| Under 10 inches   | Under 31 inches       | 0 (DO NOT TAP - TOO SMALL)|
| 10 to 17 inches   | 31 to 53 inches       | 1 Taphole                 |
| 18 to 24 inches   | 54 to 75 inches       | 2 Tapholes                |
| Over 25 inches    | Over 76 inches        | 3 Tapholes (Maximum)      |
+-------------------+-----------------------+---------------------------+
Measuring tree diameter (DBH)
Measure your tree at Diameter at Breast Height (DBH), approximately 4.5 feet (1.4 metres) above ground level. Wrap a standard sewing tape measure around the trunk to find the circumference, then divide by 3.14 (pi) to determine diameter. Never tap a tree under 10 inches (25 cm) in diameter; undersized trees suffer chronic stress from taphole wounding. Commercial and extension guidance increasingly recommends sticking to one tap per tree up to 50 cm (20 in) DBH to minimize long-term trunk wounding.
The essential freeze-thaw weather window
Sap flow is driven by stem pressure fluctuations governed by freezing and thawing cycles:
- Freezing Nights (<0°C / 32°F): Cold temperatures cause gases inside the wood vessels to contract and dissolve, creating negative pressure that draws water and nutrients from the soil up into the root crown and trunk.
- Thawing Days (>0°C / 32°F): Warm daytime temperatures (ideally 4°C to 8°C / 40°F to 45°F) cause wood gases to expand, creating positive pressure that pushes sugary sap outward through any wound or taphole.
- Duration: The tapping window typically runs 3 to 6 weeks between late winter and early spring across eastern Canada and the northern United States, though the actual flow days within that period usually number only 10 to 20.
Step-by-step tapping procedure and sap collection
Equip yourself with clean, food-grade tapping gear before heading into the snow-covered woods:
[ Step 1: Drill Hole ]   --> [ Step 2: Clear Shavings ] --> [ Step 3: Seat Spile ] --> [ Step 4: Hang Bucket ]
5/16 in bit, 1.5-2 in deep    Blow out wood chips clean      Tap gently with mallet      Daily food-grade collection
Angle slightly upward        Check for clean white wood     Do not split trunk bark     Keep sap chilled <4°C
1. Equipment needed
- Cordless drill with a sharp 5/16-inch (modern small-diameter conservation spile) or 7/16-inch high-speed wood drill bit.
- Food-grade metal or nylon plastic spiles (taps) with bucket hooks.
- Food-grade 5-gallon collection buckets with lids, or dedicated plastic tubing drop lines.
- Clean rubber mallet.
2. Drilling the taphole
- Choose a healthy spot on the trunk, preferably on the south or east-facing side of the tree where morning sun warms the bark first.
- Position the taphole 2 to 4 feet above the ground. If the tree was tapped in previous years, locate the new hole at least 6 inches (15 cm) horizontally and 12 inches (30 cm) vertically away from old, healed scars.
- Drill 3.8 cm (1.5 in) into the sapwood, excluding the bark, angling the drill bit slightly upward (roughly 5 degrees) so sap flows outward by gravity.
- Inspect the wood shavings coming out of the hole: they should be clean, pale cream-white. If shavings are dark brown, the wood is decayed; remove the bit and choose a different location.
3. Seating the spile and hanging buckets
- Blow gently into the taphole to clear loose sawdust shavings.
- Insert the tapered end of the spile into the hole.
- Tap the spile gently with your mallet until it seats firmly with a snug, solid sound. Do not hammer forcefully, which splits the bark and causes sap to leak behind the tap.
- Hang your covered collection bucket on the hook. On a good run day, a single taphole can produce 5 to 15 litres of sap in 24 hours.
Boiling down sap: the outdoor evaporation method
Turning thin, watery sap (which looks and tastes like crisp spring water with a hint of sweetness) into thick amber syrup requires removing roughly 95% of its water content:
+-----------------------------------------------------------------------+
|                    THE 40:1 SAP EVAPORATION RATIO                     |
+-----------------------------------------------------------------------+
|  40 Litres Raw Maple Sap (2% Sugar)  -->  Boiled Outdoors             |
|  --> 39 Litres Water Evaporated as Steam                              |
|  --> 1 Litre Finished Pure Maple Syrup (66° Brix Density at 104°C)    |
+-----------------------------------------------------------------------+
The golden rule: always evaporate outdoors
Never boil large volumes of raw maple sap on an indoor kitchen stove. Evaporating 40 to 100 litres of water indoors will saturate household drywall, strip wallpaper, and leave a sticky sugar film across ceilings and cabinetry. Perform the bulk evaporation outdoors using a dedicated wood-fired arch, an outdoor propane burner, or a homemade evaporator pan over a fire pit.
Evaporation and finishing steps
- Continuous Boiling: Maintain a vigorous rolling boil in wide, shallow stainless steel pans. As water evaporates and the level drops, continuously ladle in warm, fresh pre-heated sap to keep the boil active.
- Finishing Indoors: When the liquid in your outdoor pan reduces down to a golden-amber concentrate (the final 2 to 4 litres), transfer it indoors to a deep pot on the kitchen stove for precise temperature control.
- The 104°C (219°F) Rule: Monitor the boiling liquid using an accurate digital thermometer or a syrup hydrometer (calibrated to the Brix or Baumé scale). Finished maple syrup boils at 4°C (7.2°F) above the boiling point of water. Because barometric pressure changes with weather and altitude, boil a pan of plain water first to find today's exact baseline, then add 4°C (7.2°F) to determine your finish temperature (typically around 104°C / 219°F at sea level), reaching 66° Brix.
Filtering, hot packing, and post-season tree recovery
Proper finishing guarantees clear, shelf-stable syrup that stores for years:
- Hot Filtering: Hot syrup naturally precipitates "sugar sand" (nitre / mineral crystals composed primarily of calcium malate). Pour hot syrup (at least 85°C / 185°F) through a multi-layer wool or synthetic felt syrup filter cone into sterile glass canning jars.
- Hot Packing and Sealing: Fill jars to within 0.5 cm of the rim, seal with clean lids, and invert jars for 5 minutes so hot syrup sterilises the lid underside. Sealed jars store indefinitely at room temperature in a dark pantry. For complementary cold-storage techniques, see our guide on how to store potatoes.
- Post-Season Tap Removal: When daytime temperatures remain warm and night frosts cease (or when sap turns cloudy and woody), pull the spiles cleanly out of the tree. Do not plug or seal the taphole with wax, tar, or dowels. The tree's natural compartmentalization mechanisms will heal the small hole within one to two growing seasons.
- Homestead Integration: To explore complementary homestead food preservation systems, review our guides on root cellaring for no-power food storage and canning potatoes. For managing seasonal gluts across crops, consult preserving garden glut crops.