Key takeaways
- Sheet mulching effectively suppresses weeds by 90% or more, reducing the need for manual weeding or herbicides.
- The layered approach builds soil organic matter, increasing water retention by 20% to 50% and improving soil structure by 30%.
- Cardboard forms an effective weed barrier, breaking down over several months to add carbon to the soil.
- A minimum of 6 inches of organic materials is recommended for effective weed suppression and soil building.
- This method is ideal for establishing new garden beds, especially for perennial crops like asparagus, with minimal soil disturbance.
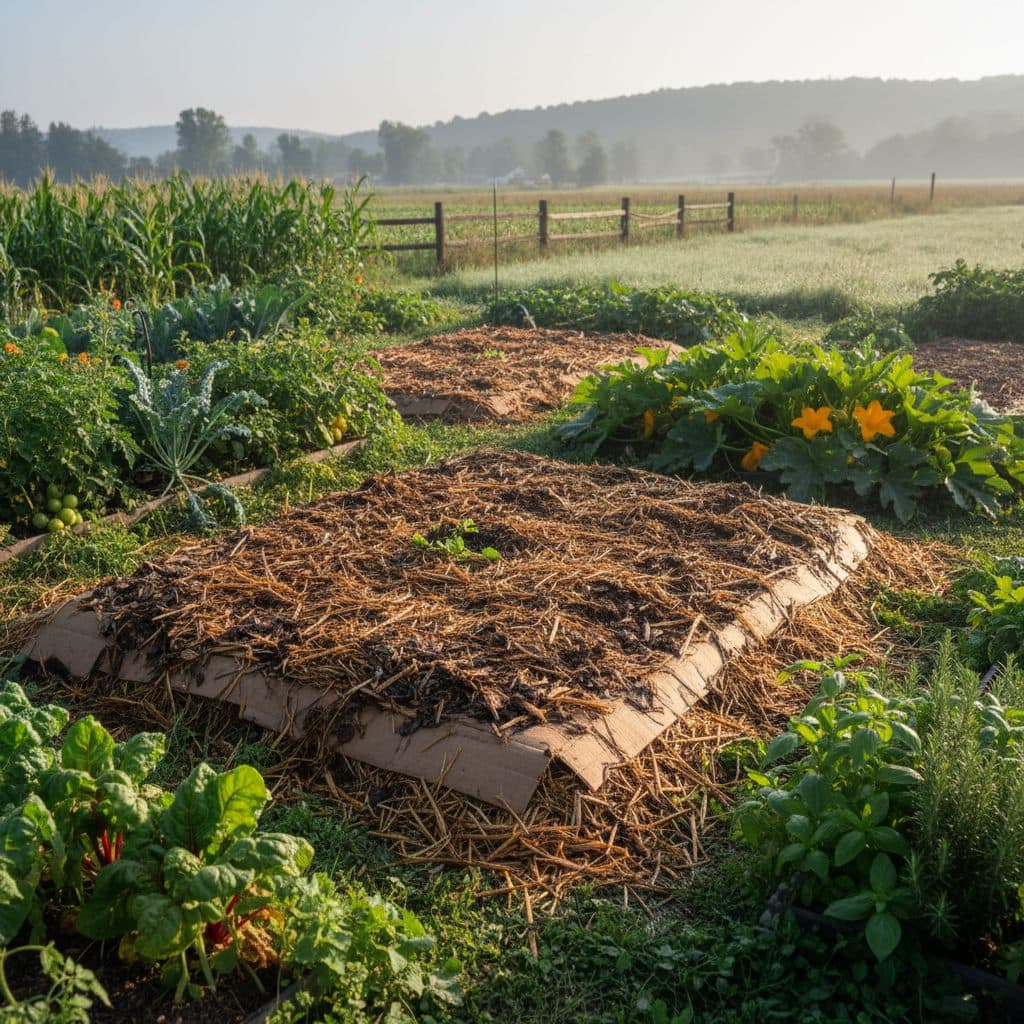
Quick answer: Sheet mulching, also known as lasagna gardening, improves soil structure and suppresses weeds by layering organic materials, with cardboard as a primary barrier. This method builds soil organic matter, increases water retention, and fosters beneficial microbial communities.
In the humid climate of the Pacific Northwest, specifically USDA zone 8b, gardeners often battle persistent weeds that can emerge within days of tilling a new bed. Traditional methods of weed removal, like repeated cultivation or chemical sprays, can deplete soil organic matter by 1% to 3% annually and harm beneficial soil microbes. Sheet mulching, also known as ‘lasagna gardening,’ offers a practical, less labor-intensive approach to transforming a weedy patch into a productive garden bed, reducing initial weed pressure by up to 90%.
This method leverages layers of organic materials, with cardboard as a primary weed barrier, to gradually break down and enrich the soil. It’s a technique that builds soil health over time, increasing its water-holding capacity by 20% to 50% and supporting soil life beneath the surface. For growers in regions like the Midwest, where soil compaction is a common issue, sheet mulching can improve soil structure by 30% to 40% in just one growing season, preparing the ground for vigorous plant growth without turning a single spadeful of earth.
The case for sheet mulching: building soil, not just smothering weeds
When faced with a neglected patch of ground, perhaps covered in tough perennial weeds like broadleaf plantain or tenacious purslane, the thought of digging it all out can be daunting. Sheet mulching provides a less strenuous alternative, allowing you to establish a new garden bed with minimal physical labor. This method works by creating an environment where existing weeds are deprived of light and air, effectively smothering them over several weeks or months. In studies from the USDA Natural Resources Conservation Service, sheet mulching has been shown to reduce weed growth by 90% or more, making it a highly effective organic weed management strategy.
Beyond weed suppression: soil health benefits
The true value of sheet mulching extends far beyond just killing weeds; it’s a powerful tool for soil regeneration. By layering organic materials, you’re essentially creating a slow-release compost pile directly on your garden site. This process introduces vast amounts of organic matter, which is essential for healthy soil. Organic matter can increase the soil’s water-holding capacity by 20% to 50%, a significant advantage in arid regions like Arizona or during drought conditions in the Central Plains. It also improves soil structure, aeration, and nutrient availability, supporting a diverse microbial community that aids plant health. A 1988 study even noted significant improvements in broadleaved tree establishment when sheet mulching was employed, demonstrating its long-term benefits for plant vigor.
- Reduces manual weeding by up to 90%.
- Increases soil organic matter by 1% to 5% annually.
- Boosts soil water retention by 20% to 50%.
- Improves soil structure and aeration.
- Supports beneficial soil microorganisms.
Gathering your materials: cardboard and organic layers
The success of your sheet mulching project hinges on selecting the right materials. The foundational layer is typically cardboard, which acts as a dependable weed barrier. When sourcing cardboard, prioritize plain, unprinted boxes, or remove any plastic tape and glossy labels. While cardboard has been a common material for various purposes, including packaging, since at least 2017, its utility in gardening lies in its ability to block light and suppress weeds like the persistent Canada thistle, while still allowing water and air to penetrate. Avoid waxy or heavily dyed cardboard, as these might contain undesirable chemicals that could leach into your soil.
Layering for success: carbon and nitrogen sources
Beyond cardboard, you’ll need a variety of organic materials, broadly categorized into ‘brown’ (carbon-rich) and ‘green’ (nitrogen-rich) layers. Brown materials include things like dried leaves, straw, wood chips, and shredded newspaper. If you have access to a 15 HP Heavy-Duty Petrol Branch Chipper, you can easily create your own wood chips from fallen branches, which are excellent for long-term decomposition. Green materials consist of grass clippings, kitchen scraps, aged manure, and even a thin layer of fermented soybean meal organic fertilizer. Aim for a carbon-to-nitrogen ratio of roughly 30:1 for optimal decomposition, though exact precision isn’t necessary. For a 100 square foot bed, you might need 10 to 15 large cardboard boxes and 2 to 3 cubic yards of mixed organic matter.
- Plain, unprinted cardboard boxes.
- Dried leaves or straw (brown layer).
- Wood chips or shredded branches (brown layer).
- Grass clippings or kitchen scraps (green layer).
- Aged manure or compost (green layer).
Layering it up: a step-by-step guide
The actual layering process is straightforward, but attention to detail ensures maximum effectiveness. First, clear any large debris, but don’t worry about removing every single weed; the cardboard will take care of them. For a 10 ft by 10 ft bed, begin by watering the area thoroughly until the soil is moist to a depth of 6 to 8 inches. This initial moisture is vital for kickstarting the decomposition process and attracting beneficial organisms.
The layering sequence for optimal results
Next, lay down a 1 to 2-inch layer of nitrogen-rich material directly on the watered soil. This could be grass clippings, aged manure, or a thin scattering of fermented soybean meal. This ‘green’ layer provides nutrients for the soil microbes that will begin breaking down the cardboard. Overlap the edges of each piece by at least 4 to 6 inches to prevent weeds from finding gaps. Wet the cardboard thoroughly as you lay it down to help it conform to the ground and deter pests. Finally, add a substantial 4 to 6-inch layer of mixed brown materials (wood chips, straw, or dried leaves) to cap off the bed. The total depth of your layers should be at least 6 inches for effective weed suppression, especially against tough weeds like bindweed or horsetail in regions like upstate New York.
- Water the bed thoroughly before starting.
- Lay down a 1-2 inch layer of nitrogen-rich material.
- Cover with overlapping cardboard, wetting it as you go.
- Add a 4-6 inch top layer of carbon-rich materials.
- Ensure total depth is at least 6 inches.
Planting and ongoing care for your new bed
Once your sheet mulched bed is established, typically after 2 to 4 months, it will be ready for planting. The cardboard and other organic layers will have begun to break down, creating a rich, friable soil beneath. When planting, simply dig a hole through the layers, just large enough for your plant’s root ball. Backfill with a mixture of the existing decomposed material and some fresh compost. This method is particularly effective for establishing perennial beds, such as an asparagus bed that can last 20 years, as it provides a stable, weed-free environment for long-term growth.
Maintaining your sheet mulched garden over time
Ongoing maintenance for a sheet mulched bed is minimal compared to a traditionally tilled garden. You’ll find significantly fewer weeds, often less than 10% of what you’d typically encounter. Any rogue weeds, such as persistent dandelions, can usually be pulled easily from the softened soil. Each fall, consider adding another 2 to 3 inches of organic material (compost, leaves, or wood chips) to replenish the layers and continue building soil health. This annual top-dressing helps maintain the 6-inch depth needed for ongoing weed suppression and nutrient cycling. Remember that future research, such as a 2026 study on mulching sheets from agro waste, continues to explore sustainable mulching materials, potentially offering even more options for growers.
- Dig planting holes through the layers.
- Backfill with decomposed material and compost.
- Top-dress annually with 2-3 inches of organic matter.
- Monitor for any emerging weeds and remove them manually.
- Maintain a total mulch depth of at least 6 inches.
Troubleshooting and common considerations
While sheet mulching is generally a forgiving method, a few considerations can help you achieve the best results. One common concern is the presence of pests. Slugs and snails can sometimes find refuge in the moist layers, especially in damp climates like coastal Oregon. To mitigate this, ensure your top layer is relatively coarse, like wood chips, and consider placing copper tape around vulnerable plants. Another point of confusion can arise from the term ‘cardboard plant,’ which refers to Zamia furfuracea, a distinct species noted in botanical literature by 2007; ensure you’re using actual cardboard for mulching, not this plant.
Addressing specific challenges
If you’re dealing with extremely tenacious weeds, such as Bermuda grass or nutsedge, you might need to apply a second layer of cardboard after a few weeks, ensuring a double barrier. For very dry climates, like parts of California, a thicker initial watering and perhaps a slightly thicker top layer of mulch (up to 8 inches) can help retain moisture more effectively. Some growers worry about the glues in cardboard, but most modern corrugated cardboard uses starch-based glues that break down harmlessly. If you’re concerned, stick to plain brown boxes and avoid glossy or heavily printed materials. This method is a natural weed killer that works by smothering, a stark contrast to chemical options that can wreck your soil structure and microbial balance.
- Use coarse top layers to deter slugs and snails.
- Double-layer cardboard for aggressive weeds like Bermuda grass.
- Ensure thorough watering in dry climates.
- Avoid glossy or heavily printed cardboard.
- Consider adding a layer of composted material for faster breakdown.
Sheet mulching vs. traditional tilling
Feature | Sheet Mulching | Traditional Tilling |
|---|---|---|
Weed Suppression | 90%+ reduction, long-term | Temporary, often increases weeds |
Soil Health | Builds organic matter, improves structure by 30-40% | Degrades organic matter, interrupts structure |
Labor Intensity | Low initial effort, minimal ongoing | High initial effort, continuous weeding |
Water Retention | Increases by 20-50% | Can decrease due to evaporation |
Cost | Low, uses recycled materials | Moderate (equipment, fuel, amendments) |
Time to Plant | 2-4 months for decomposition | Immediate after tilling |
Weed Control: Sheet mulching can reduce weed growth by 90% or more, significantly cutting down on weeding time in a 100 square foot bed.
Soil Improvement: Adding organic matter through mulching can increase soil water retention by 20% to 50% and improve structure by 30%.
Material Depth: A minimum 6-inch layer of combined organic materials is necessary for effective weed suppression and soil building.
Frequently asked questions
How long does sheet mulching take to break down?
The breakdown time varies depending on climate and materials, but generally, a sheet mulched bed is ready for planting in 2 to 4 months. In warmer, wetter climates like Florida, decomposition can be faster, sometimes as quick as 6 weeks.
Can I plant immediately into a sheet mulched bed?
While it’s best to wait 2 to 4 months for significant decomposition, you can plant immediately by digging through the layers and filling the hole with compost. For larger plants, ensure the hole is at least 12 inches deep and wide.
What kind of cardboard should I use?
Use plain, corrugated cardboard boxes. Avoid cardboard with glossy finishes, heavy dyes, or excessive plastic tape. Most modern cardboard glues are starch-based and safe, breaking down completely within 6 to 12 months.
Will sheet mulching attract pests?
Occasionally, slugs and snails might find refuge in the moist layers, especially in regions with high humidity like the Pacific Northwest. Using a coarse top layer of wood chips and ensuring adequate drainage can reduce this by 50% or more.
How deep should the layers be?
For effective weed suppression and soil building, aim for a minimum total depth of 6 inches of organic materials. In areas with very aggressive weeds like Johnson grass, an 8-inch depth may be more effective.
References
- Mulching Sheet from Agro Waste (2026). Mulching Sheet from Agro Waste.
- Sheet Mulching as an Aid to Broadleaved Tree Establishment (1988). Sheet Mulching as an Aid to Broadleaved Tree Establishment.
- Introduction to VR and Google Cardboard (2017). Introduction to VR and Google Cardboard.
- Introduction to VR and Google Cardboard (2017). Introduction to VR and Google Cardboard.
- Zamia furfuracea Cardboard Plant, Cardboard Cycad (2007). Zamia furfuracea Cardboard Plant, Cardboard Cycad.
- USDA Natural Resources Conservation Service (2024). USDA Natural Resources Conservation Service.