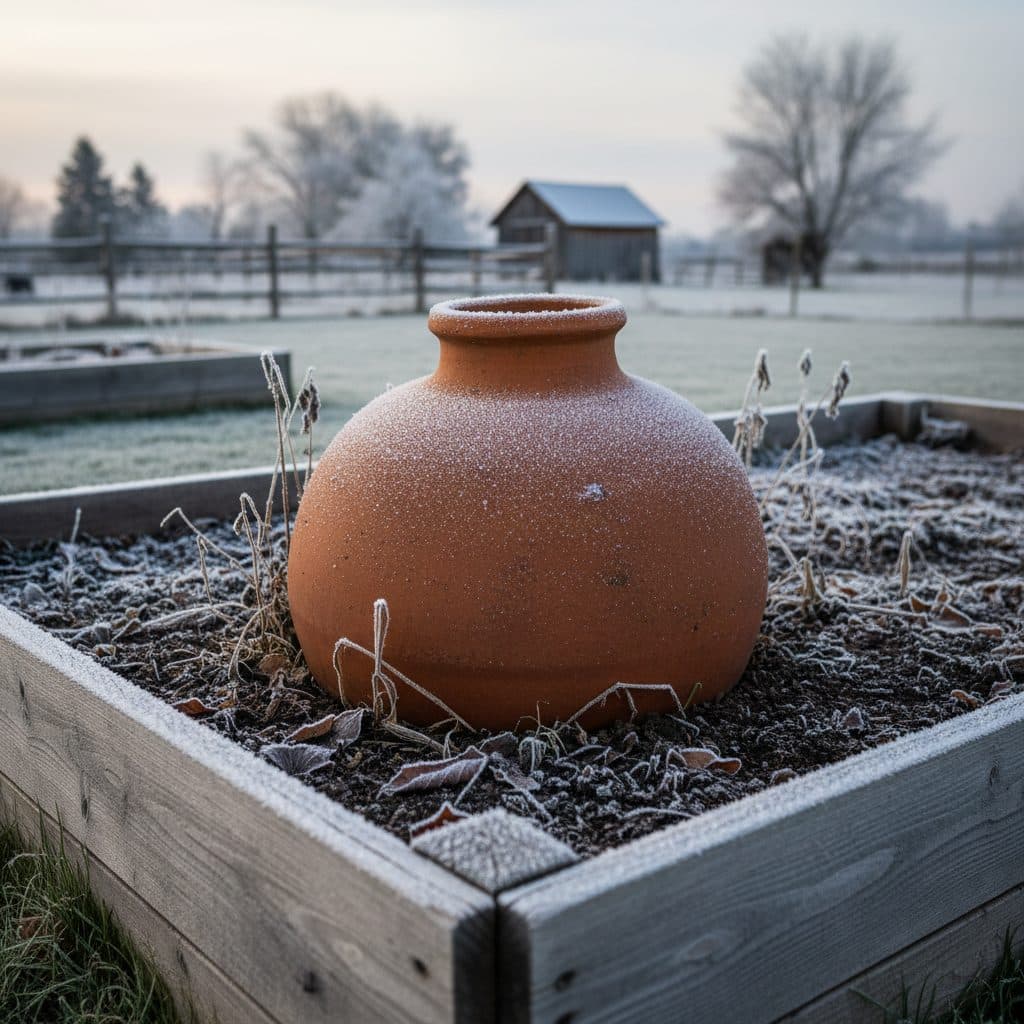
Key takeaways
- Remove ollas from the ground before the first hard freeze, typically when temperatures consistently drop below 32°F.
- Clean ollas thoroughly with a stiff brush and water. No soil or mineral deposits should remain on the porous surface.
- Store ollas in a dry, protected location where temperatures remain above 32°F, such as a shed or garage.
- Elevate ollas off concrete floors and ensure good air circulation to prevent moisture buildup and potential damage.
- For ollas in wicking beds or earthworks, consider removal or specific mulching techniques if they cannot be fully protected.
- Proper winterization can extend an olla’s lifespan to ten years or more, offering significant long-term value.
Quick answer: To winterize ollas in freezing zones, remove them from the ground before the first hard freeze, clean them thoroughly, and store them in a dry, protected location above 32°F with good air circulation. This prevents water expansion from cracking the porous terracotta.
In Nebraska’s USDA zone 5, where winter temperatures can plummet to -20°F, growers face a significant challenge: protecting their passive irrigation systems from frost damage. Ollas, unglazed terracotta pots buried in the soil, are excellent for efficient water delivery, reducing water usage by up to 70% compared to surface irrigation in arid climates. However, in regions experiencing consistent freezes, the water trapped within the olla’s porous walls can expand when frozen, leading to cracks and breakage.
This article outlines practical, field-tested strategies for winterizing and storing ollas in freezing zones, specifically USDA zones 3 through 6. By following these steps, you can ensure your ollas remain intact and ready for another season of efficient watering, saving you the cost and effort of replacement each spring. The goal is to preserve these tools for many seasons, much like preserving the integrity of any essential farm equipment.
Understanding the threat of frost damage to ollas
The primary threat to ollas in cold climates is the expansion of water as it freezes. Water expands by approximately nine percent when it turns to ice, a significant volume increase that exerts immense pressure on confining materials. Unglazed terracotta, while porous and excellent for water diffusion into the soil, is also susceptible to this pressure. When an olla is saturated with water and temperatures drop below 32°F, the water within its microscopic pores freezes and expands, causing the ceramic structure to fracture. This process can lead to hairline cracks or complete shattering, rendering the olla unusable.
the physics of freezing and ceramic integrity
The integrity of any material, including terracotta, is tested by extreme temperature fluctuations. Research into the commercial freezing and storing of fish, for instance, highlights the importance of maintaining stable temperatures to prevent material degradation over time, a principle that applies broadly to preserving physical objects [1]. While fish and ollas are vastly different, the underlying physics of controlled temperature environments for preservation remains consistent. In USDA zone 4, where winter lows can reach -30°F, an olla left in the ground with water is almost guaranteed to crack. Even in USDA zone 6, with average winter lows around 0°F, prolonged cold snaps can cause irreversible damage. Preventing this damage requires understanding the material’s limits and acting proactively.
- Water expands by nine percent when frozen.
- Terracotta’s porous structure is vulnerable to ice expansion.
- Temperatures consistently below 32°F pose a risk.
- Cracks can develop from microscopic to macroscopic.
- Ollas can shatter completely if left unprotected.
Removing and cleaning ollas for winter storage
The most reliable method for preventing olla damage in freezing zones is to remove them from the ground before the first hard freeze. A hard freeze is generally defined as temperatures dropping to 28°F or below for several hours, but it is safer to remove them when consistent overnight temperatures dip below 35°F. In northern Minnesota’s USDA zone 3, this might be as early as late September, while in parts of southern Oregon’s USDA zone 6, it could be late November. Once removed, ollas require thorough cleaning to remove soil, mineral deposits, and any plant roots that may have grown into their pores. Neglecting this step can lead to mold, mildew, or further mineral buildup that reduces the olla’s efficiency next season.
step-by-step removal and cleaning process
Start by gently digging around the olla, loosening the surrounding soil to a depth of at least six inches. Avoid pulling the olla directly, as this can damage its structure or surrounding plant roots. Once free, empty any remaining water. Use a stiff brush — a wire brush works well for stubborn deposits — and plain water to scrub the exterior and interior surfaces. For significant mineral buildup, a solution of one part white vinegar to ten parts water can help dissolve calcium and other deposits; let it soak for 30 minutes before scrubbing. Rinse thoroughly with clean water. Allow the ollas to air dry completely for at least 24 hours in a protected area, ensuring all moisture has evaporated from the pores before storage. This complete drying prevents any residual water from freezing and cracking the olla during storage. You can find useful tools for cleaning, such as an expandable hose with a 7-pattern spray nozzle, to make this task easier.
- Begin removal when temperatures consistently fall below 35°F.
- Gently dig around the olla, not pulling directly.
- Empty all water from the olla.
- Scrub surfaces with a stiff brush and water.
- Use a 1:10 vinegar solution for mineral deposits.
Proper storage techniques for olla longevity
Once cleaned and thoroughly dried, ollas need to be stored in a location that remains above freezing throughout the winter. An unheated garage, shed, or basement is ideal, provided it maintains temperatures above 32°F. Storing them in a controlled environment, much like the precise temperature management required for commercial freezing of fish to prevent spoilage [1], ensures their structural integrity. Avoid storing them directly on concrete floors, which can draw moisture and lead to potential issues. Instead, place them on pallets, wooden shelves, or even layers of cardboard. Good air circulation around the stored ollas is also beneficial to prevent any residual dampness from encouraging mold growth.
optimizing storage conditions for ceramic preservation
The key to long-term olla preservation is a stable, dry environment. A temperature range between 40°F and 60°F with a relative humidity below 70% is optimal. Stacking ollas carefully can save space, but ensure they are not packed so tightly that air cannot circulate. Placing a piece of cardboard or newspaper between stacked ollas can prevent chipping. Some growers in colder parts of Michigan’s USDA zone 4 even place a desiccant packet inside each olla before sealing it in a plastic bag, though this is usually unnecessary if the olla is completely dry and the storage area is climate-controlled. With proper care, an olla can last for ten years or more of reliable irrigation. This longevity makes the initial investment and annual winterization effort worthwhile, and fits sustainable gardening practices like those found in permaculture gardening.
- Store above 32°F in a garage, shed, or basement.
- Avoid direct contact with concrete floors.
- Use pallets, wood, or cardboard for elevation.
- Ensure good air circulation around stored ollas.
- Stack carefully, using separators to prevent chipping.
Winterizing ollas in wicking beds and passive irrigation earthworks
For ollas integrated into wicking beds or larger passive irrigation earthworks, removal might be more complex or even impractical. In such cases, alternative winterization strategies are necessary. For wicking beds in USDA zone 5, where the entire bed might be designed to retain moisture, the risk of olla cracking is still high. If the wicking bed can be drained, that is the best option. Otherwise, the olla itself needs specific protection. This often means making sure the olla is completely empty of water, then insulating it heavily. While the OLLAS Reports from 2023 [2] primarily focus on performance during growing seasons, the principles of material protection extend to off-season care.
insulation and drainage for in-situ ollas
If an olla cannot be removed, ensure it is completely empty of water. This is critical. Then, surround the top six inches of the olla with a thick layer of insulating material. This could be straw, wood chips, or even a specialized insulating blanket, extending at least one foot in diameter around the olla. A layer of straw 12 inches deep can provide significant insulation, raising the soil temperature by several degrees. In areas like central New York’s USDA zone 4, some growers will cover the entire wicking bed with a tarp after mulching, creating an additional barrier against freezing rain and snow. For larger earthworks or swales that incorporate ollas, good surface drainage away from the olla’s immediate vicinity can help prevent water from pooling and freezing around it. Consider the principles of rainwater harvesting and management to direct excess winter moisture away from vulnerable areas. While these methods reduce risk, removal and indoor storage remain the most secure option for preventing damage from extreme cold, especially below 20°F.
- Empty ollas completely if they cannot be removed.
- Insulate the top six inches with a 12-inch layer of straw or wood chips.
- Cover the entire wicking bed with a tarp for added protection.
- Ensure good drainage in earthworks to prevent water pooling.
- Monitor local weather for extreme cold snaps below 20°F.
Annual inspection and spring preparation
When spring arrives and the threat of hard freezes has passed—typically when overnight temperatures consistently stay above 35°F in USDA zone 5, usually by late April—it’s time to retrieve your stored ollas. Before re-burying them, conduct a thorough inspection. Look for any hairline cracks, chips, or signs of structural weakness that might have developed despite careful storage. Even a small crack can compromise the olla’s ability to hold water and diffuse it effectively. Minor surface imperfections are usually harmless, but anything that penetrates the wall will lead to leaks and inefficiency. This annual check is a critical part of maintaining your passive irrigation system, which keeps it operating at its peak performance.
preparing ollas for the new growing season
If an olla passes inspection, a quick rinse with clean water is usually sufficient before re-installation. For ollas that showed signs of significant mineral buildup during the previous season, a pre-season soak in a 1:10 vinegar-to-water solution for a few hours can help restore optimal porosity. After rinsing, allow them to air dry for a few hours before burying them. When placing them back into the garden, ensure they are buried to the correct depth, with only the neck exposed, typically one to two inches above the soil line. This prevents soil and debris from entering the olla and allows for easy refilling. By following these annual steps, you can expect your ollas to provide efficient irrigation for many years, often exceeding ten years of service, as demonstrated by long-term use in arid regions of Arizona. This commitment to maintenance reflects a broader understanding of resource management, much like the community engagement discussed in OLLAS Report No. 3 from 2006 regarding political participation in Nebraska [3], where consistent effort yields sustained benefits.
- Inspect ollas thoroughly for cracks or chips in spring.
- Rinse clean or soak in 1:10 vinegar solution if needed.
- Allow to air dry for a few hours before re-installation.
- Bury to the correct depth, leaving one to two inches of the neck exposed.
- Confirm stable soil around the olla for proper function.
Olla Winterization Strategies for Freezing Zones
Method | Pros | Cons | Recommended Zone |
|---|---|---|---|
Full Removal & Indoor Storage | Highest protection, near-zero risk of cracking, easy cleaning. | Labor-intensive, requires storage space, interrupts soil. | USDA Zones 3-6 (most reliable) |
In-Situ Insulation (Empty & Mulch) | Less labor, maintains soil structure, suitable for large installations. | Higher risk of cracking in extreme cold, requires vigilant monitoring, less effective below 20°F. | USDA Zones 5-6 (with caution in 4) |
In-Situ Insulation (Empty & Cover) | Protects against precipitation, good for wicking beds, moderate labor. | Still vulnerable to ground freeze, tarp can shift, less effective below 10°F. | USDA Zones 5-6 (for wicking beds) |
Water Expansion: Water expands by approximately nine percent when it freezes, exerting significant pressure on materials like terracotta.
Olla Lifespan: With proper winterization and care, unglazed terracotta ollas can last for ten years or more, providing long-term irrigation benefits.
Frequently asked questions
At what temperature should I remove my ollas?
You should remove your ollas when consistent overnight temperatures drop below 35°F. This typically occurs in late fall, well before the ground freezes solid, to prevent any water within the olla from expanding and causing damage.
Can I leave my ollas in the ground if I drain them?
While draining them reduces risk, leaving ollas in the ground in USDA zones 3-6 is not recommended due to the potential for residual moisture in the porous ceramic to freeze and crack. Even a small amount of trapped water can cause damage when temperatures drop below 32°F.
What is the best way to clean my ollas before storage?
After removing ollas, scrub them with a stiff brush and plain water to remove soil and debris. For stubborn mineral deposits, a solution of one part white vinegar to ten parts water can be used, soaking for up to 30 minutes before rinsing thoroughly. Ensure they dry completely for at least 24 hours.
Where is the ideal place to store ollas during winter?
The ideal storage location is a dry, protected area where temperatures remain consistently above 32°F, such as an unheated garage, shed, or basement. Store them off concrete floors on pallets or shelves to prevent moisture absorption and ensure good air circulation.
How long can an olla last with proper winterization?
With consistent proper winterization and care, an olla can last for ten years or more. This longevity makes the initial investment highly cost-effective for long-term passive irrigation, significantly reducing annual replacement needs.
Are there any specific considerations for ollas in wicking beds?
For ollas in wicking beds that cannot be removed, ensure they are completely empty of water. Then, insulate the top six inches of the olla with a thick layer (at least 12 inches) of straw or wood chips, and consider covering the entire bed with a tarp for additional protection against freezing precipitation.
References
- The commercial freezing and storing of fish / (1918). The commercial freezing and storing of fish /.
- OLLAS Reports (2023). OLLAS Reports.
- Latino Political Participation in Nebraska: The Challenge of Enhancing Voter Mobilization and Representation – OLLAS Report No. 3 (2006). Latino Political Participation in Nebraska: The Challenge of Enhancing Voter Mobilization and Representation – OLLAS Report No. 3.
- Freezing and storing a tardigrade (hypisibius myrops) in liquid nitrogen (1975). [Freezing and storing a tardigrade (hypisibius myrops) in liquid nitrogen](https://doi.org/10.1016/0011-2240(75)90096-6).
- Project Animate: Promoting Student Civic Participation through Latino Voter Mobilization – OLLAS Report No. 6 (2009). Project Animate: Promoting Student Civic Participation through Latino Voter Mobilization – OLLAS Report No. 6.
- USDA Natural Resources Conservation Service (2024). USDA Natural Resources Conservation Service.